Building an adjustable router dado jig


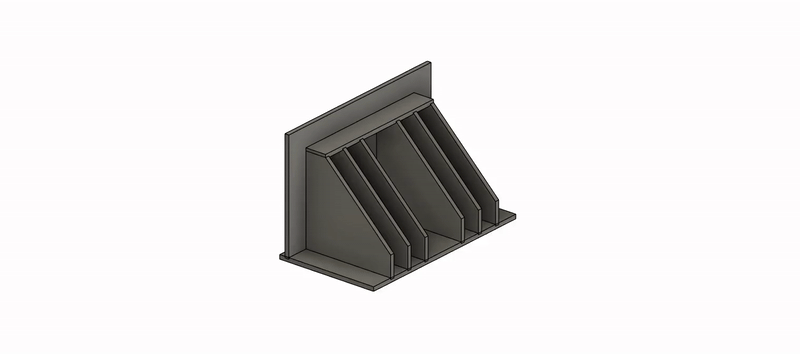
I'm about to embark on a woodworking project that I've had in mind for a long time but haven't prioritized - until now (or actually soon-ish). It's a baking tray (and other kitchen things) organizer for a wire rack in our kitchen. Something like:
But that's a blog post for another day! Like all good projects, making the kitchen tray-and-other-things-organizer requires a side project tangent. The plans for the kitchen divider call for dados to be cut into the plywood pieces as the joinery mechanism. If you are unfamiliar, a dado is a woodworking joint and is just a slot or channel cut into a project piece (A) that is as wide as project piece (B).
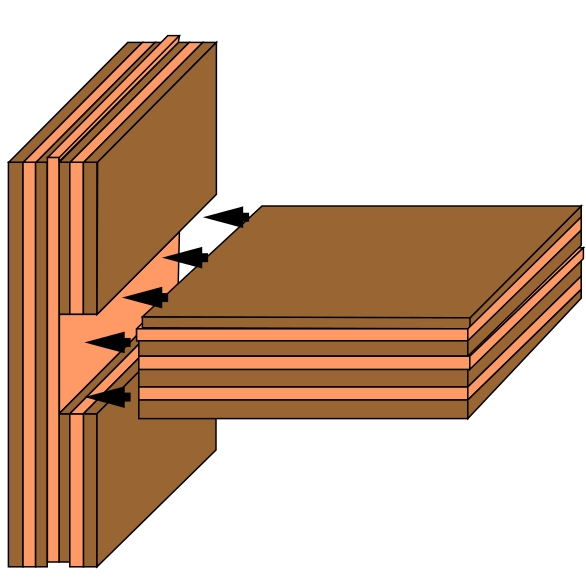
This lets you slot in project piece (B) into project piece (A) and can allow joinery without glue in certain projects - I will likely use glue and the dado joint together for the best results for my case.
There are many many many different ways to cut dados with many different tools. For my kitchen organizer project I will need to cut 20 (!!!) different dados, so I wanted to come up with an easy way to cut repeatable dados in a few different sizes.
I poked around online until I found this YouTube short:
I was sold on the perceived simplicity of that jig:
- setting the dado width is as simple as clamping the jig around a piece of wood
- locating it on your project piece is as simple as slapping it on there and clamping it
- using it as simple as taking a router with the correct bearing bit (top or bottom depending on your perspective) and running the router bit along the inner guide fence of the jig.
Sold! Let's build it :)
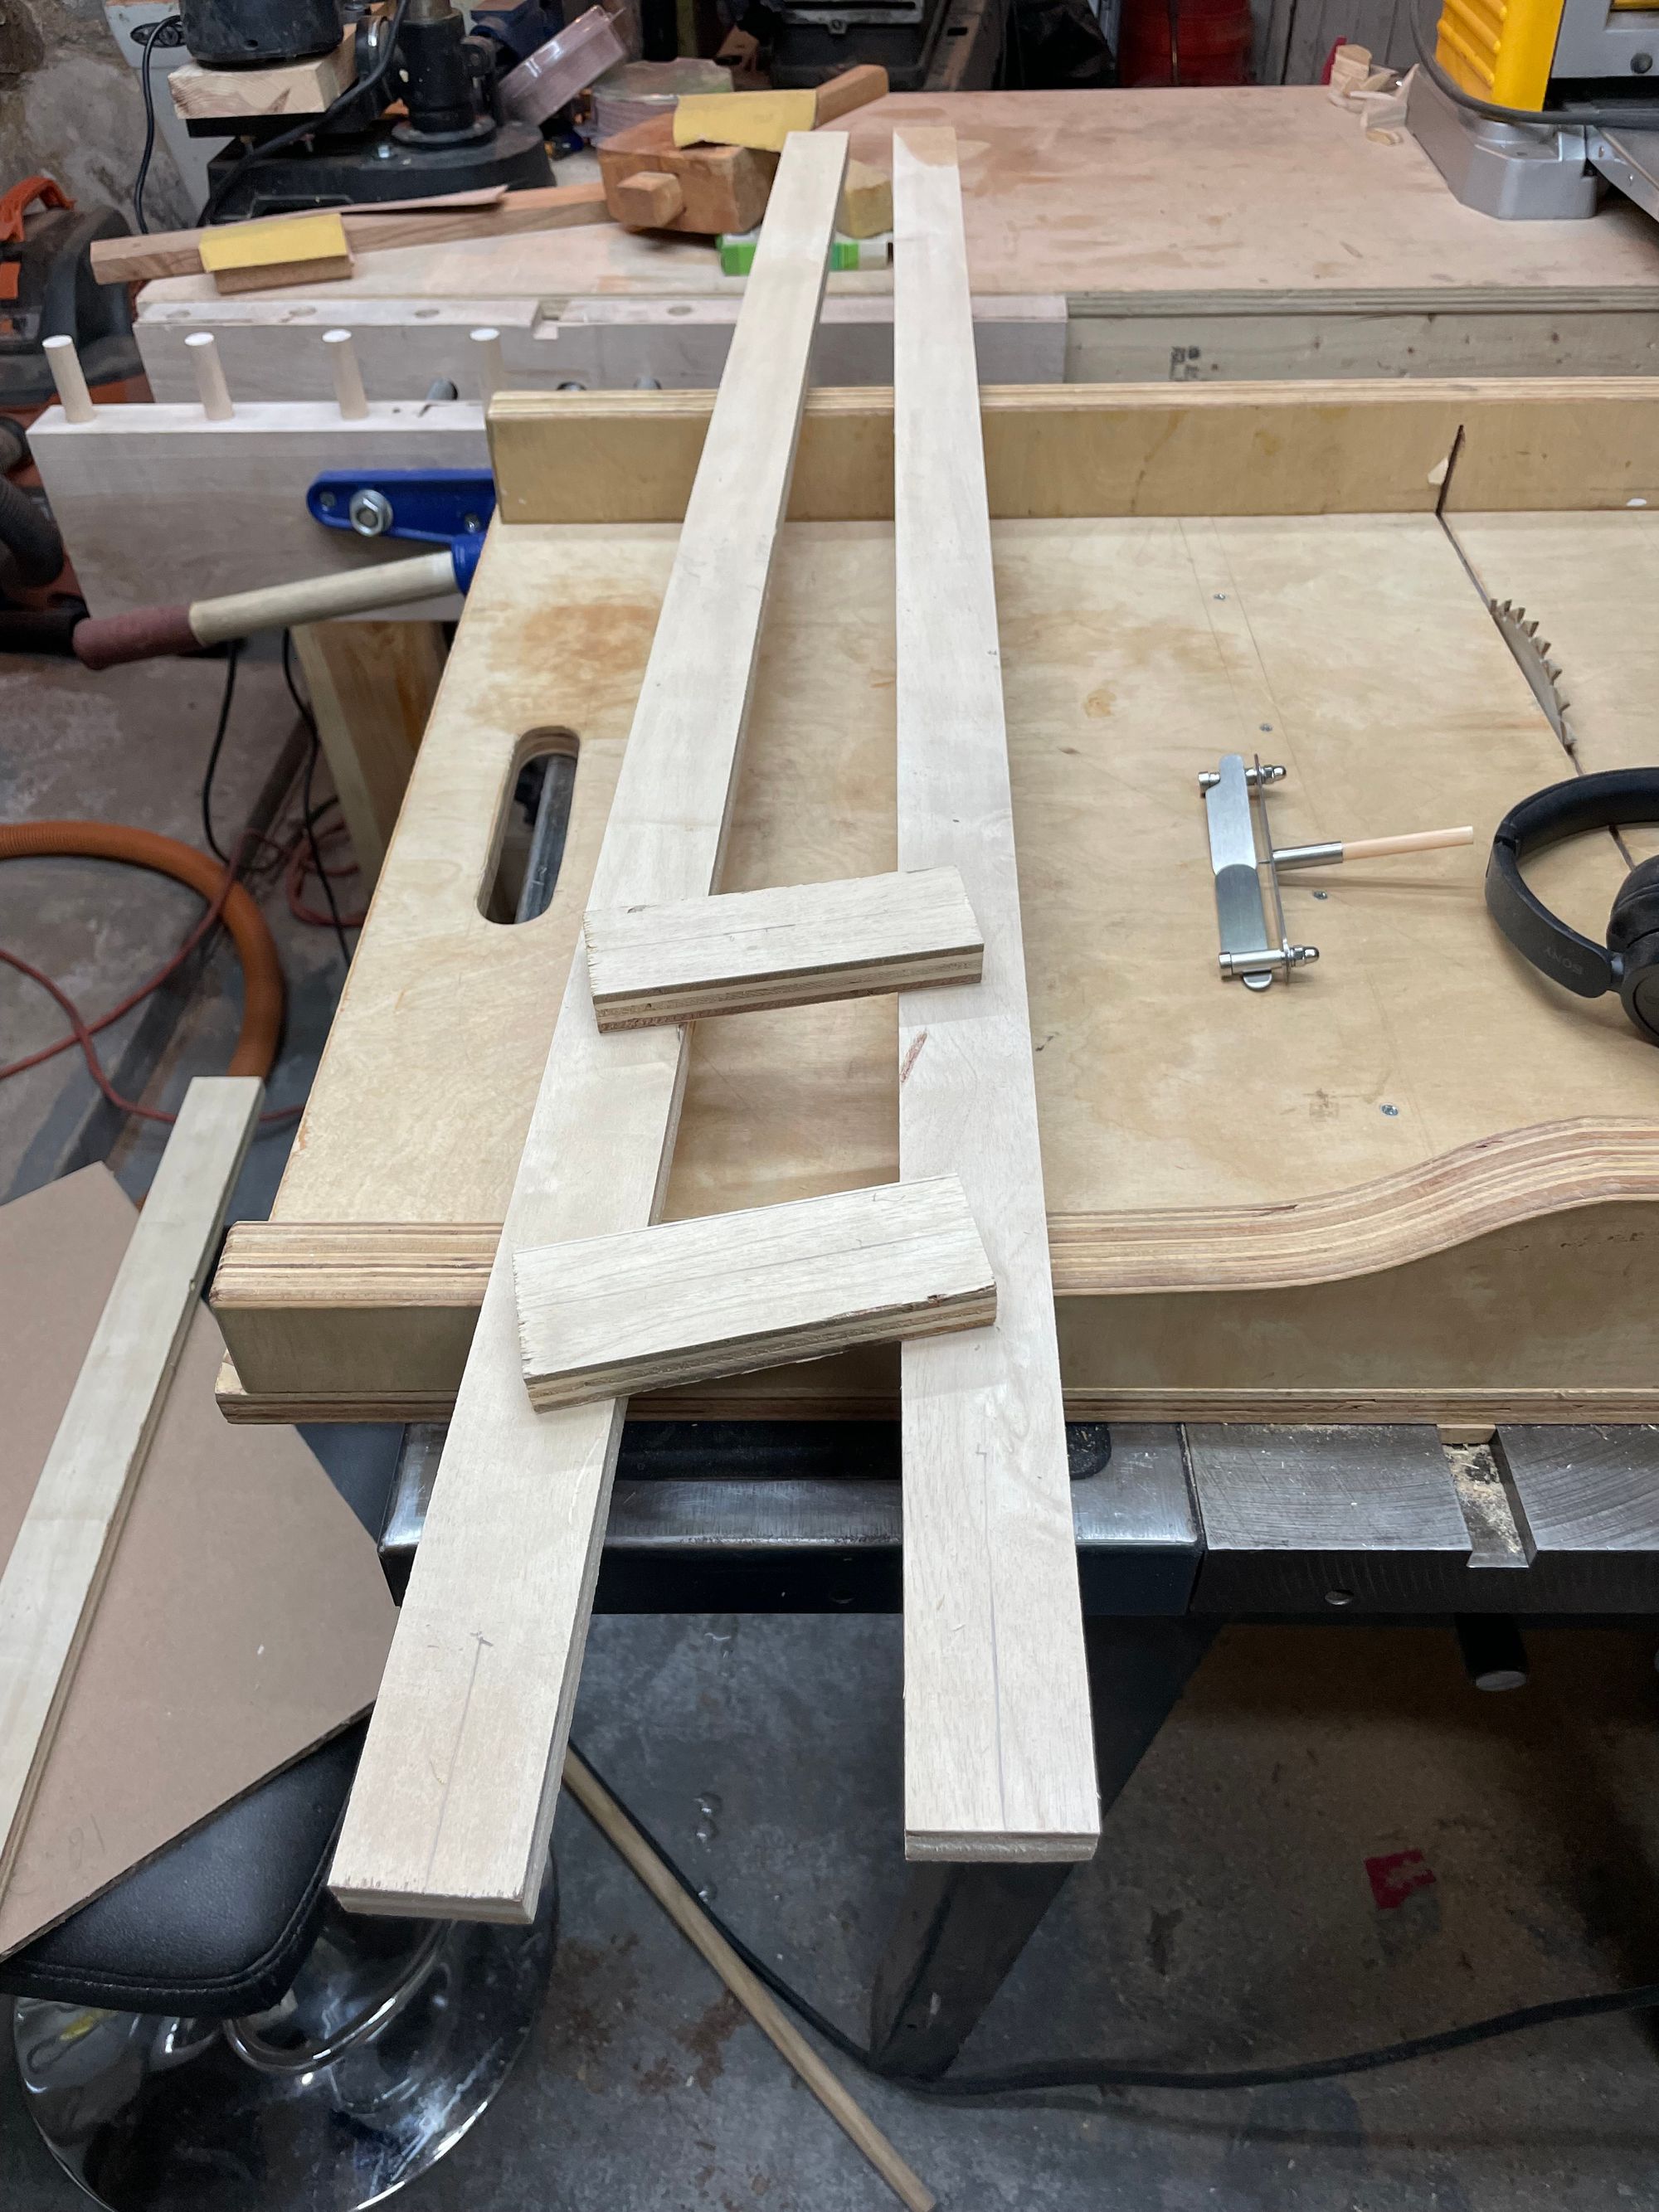
I started by dimensioning up some plywood into strips. My main concern at this step was maintaining a straight edge on the long pieces that would serve as a guide for my router. If my guide is not straight, then my dados won't be either.
To best approach this, I used a piece of scrap plywood that still had a factory straight edge i.e. it was the same straight edge as the day I bought it, and I hadn't done any machining to mess it up. I used this factory edge as the guide against my table saw fence to rip 3 strips, using the best 2 for the long pieces and cutting the shorter pieces out of the third.
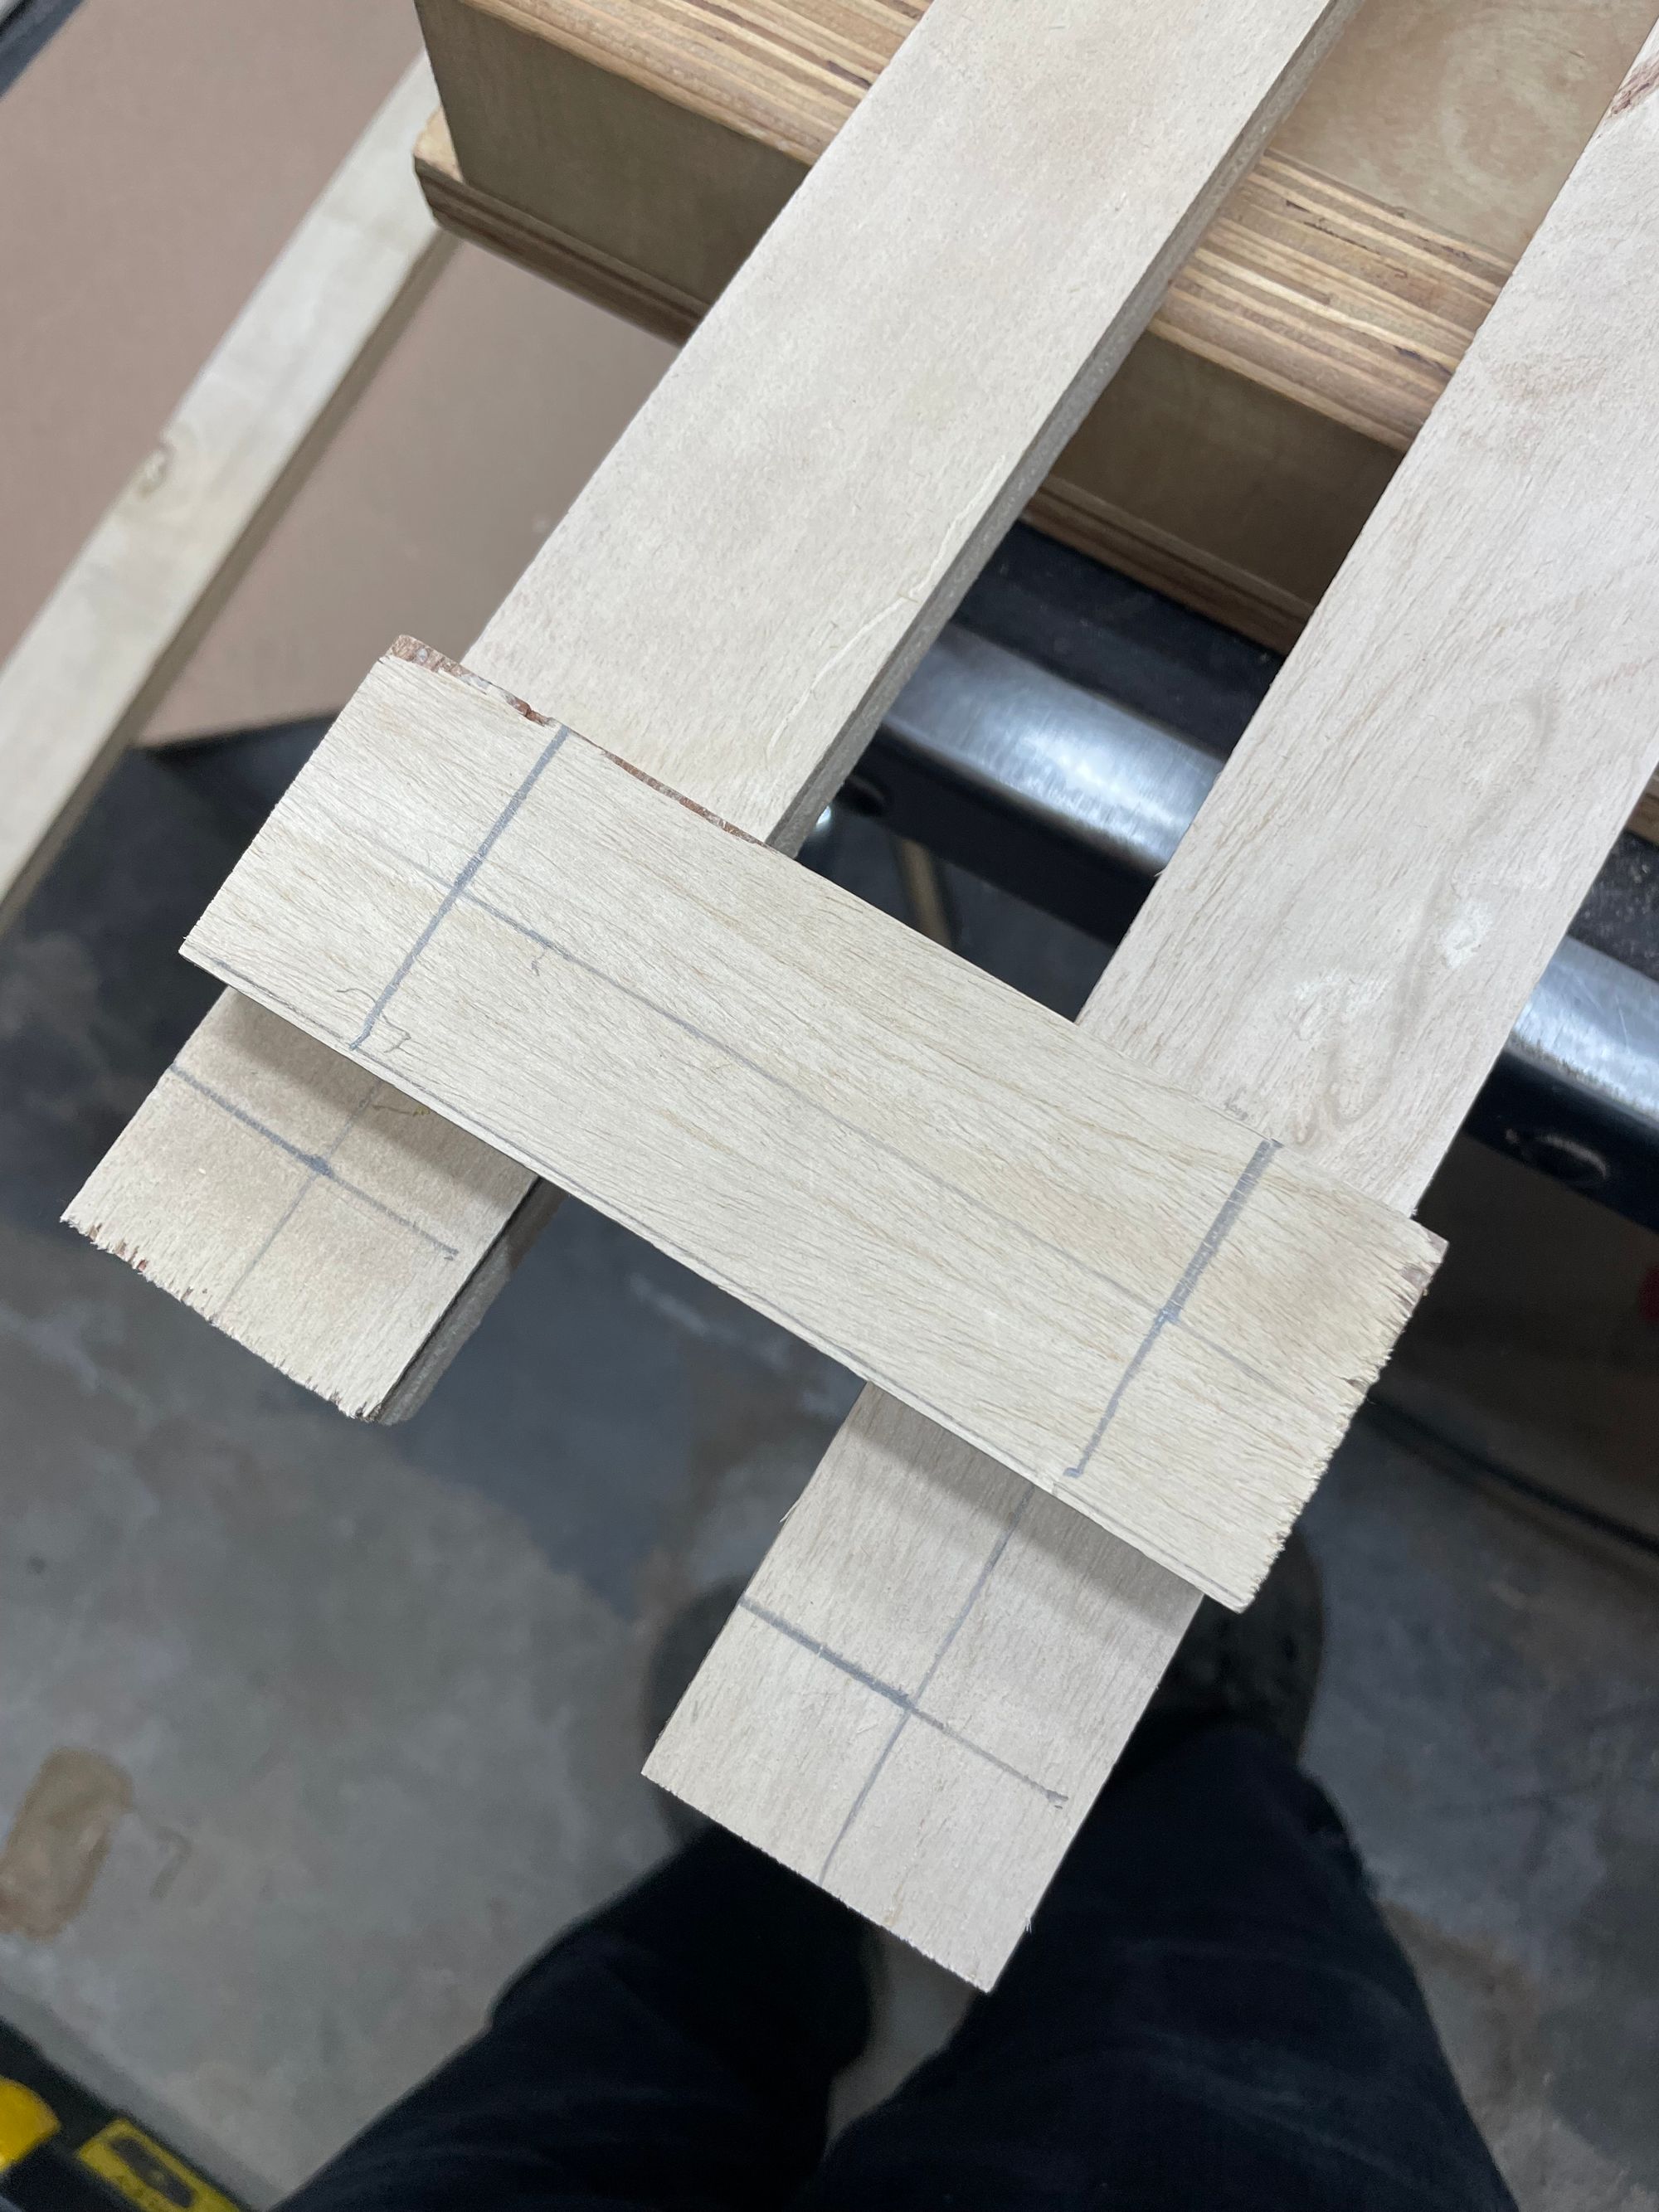
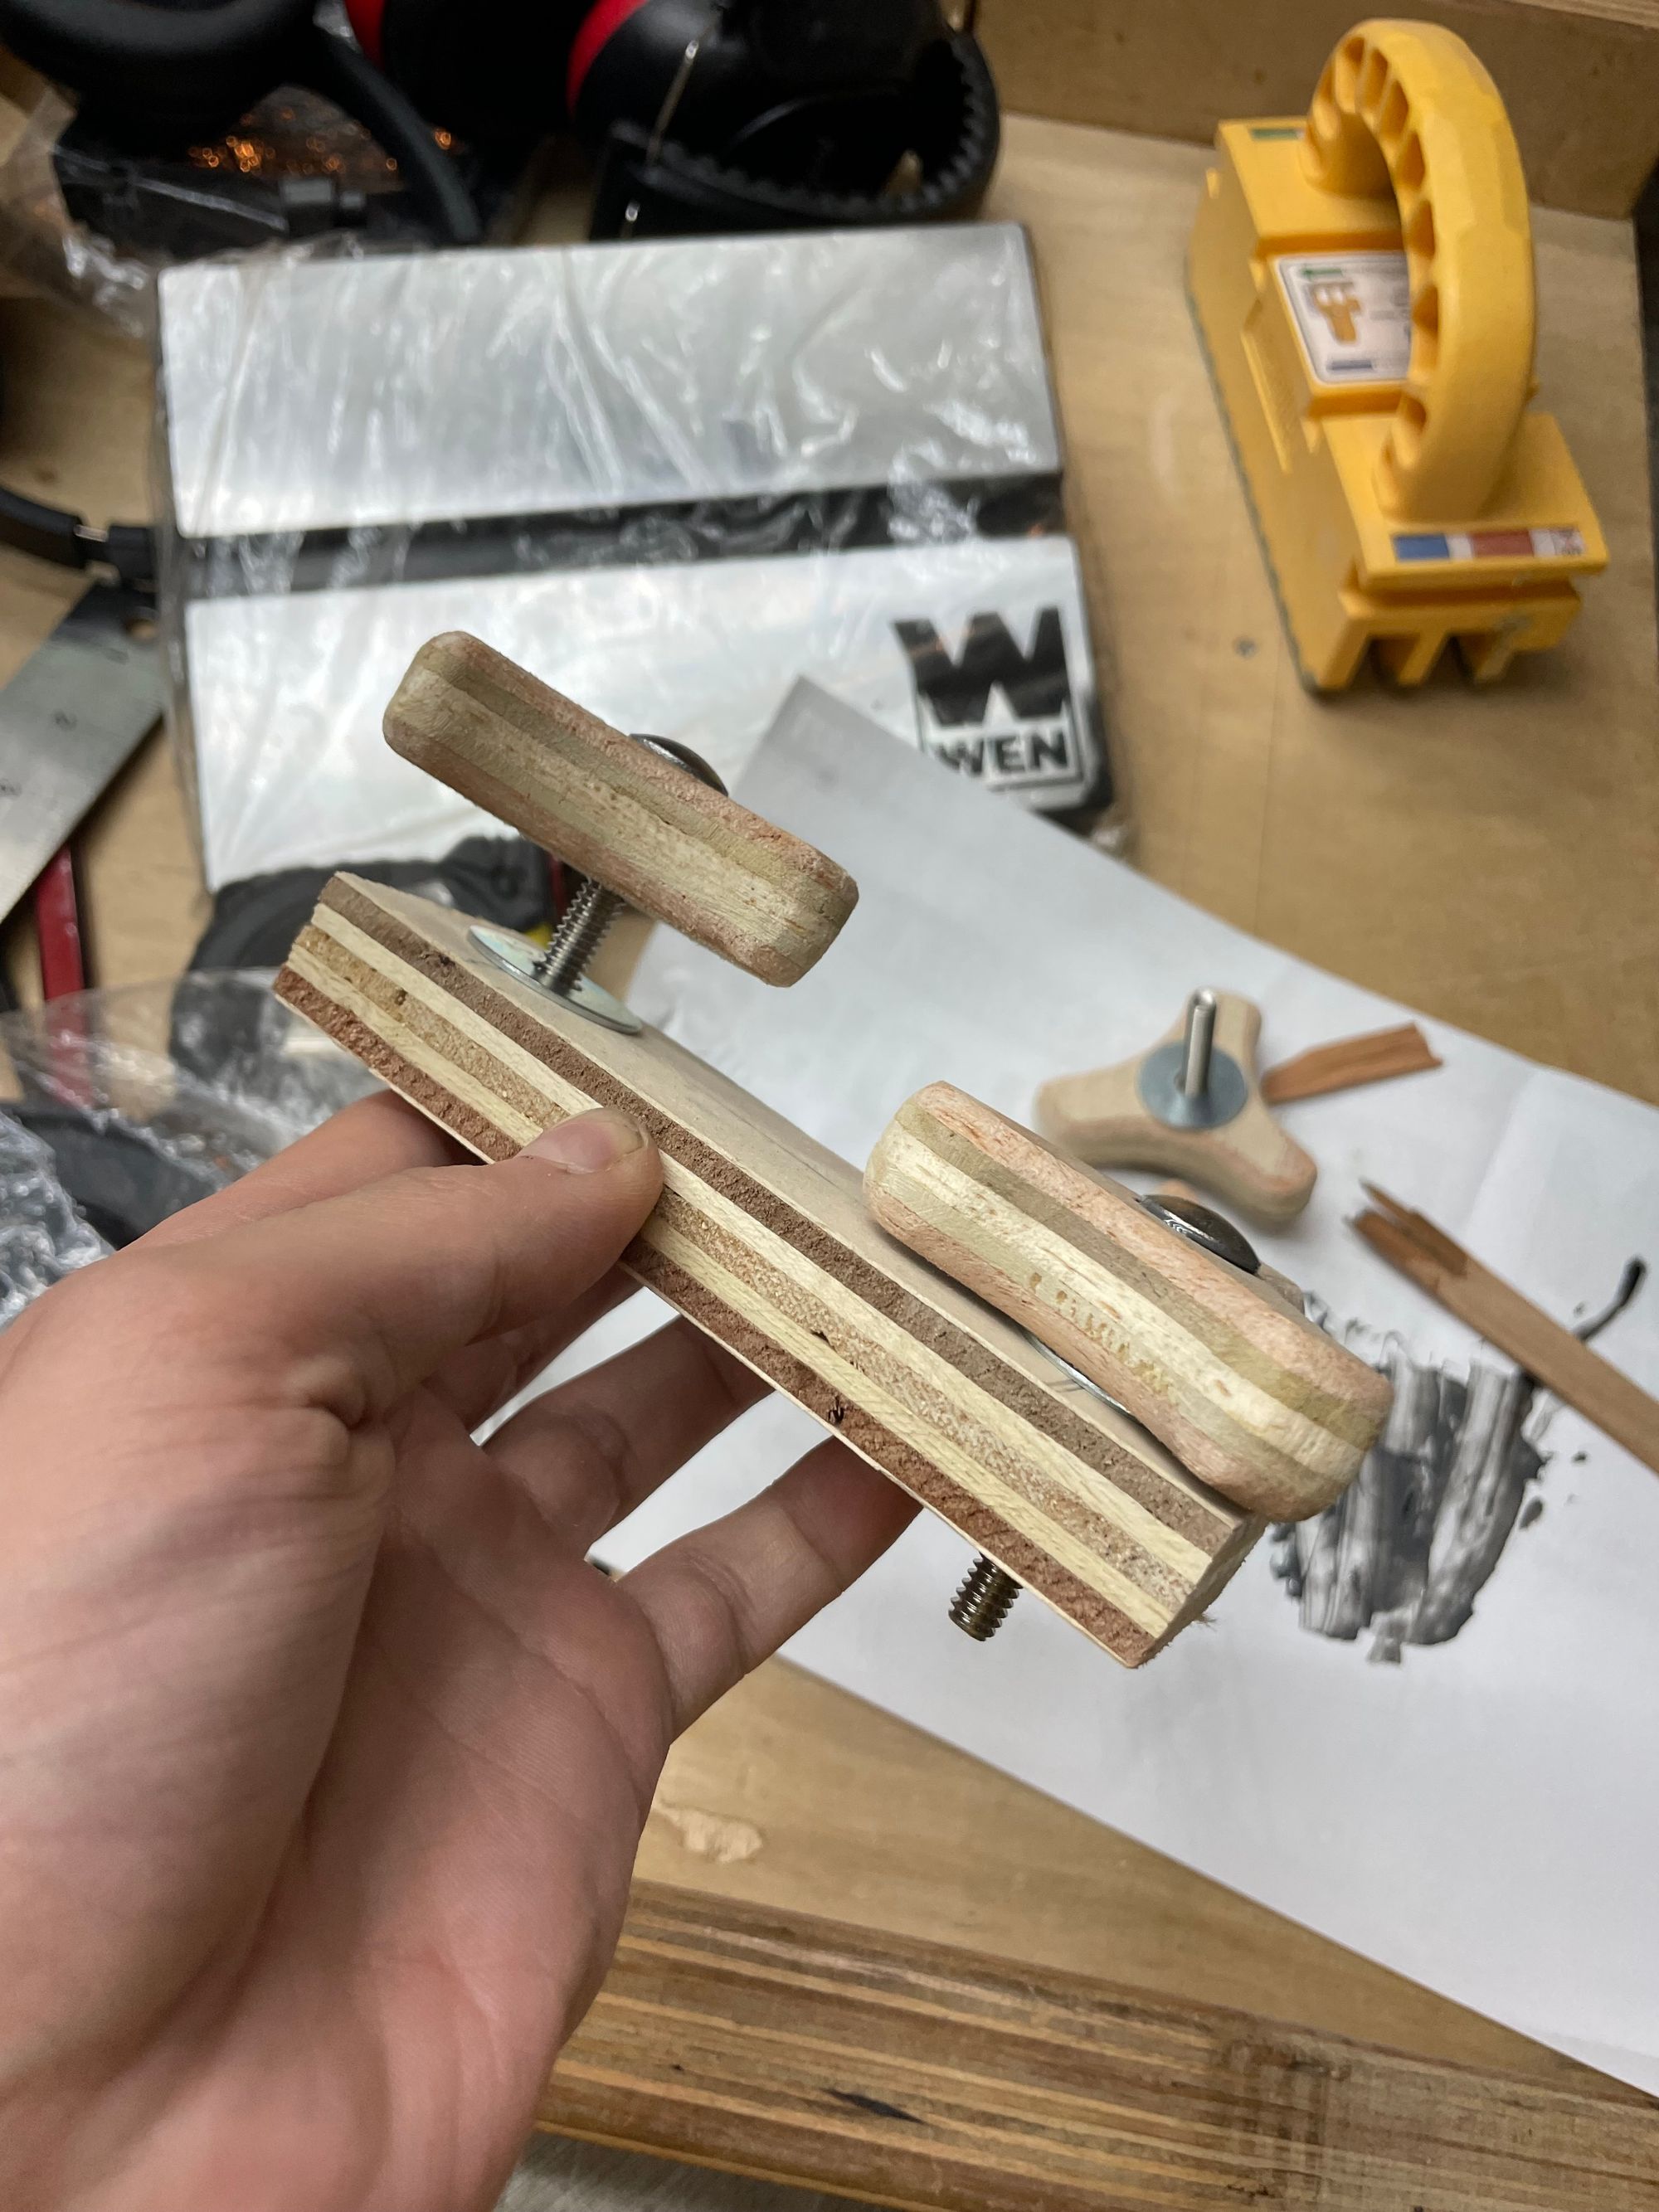
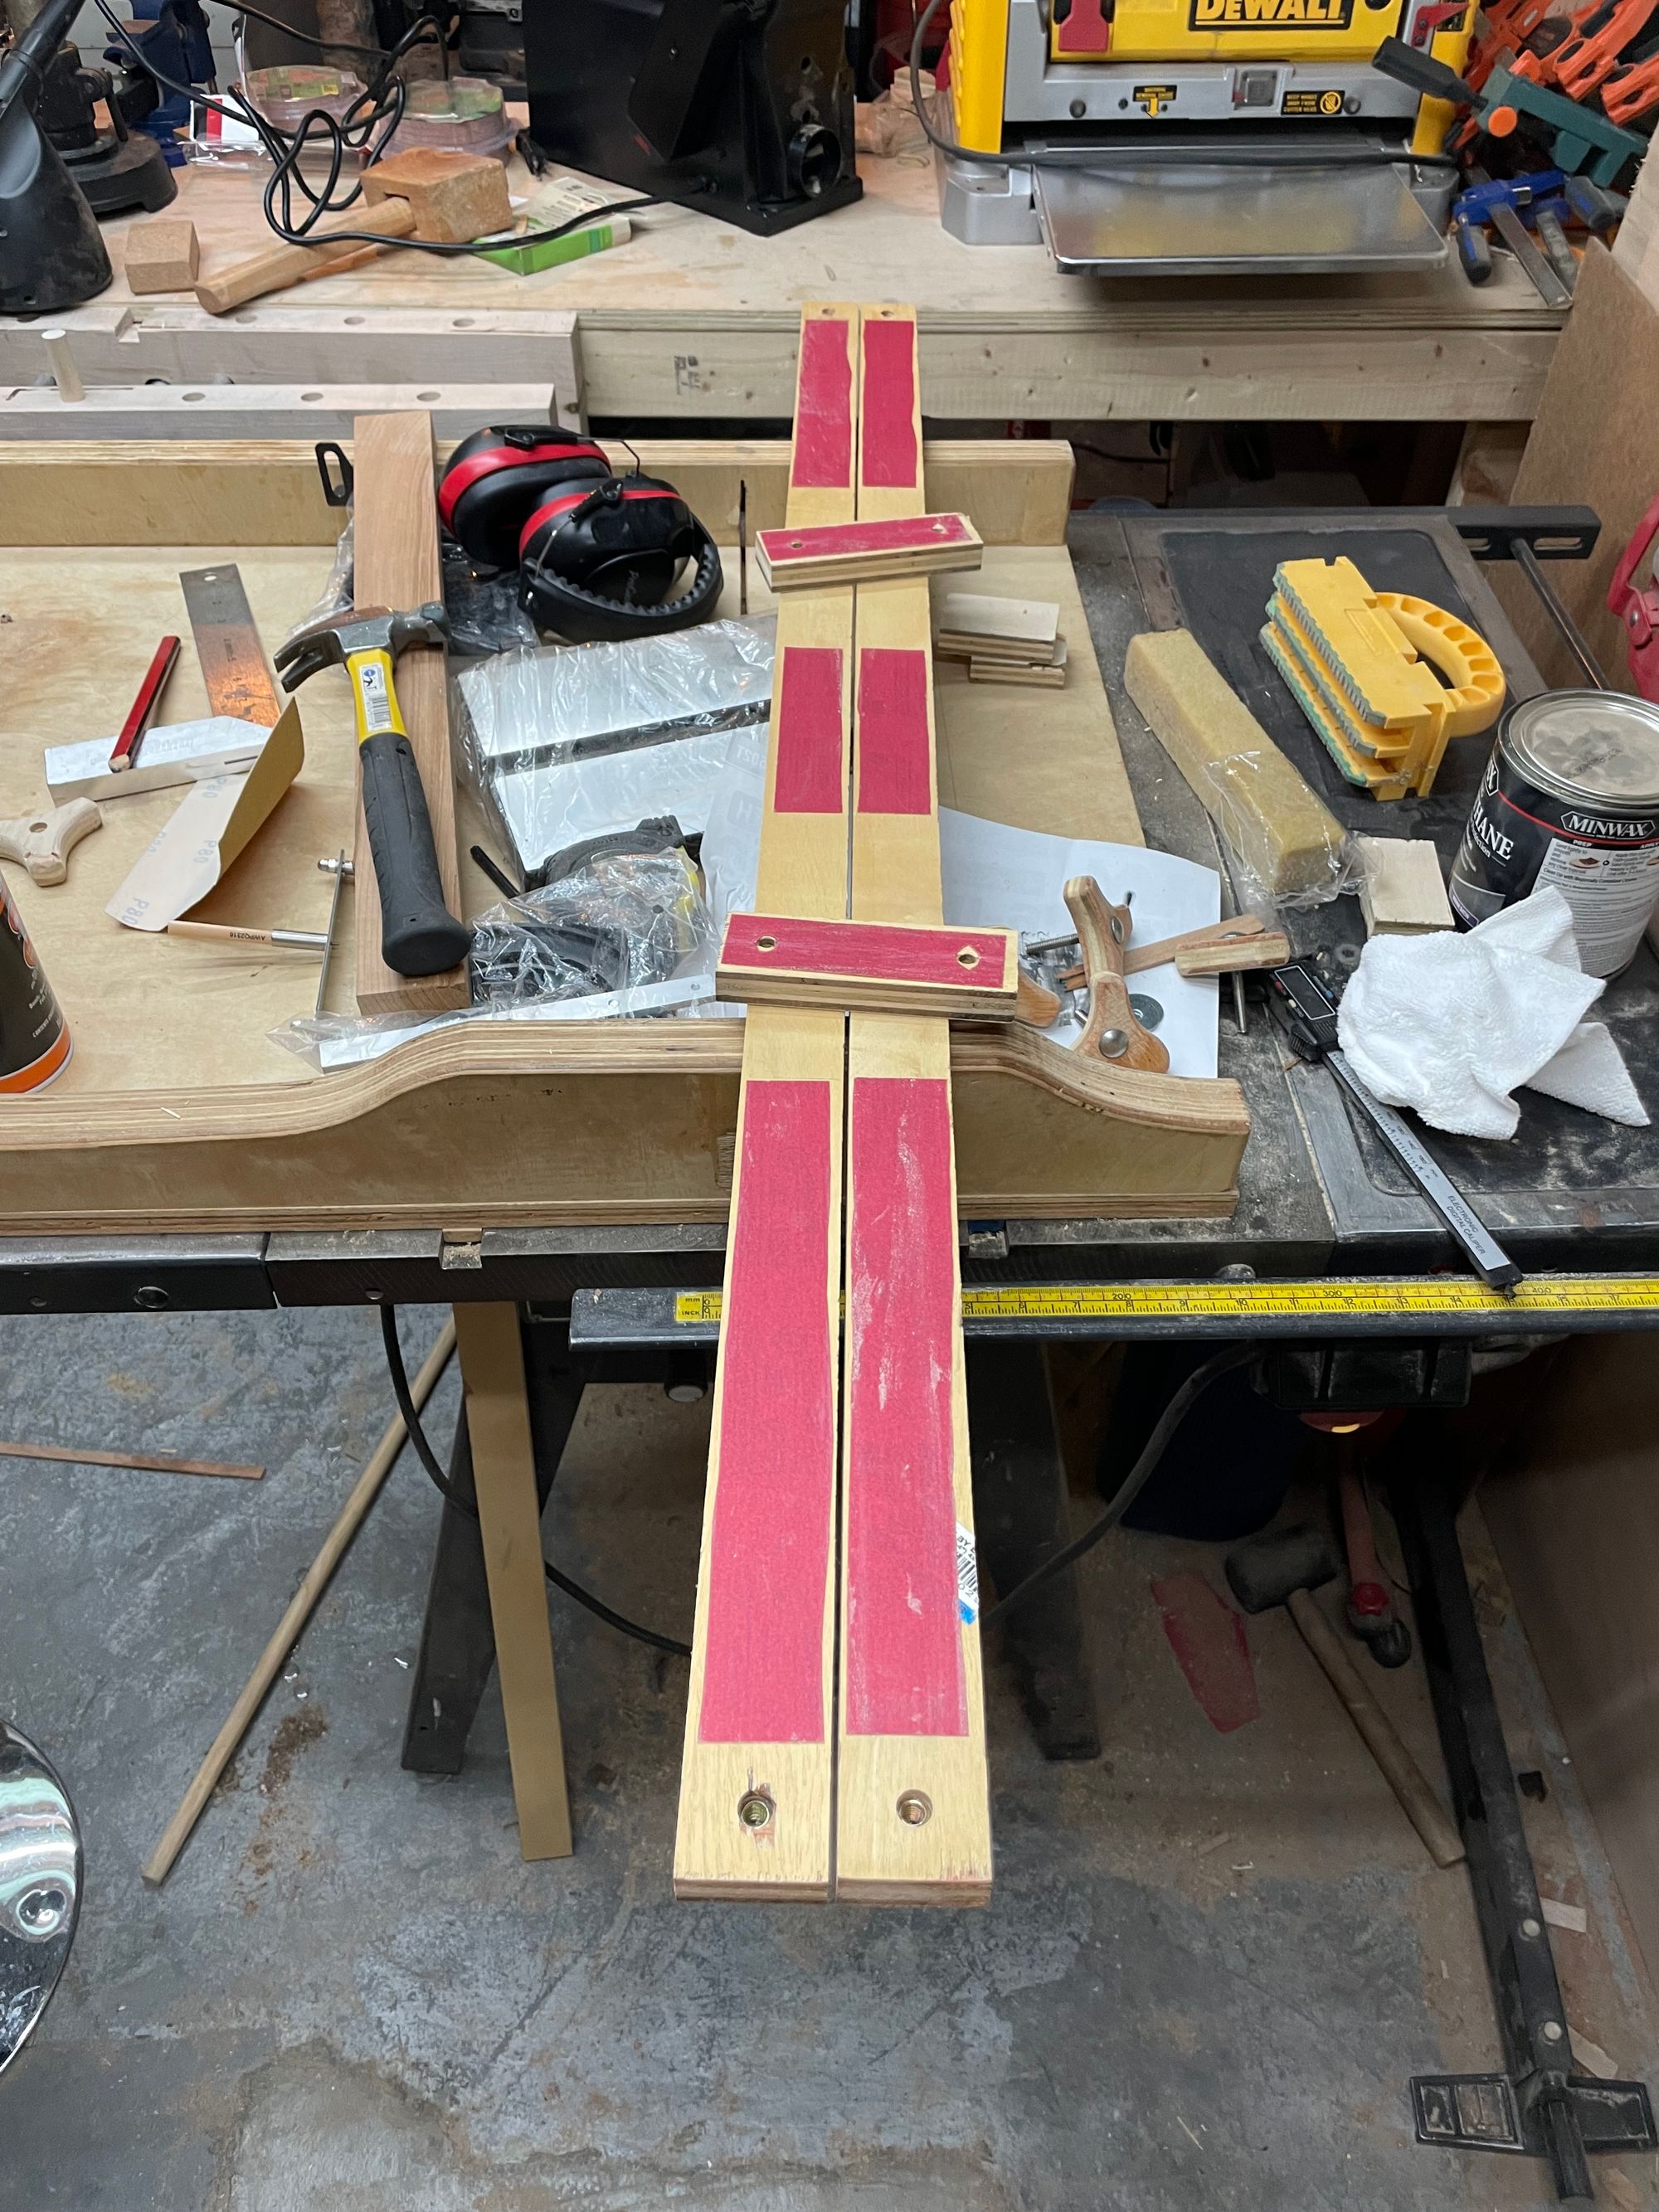
I then marked the centers - for where the pieces were going to "connect" using a threaded rod or bolt of some kind in the future. for the lines "with the grain" I was able to use my new Hanukkah present: the center marking tool. For the "across the grain" pieces I measured how wide the plywood pieces were, divided that by 2 and made my marks.
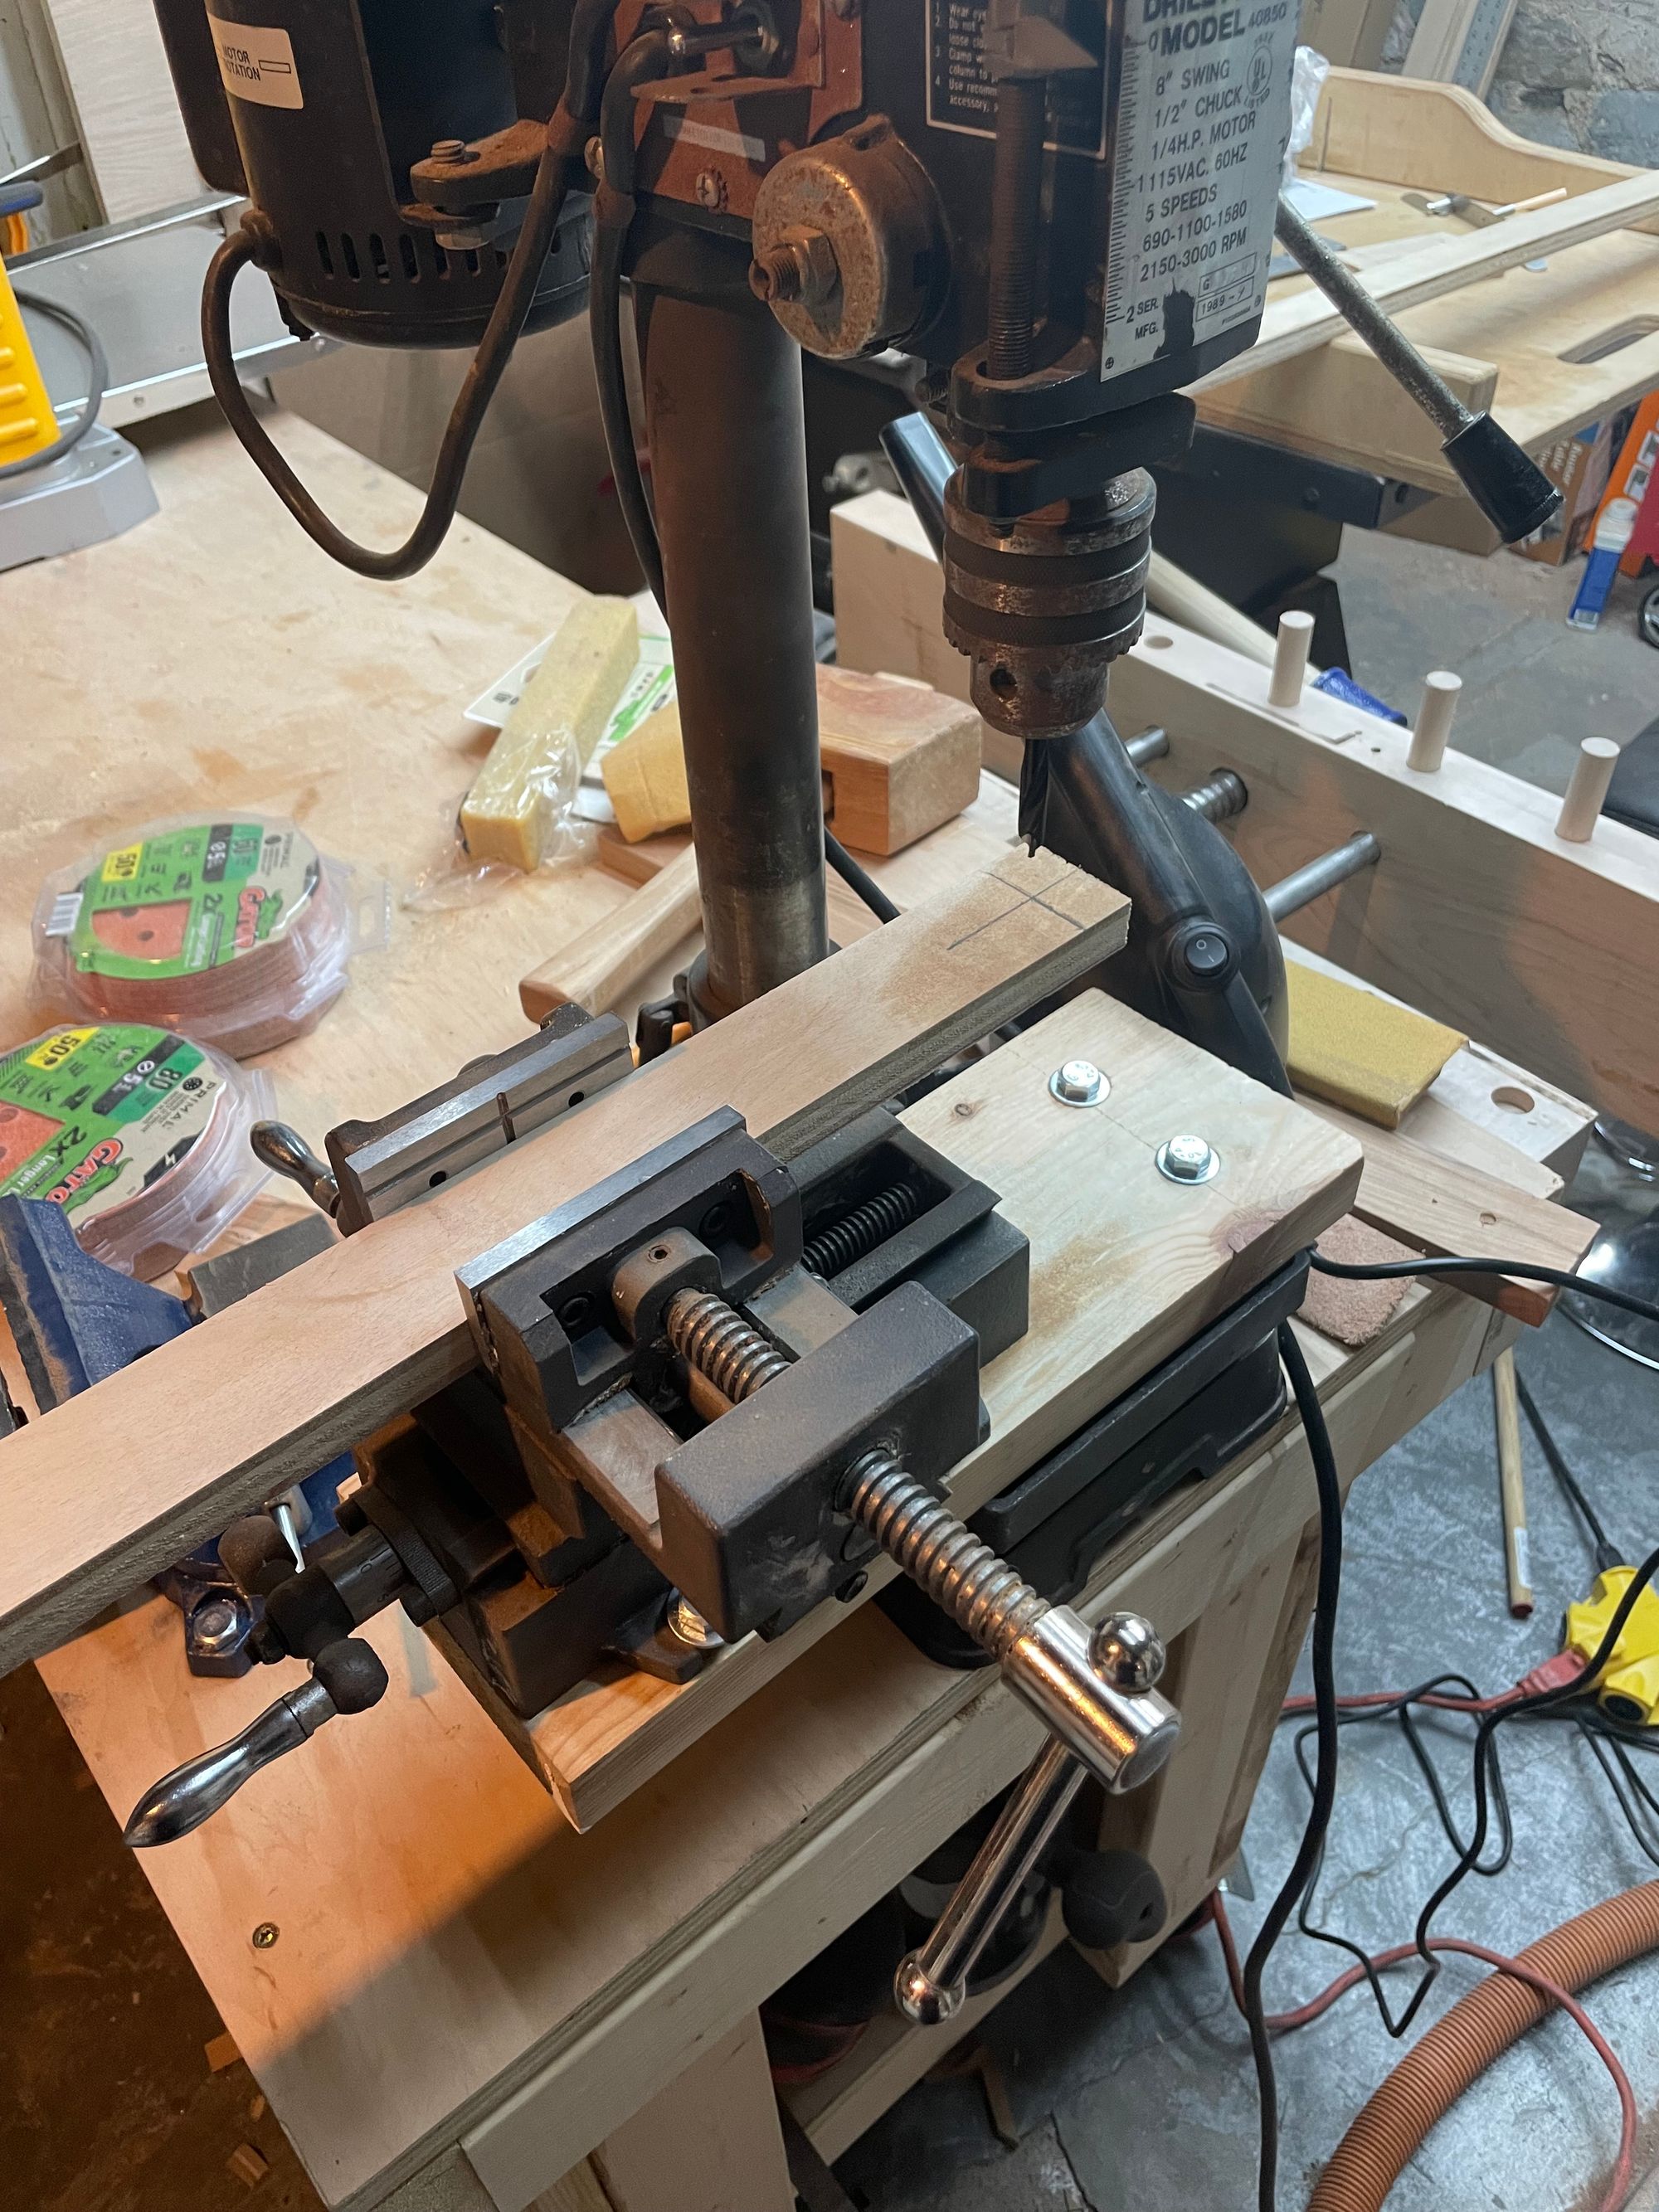
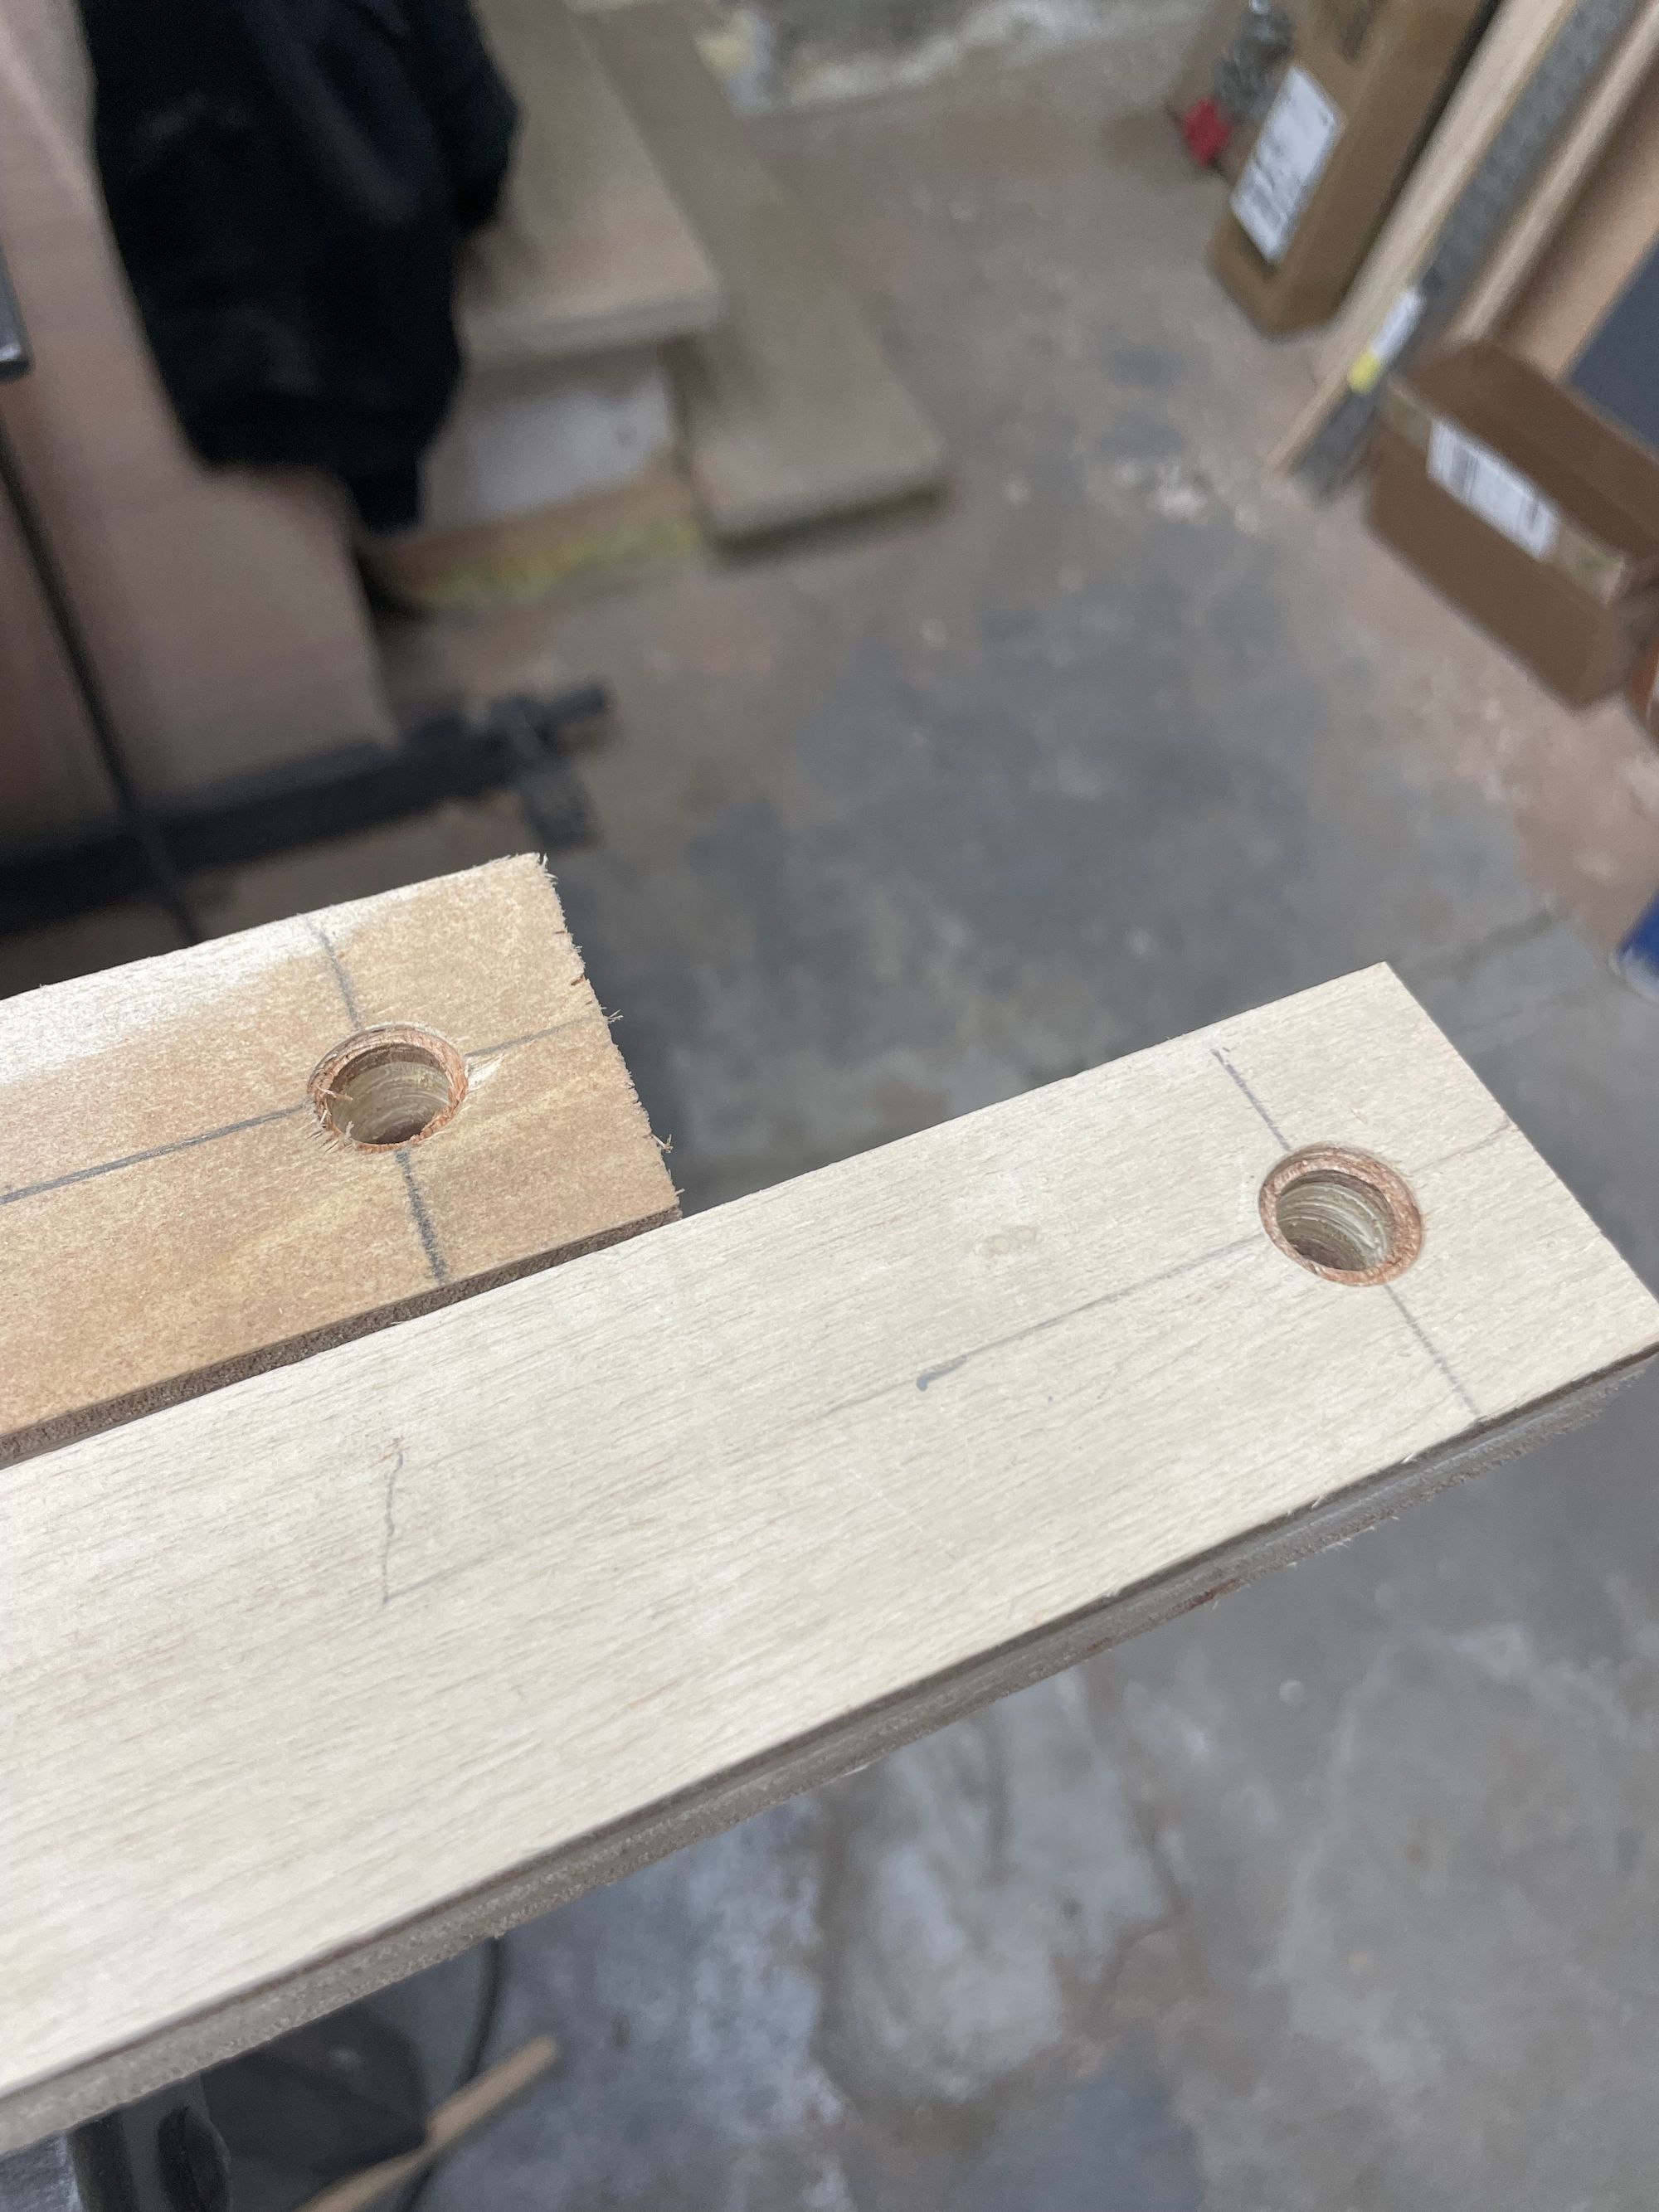
I drilled out each of the intersections with a 3/8" bit in the longer pieces to accommodate a threaded insert, and then I added a small "pocket" to allow the threaded insert to sit flush in the hole I had just drilled:
I now got to try something out that I hadn't dabbled with yet in any of my hobbies: using a 2 part epoxy. I chose to use an epoxy to secure the threaded inserts into the holes I had just made as I wanted the threaded inserts to be rigidly set into the jig pieces and I didn't want them to move or come loose over time. Plywood is much more stable to movement over time compared to solid woods, so I felt comfortable with this choice.
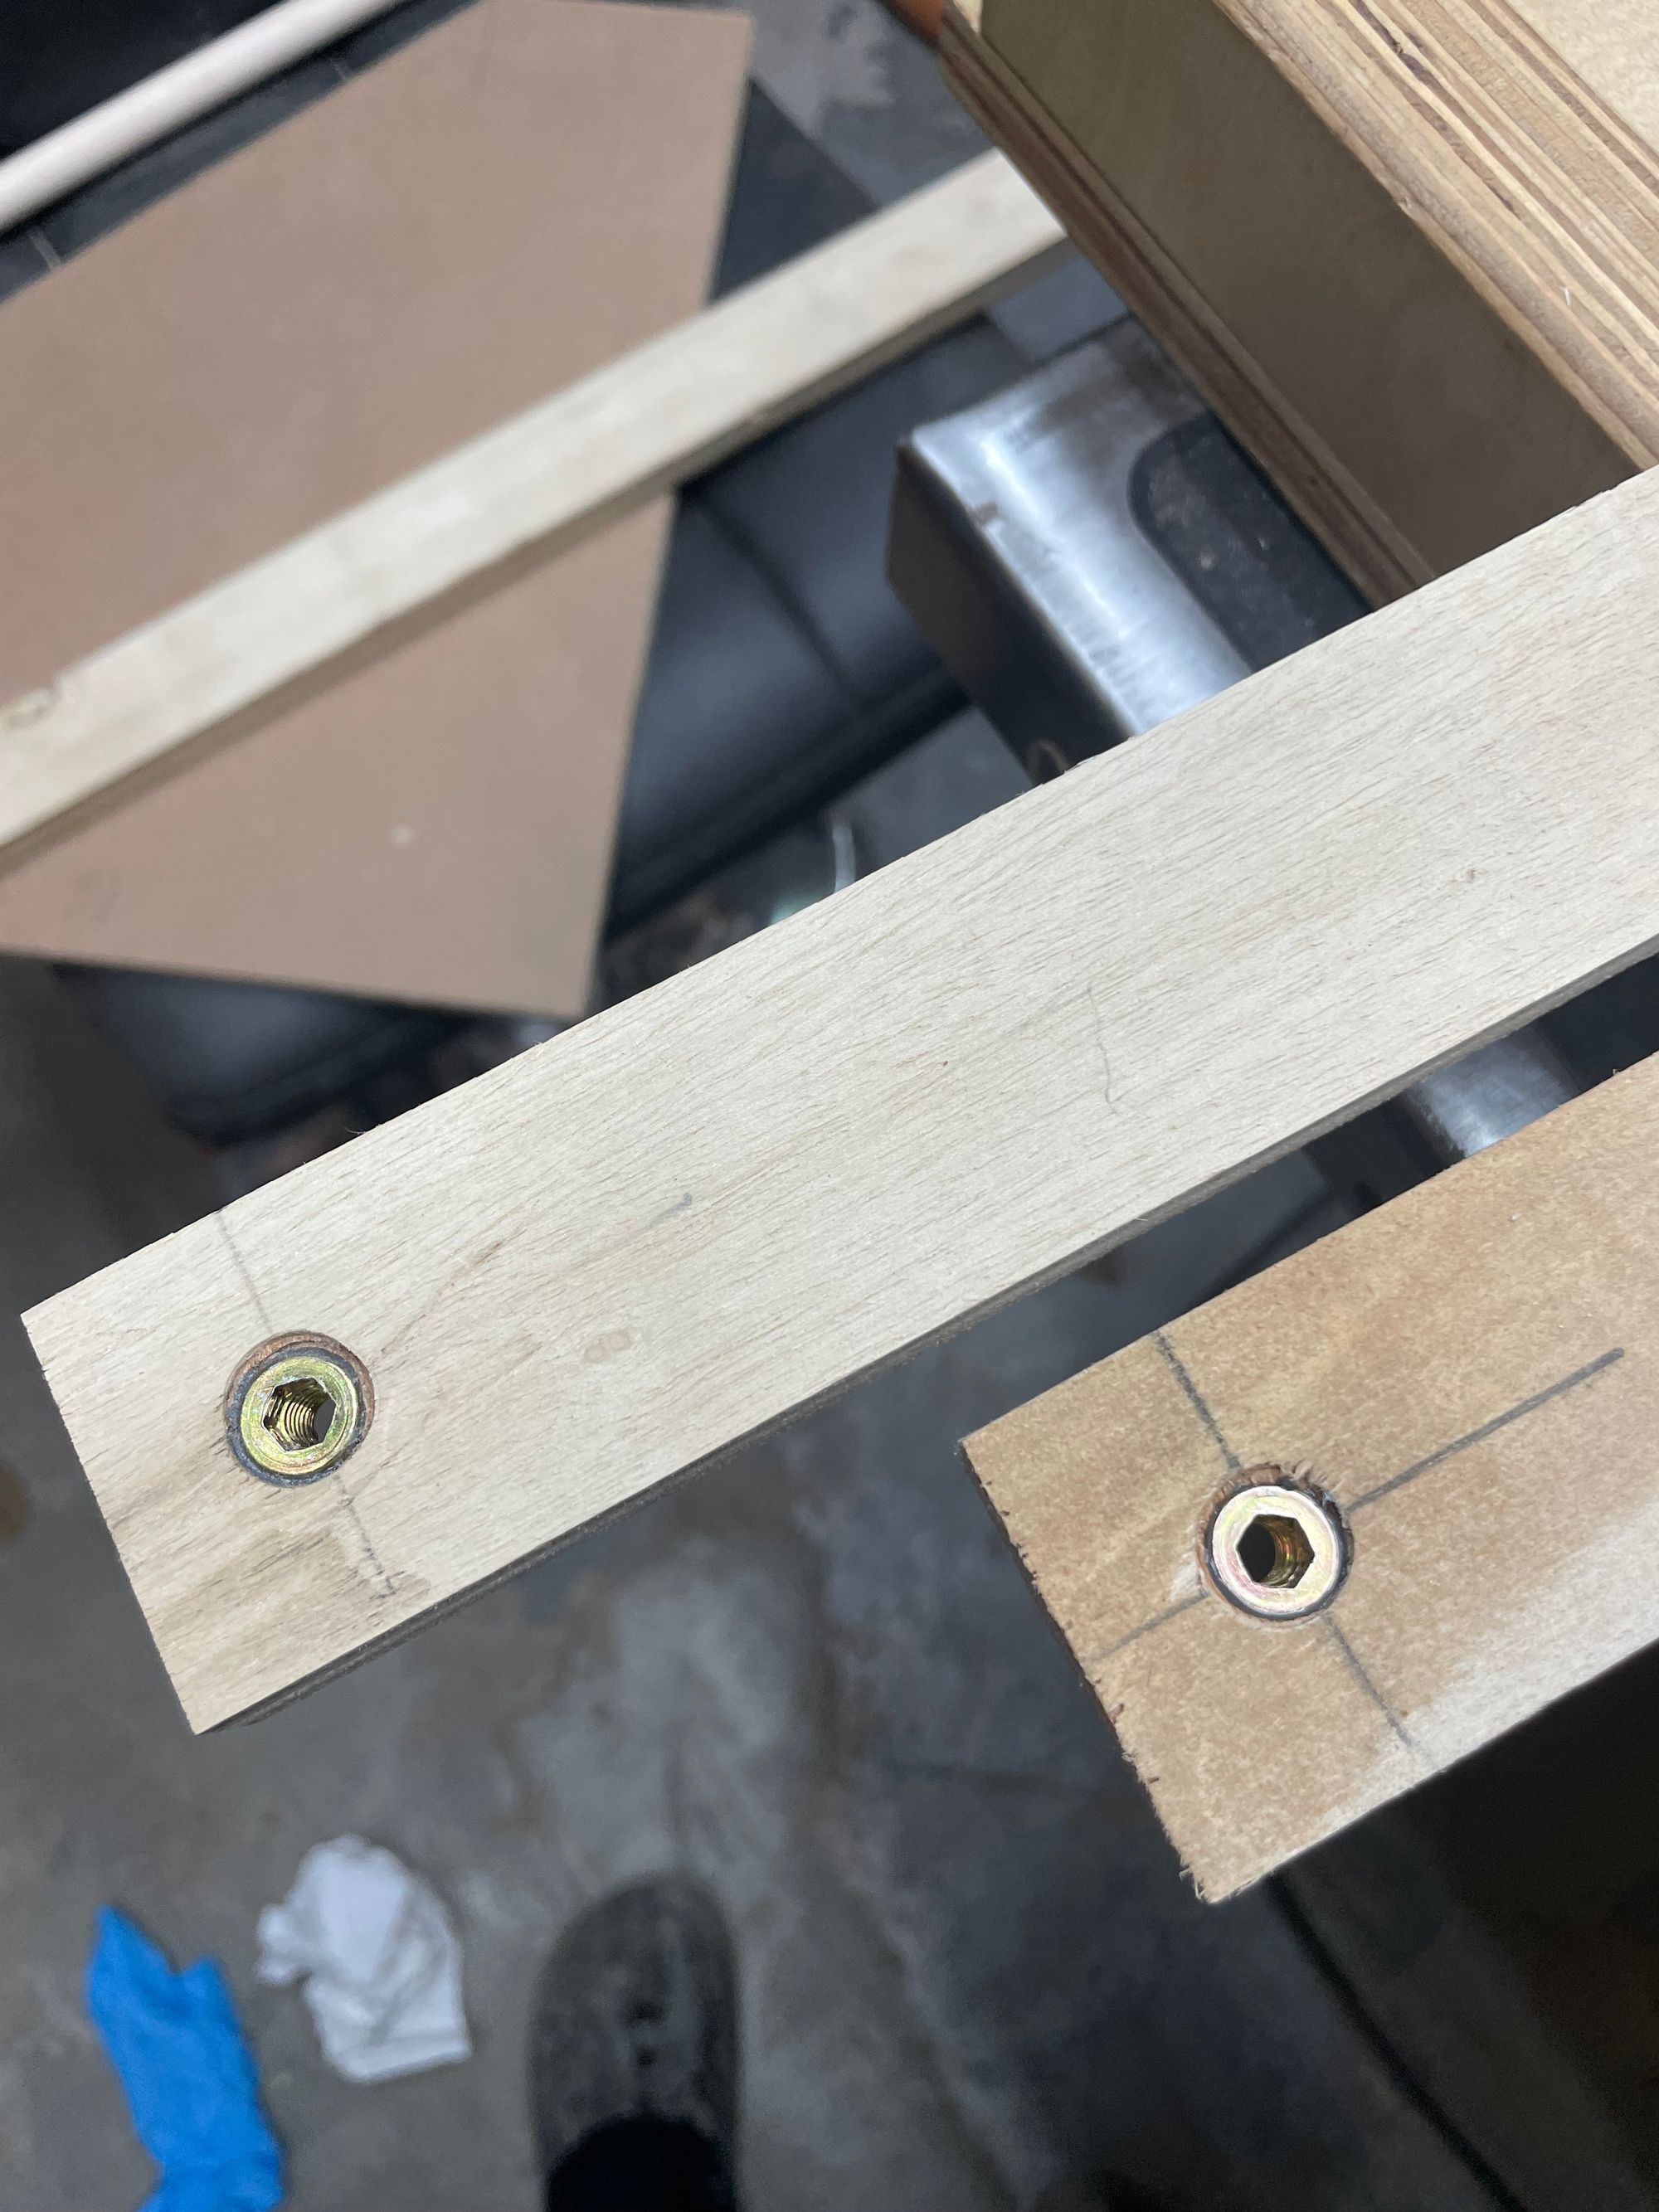
You can see the JB weld KwikWeld epoxy if you look closely above, it is the gray outline around the threaded inserts. I made sure the inserts sat flush or under the surface of the plywood. The epoxy is much stinkier than I thought it would be. After a little bit of initial panic and the proper PPE I was able to get the job done, it was easy to use.
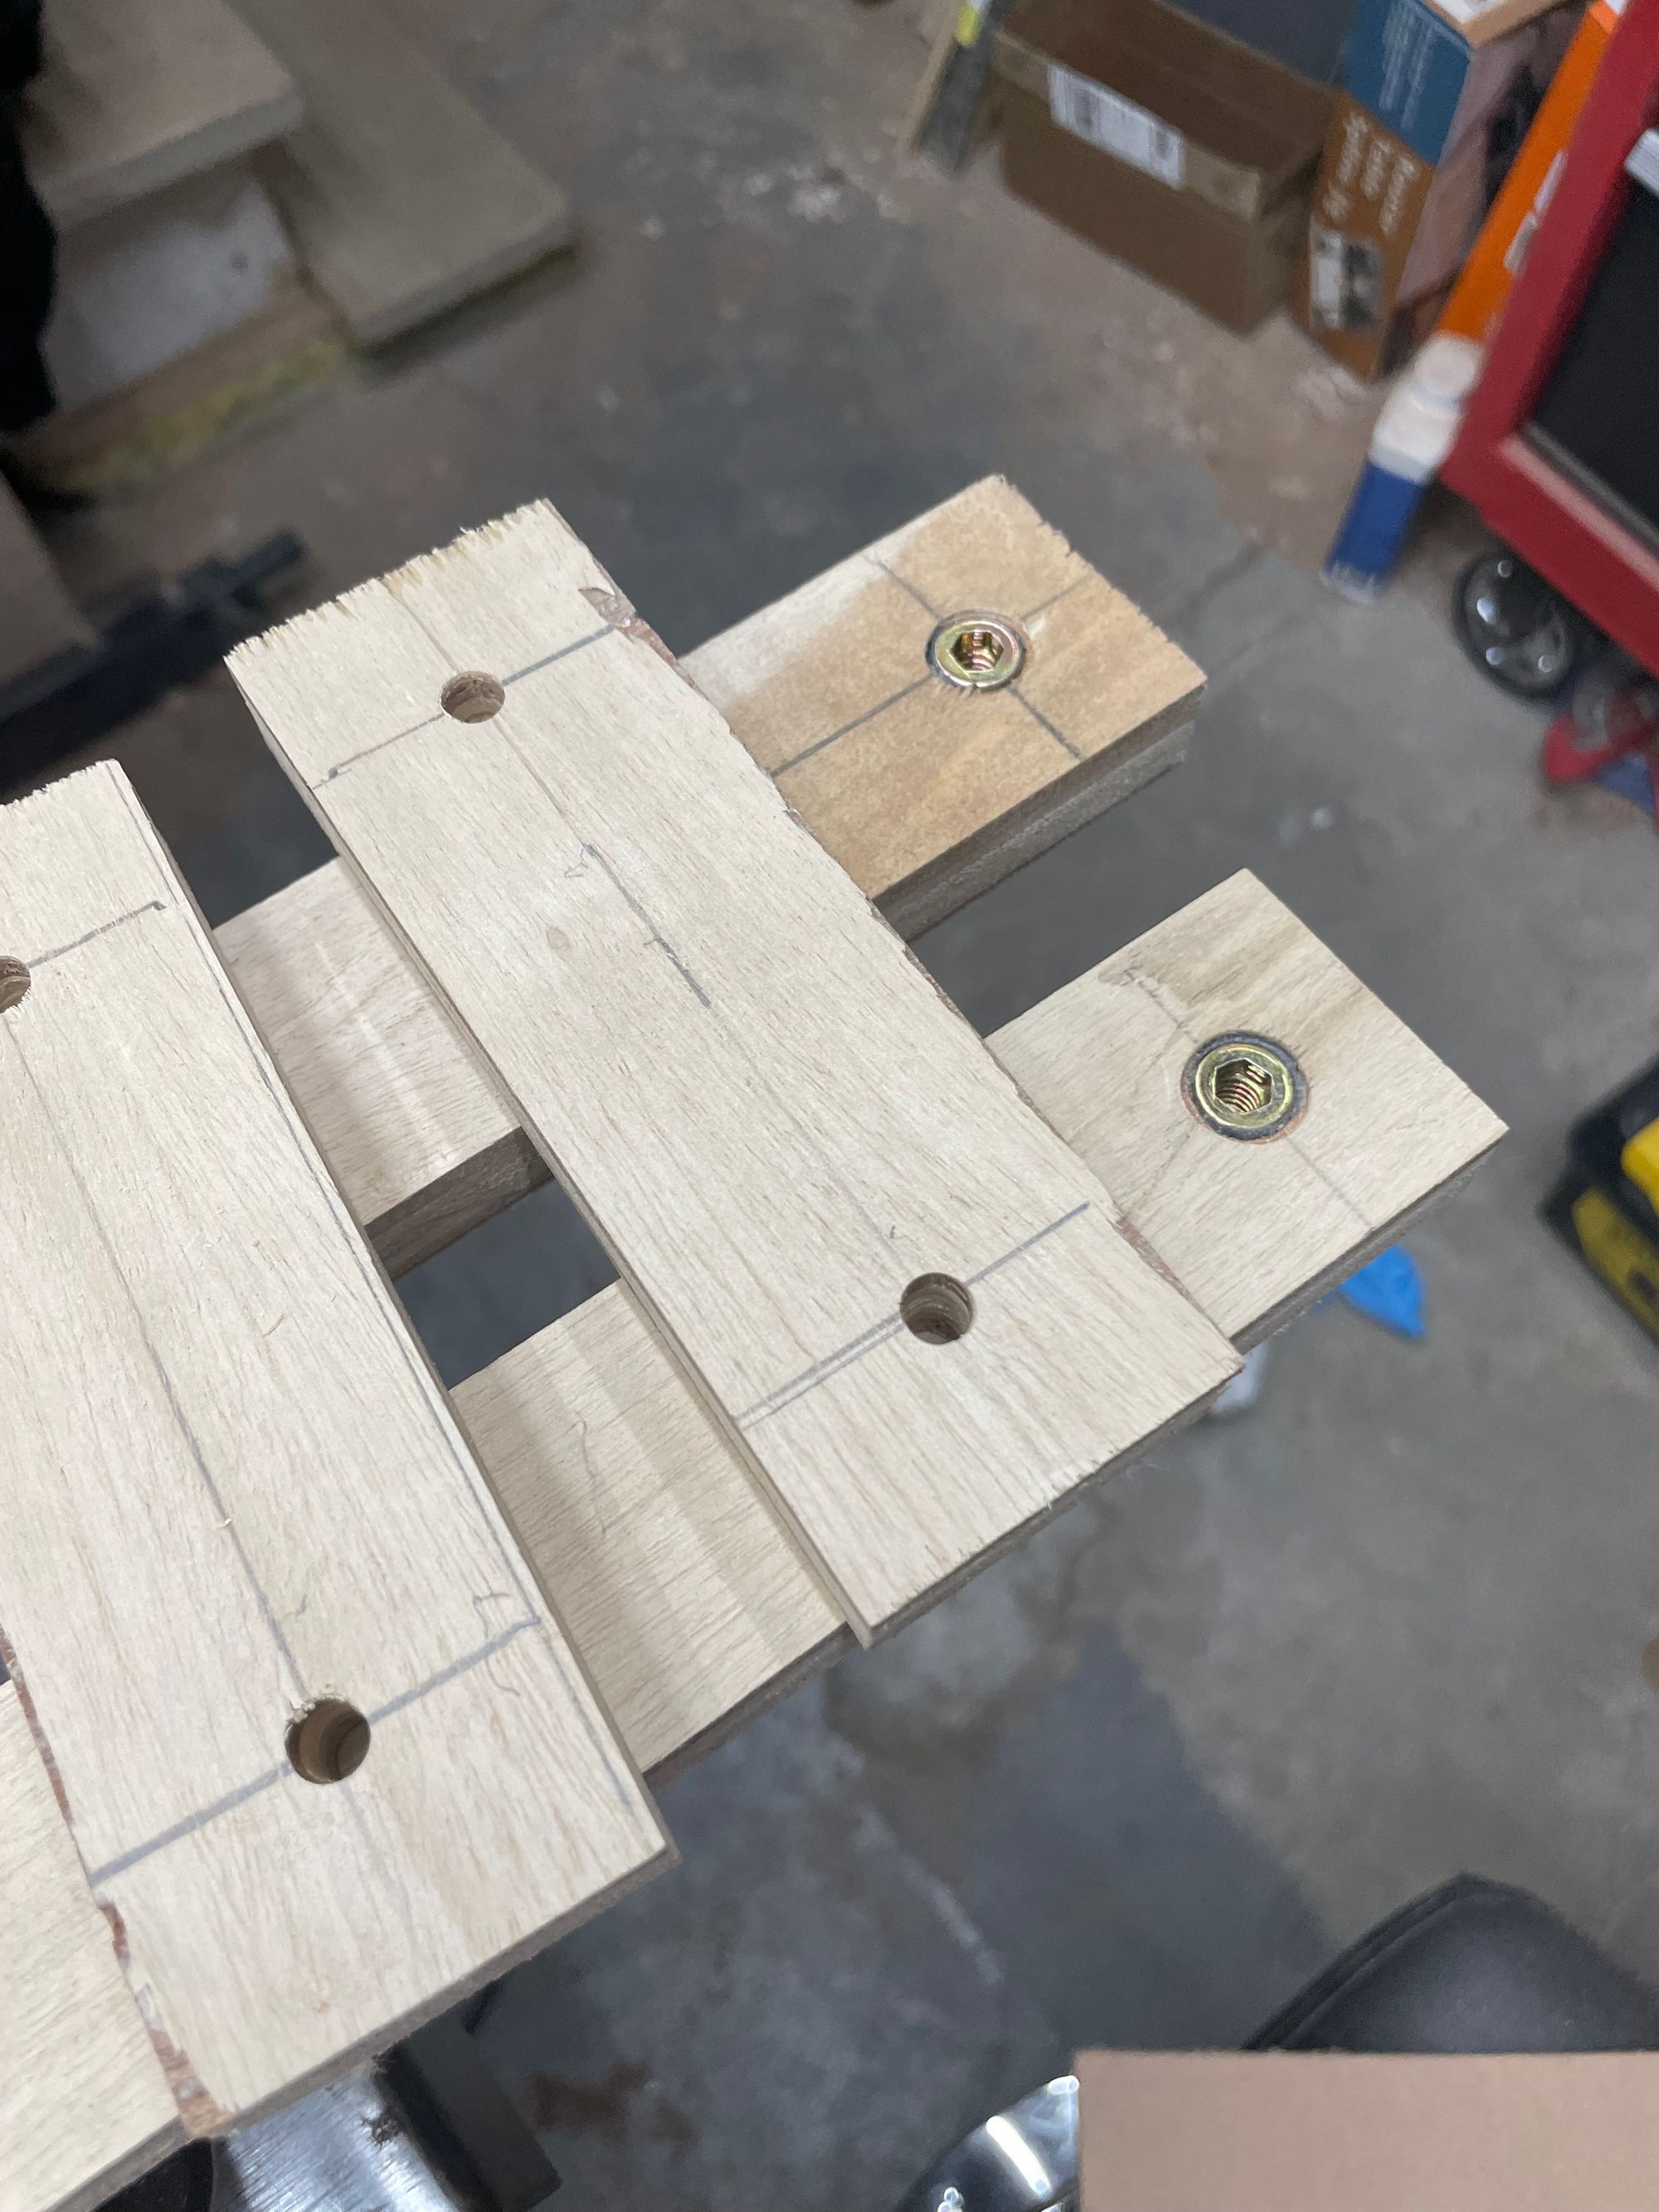
The smaller pieces got a similar treatment, with 1/4" holes to accommodate the bolt thread that will pass through them.
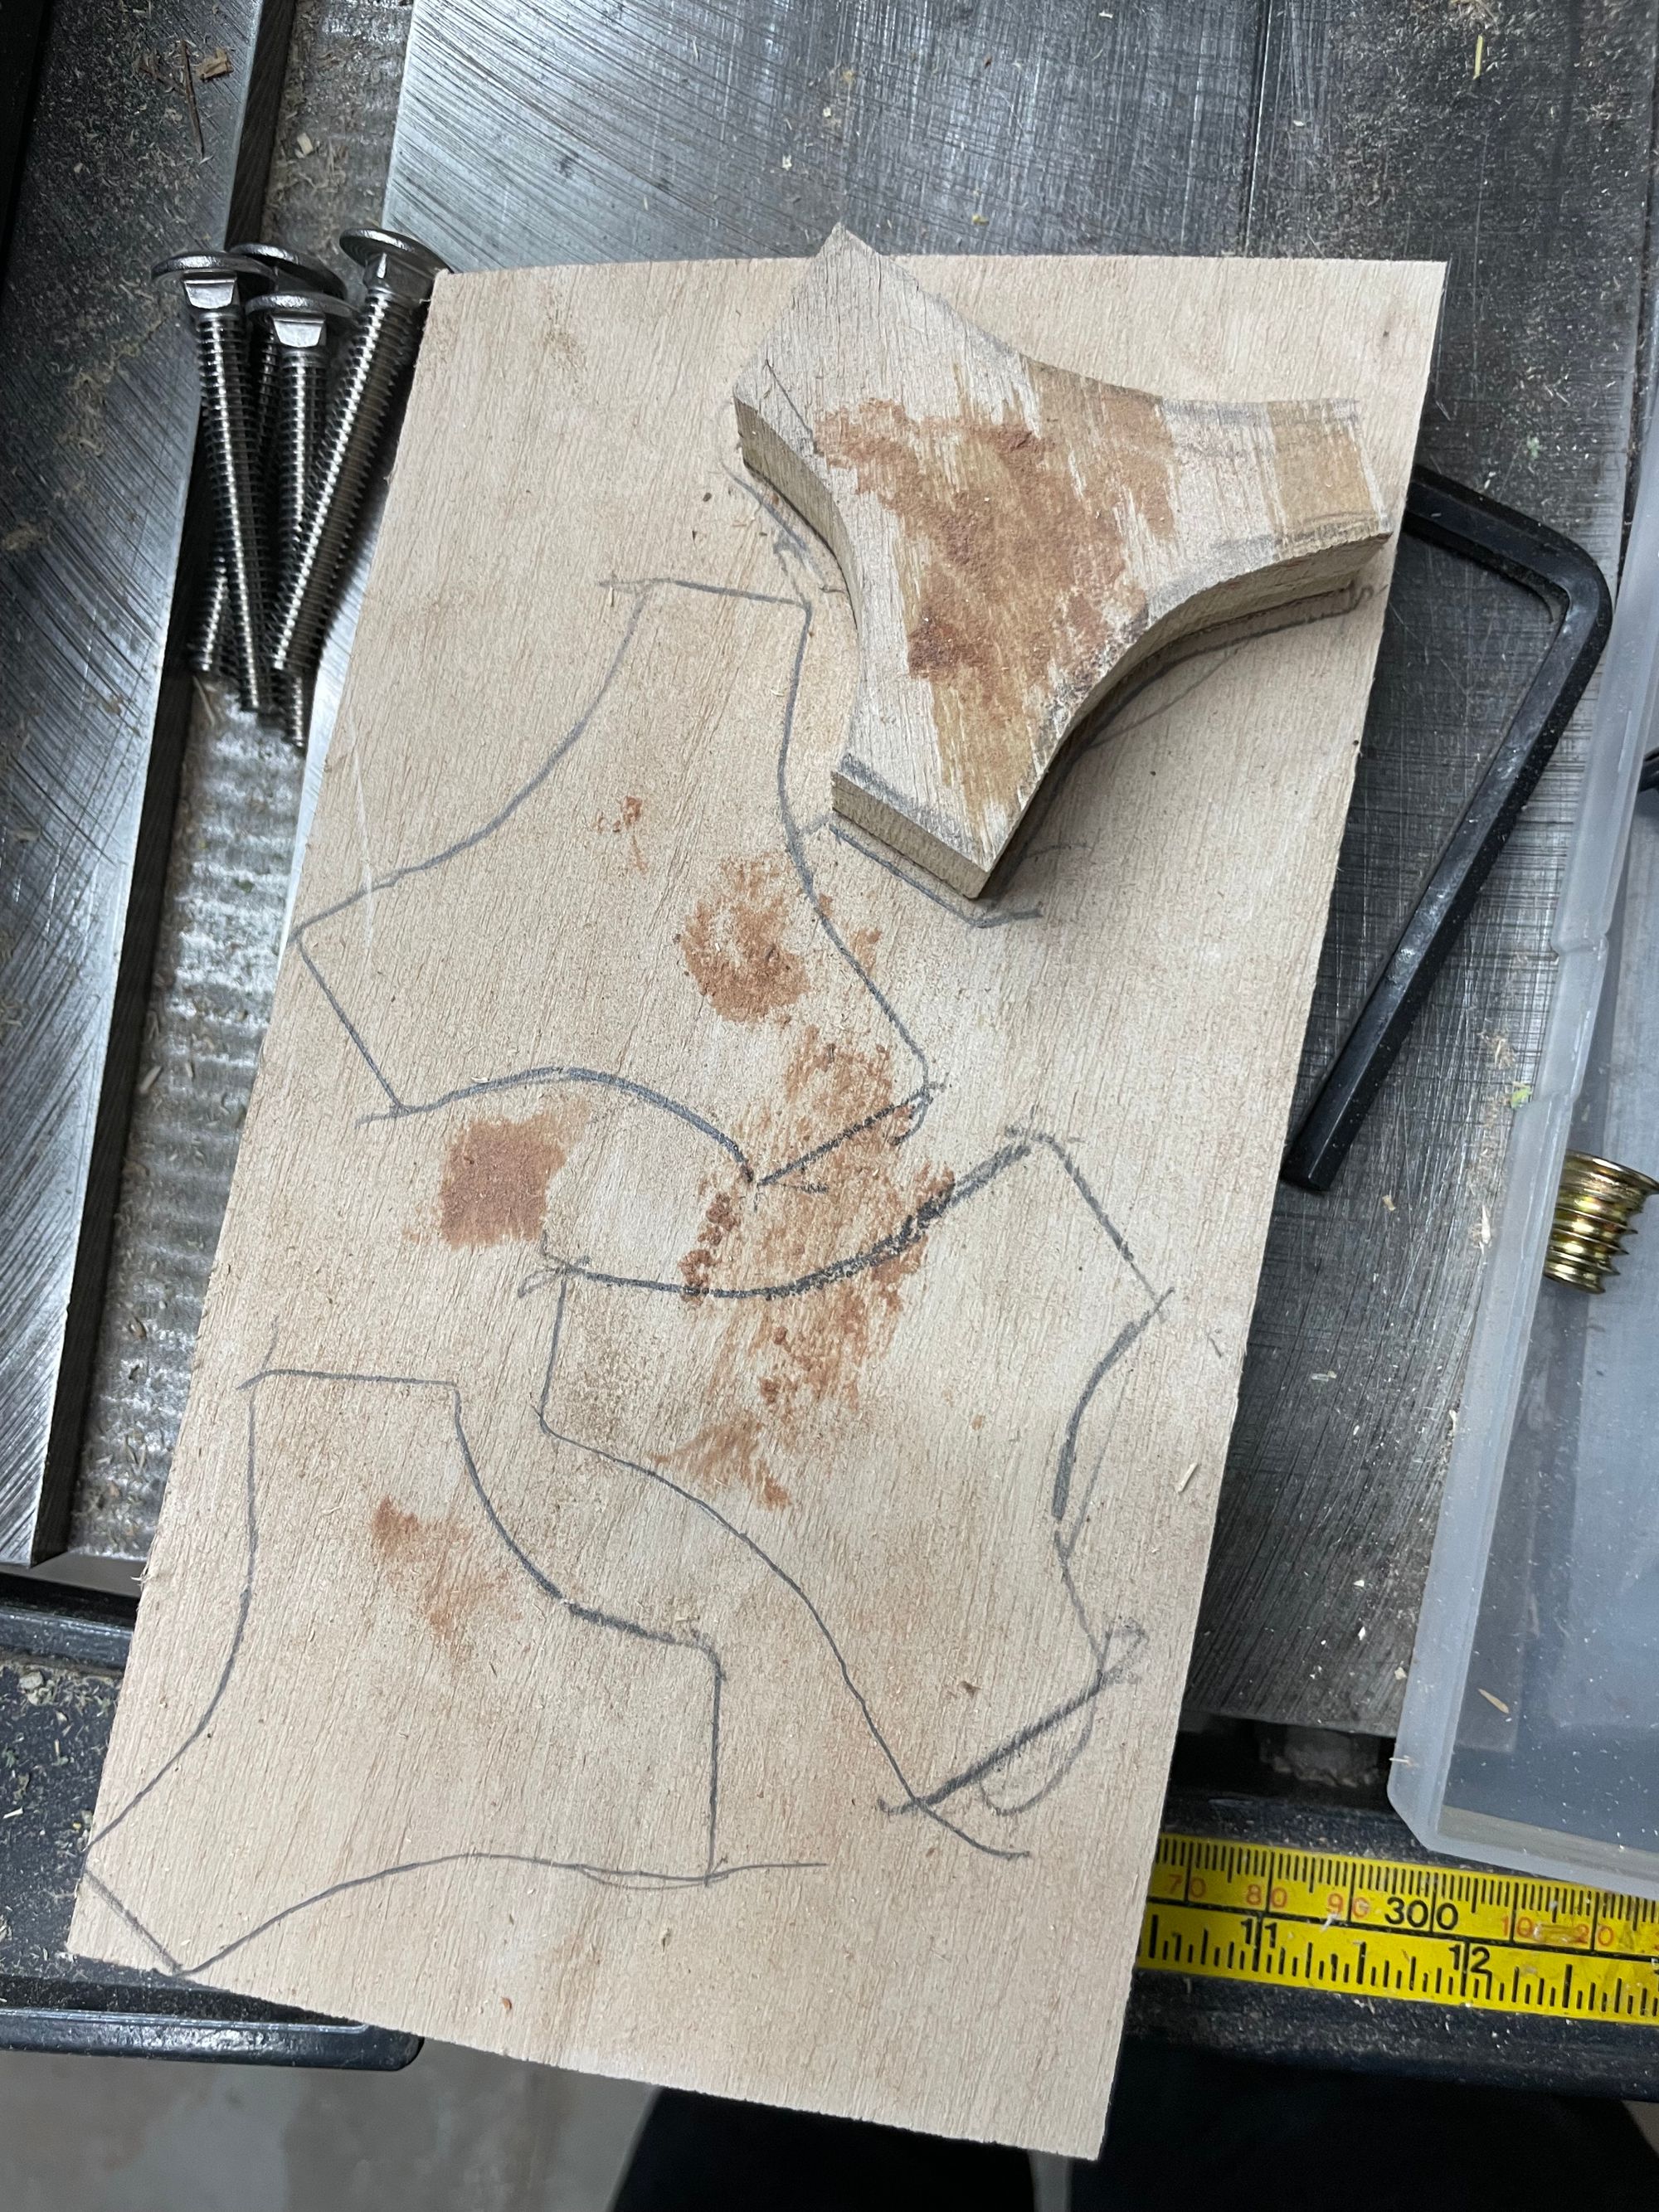
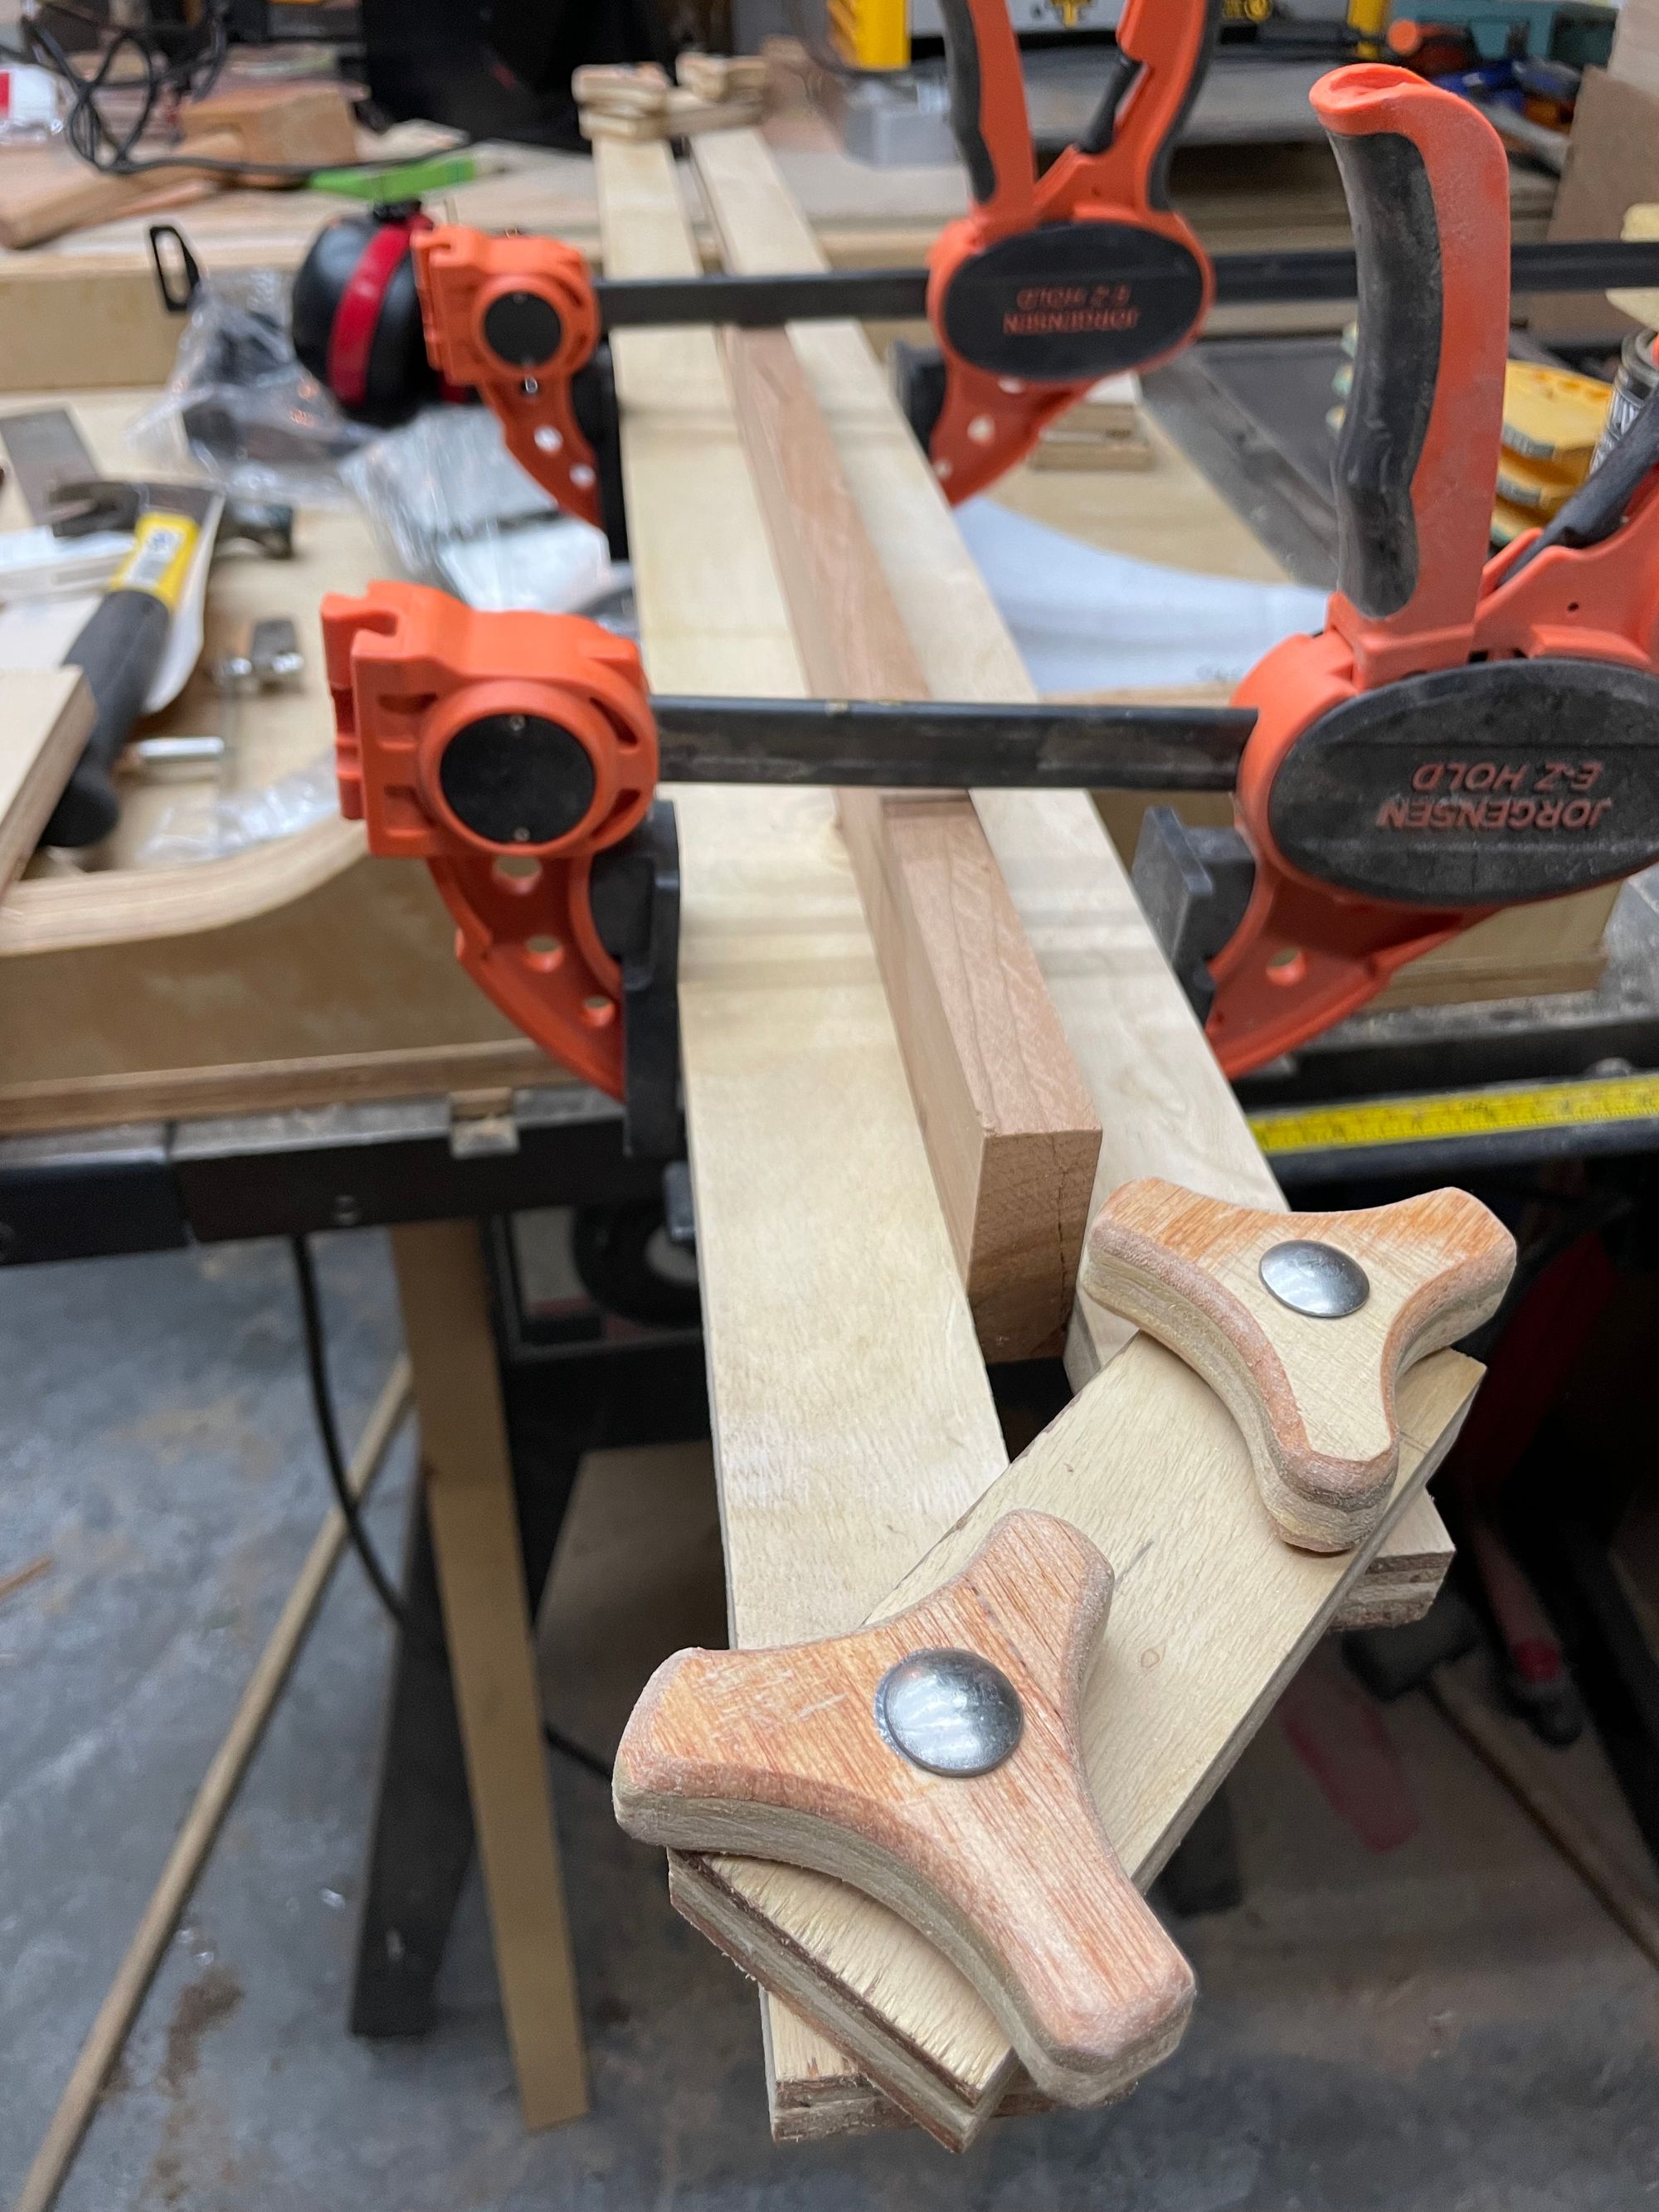
I then moved to the knobs. I went to my local hardware store but couldn't find knobs that really worked for this project. I've also been on a "try to stop supporting massive corporations with my money" kick so I didn't want to just order some online. Instead I bought some bolts from my local hardware store and decided I could just make my own. Nothing fancy, I made no measurements and just freehanded the above design, cutting out the pieces on my bandsaw.
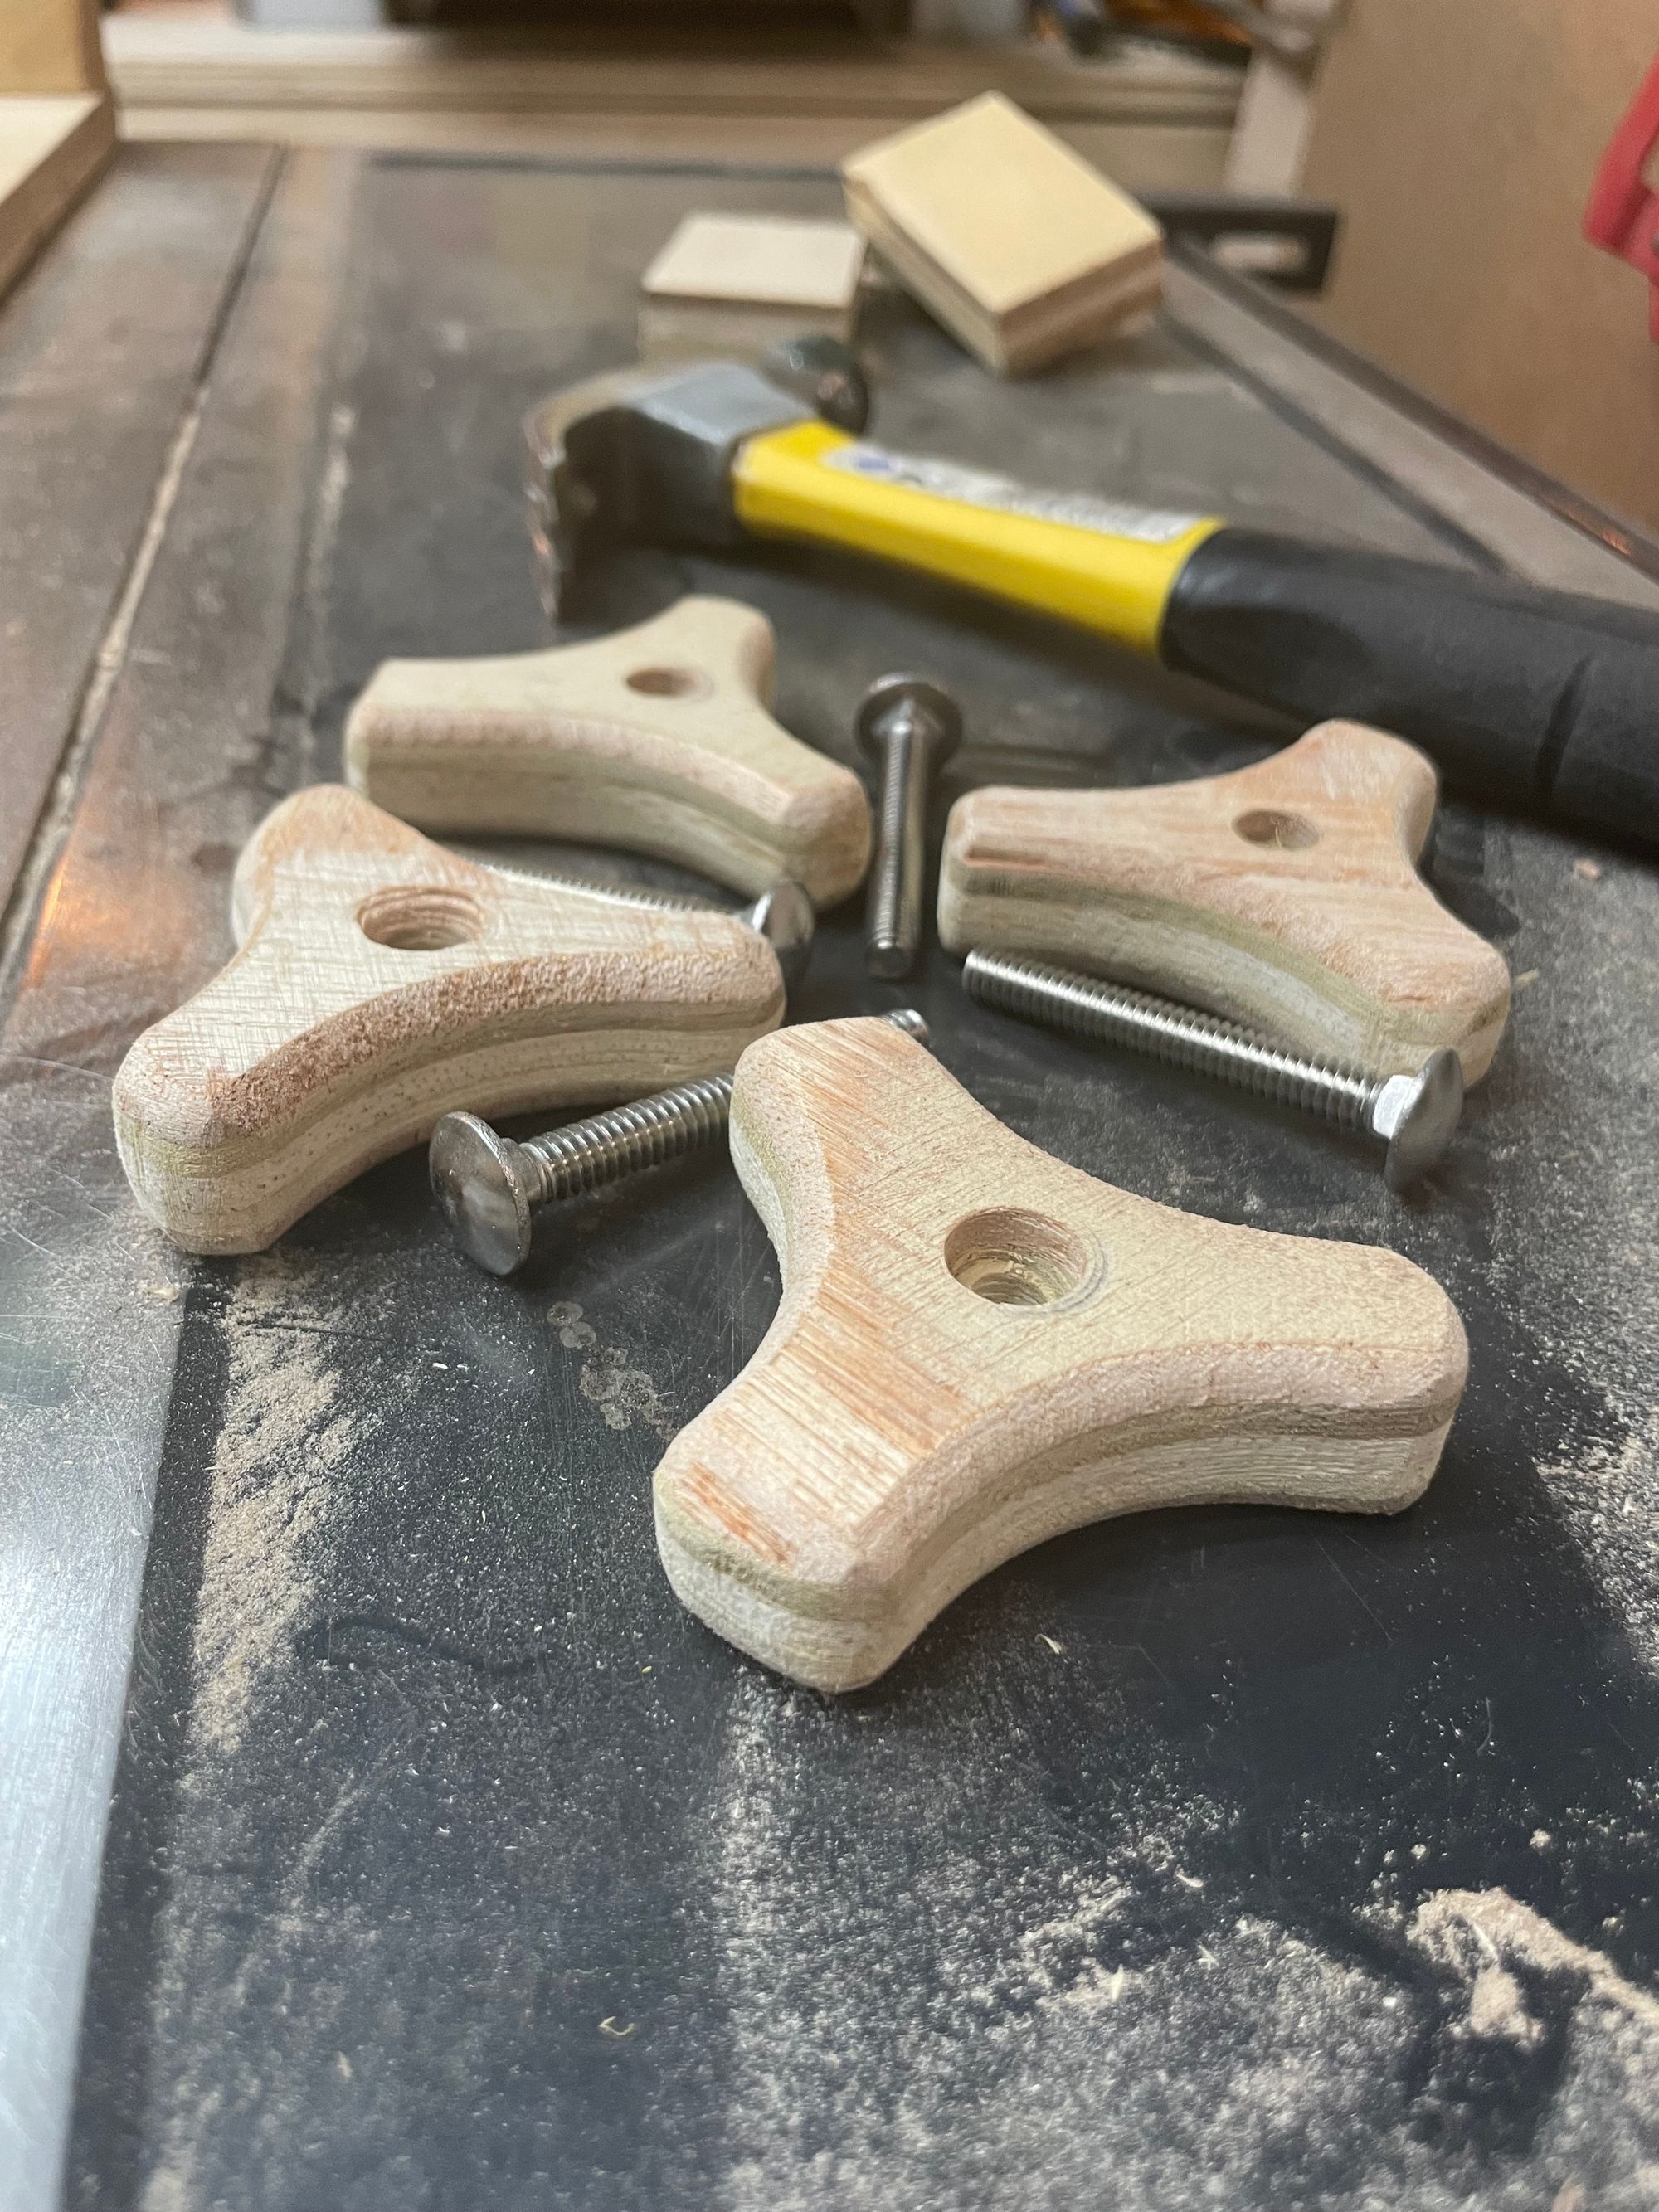
Not looking too rough after some sanding, rounding on the router, more sanding, drilling and pocketing some holes to accept the bolts!
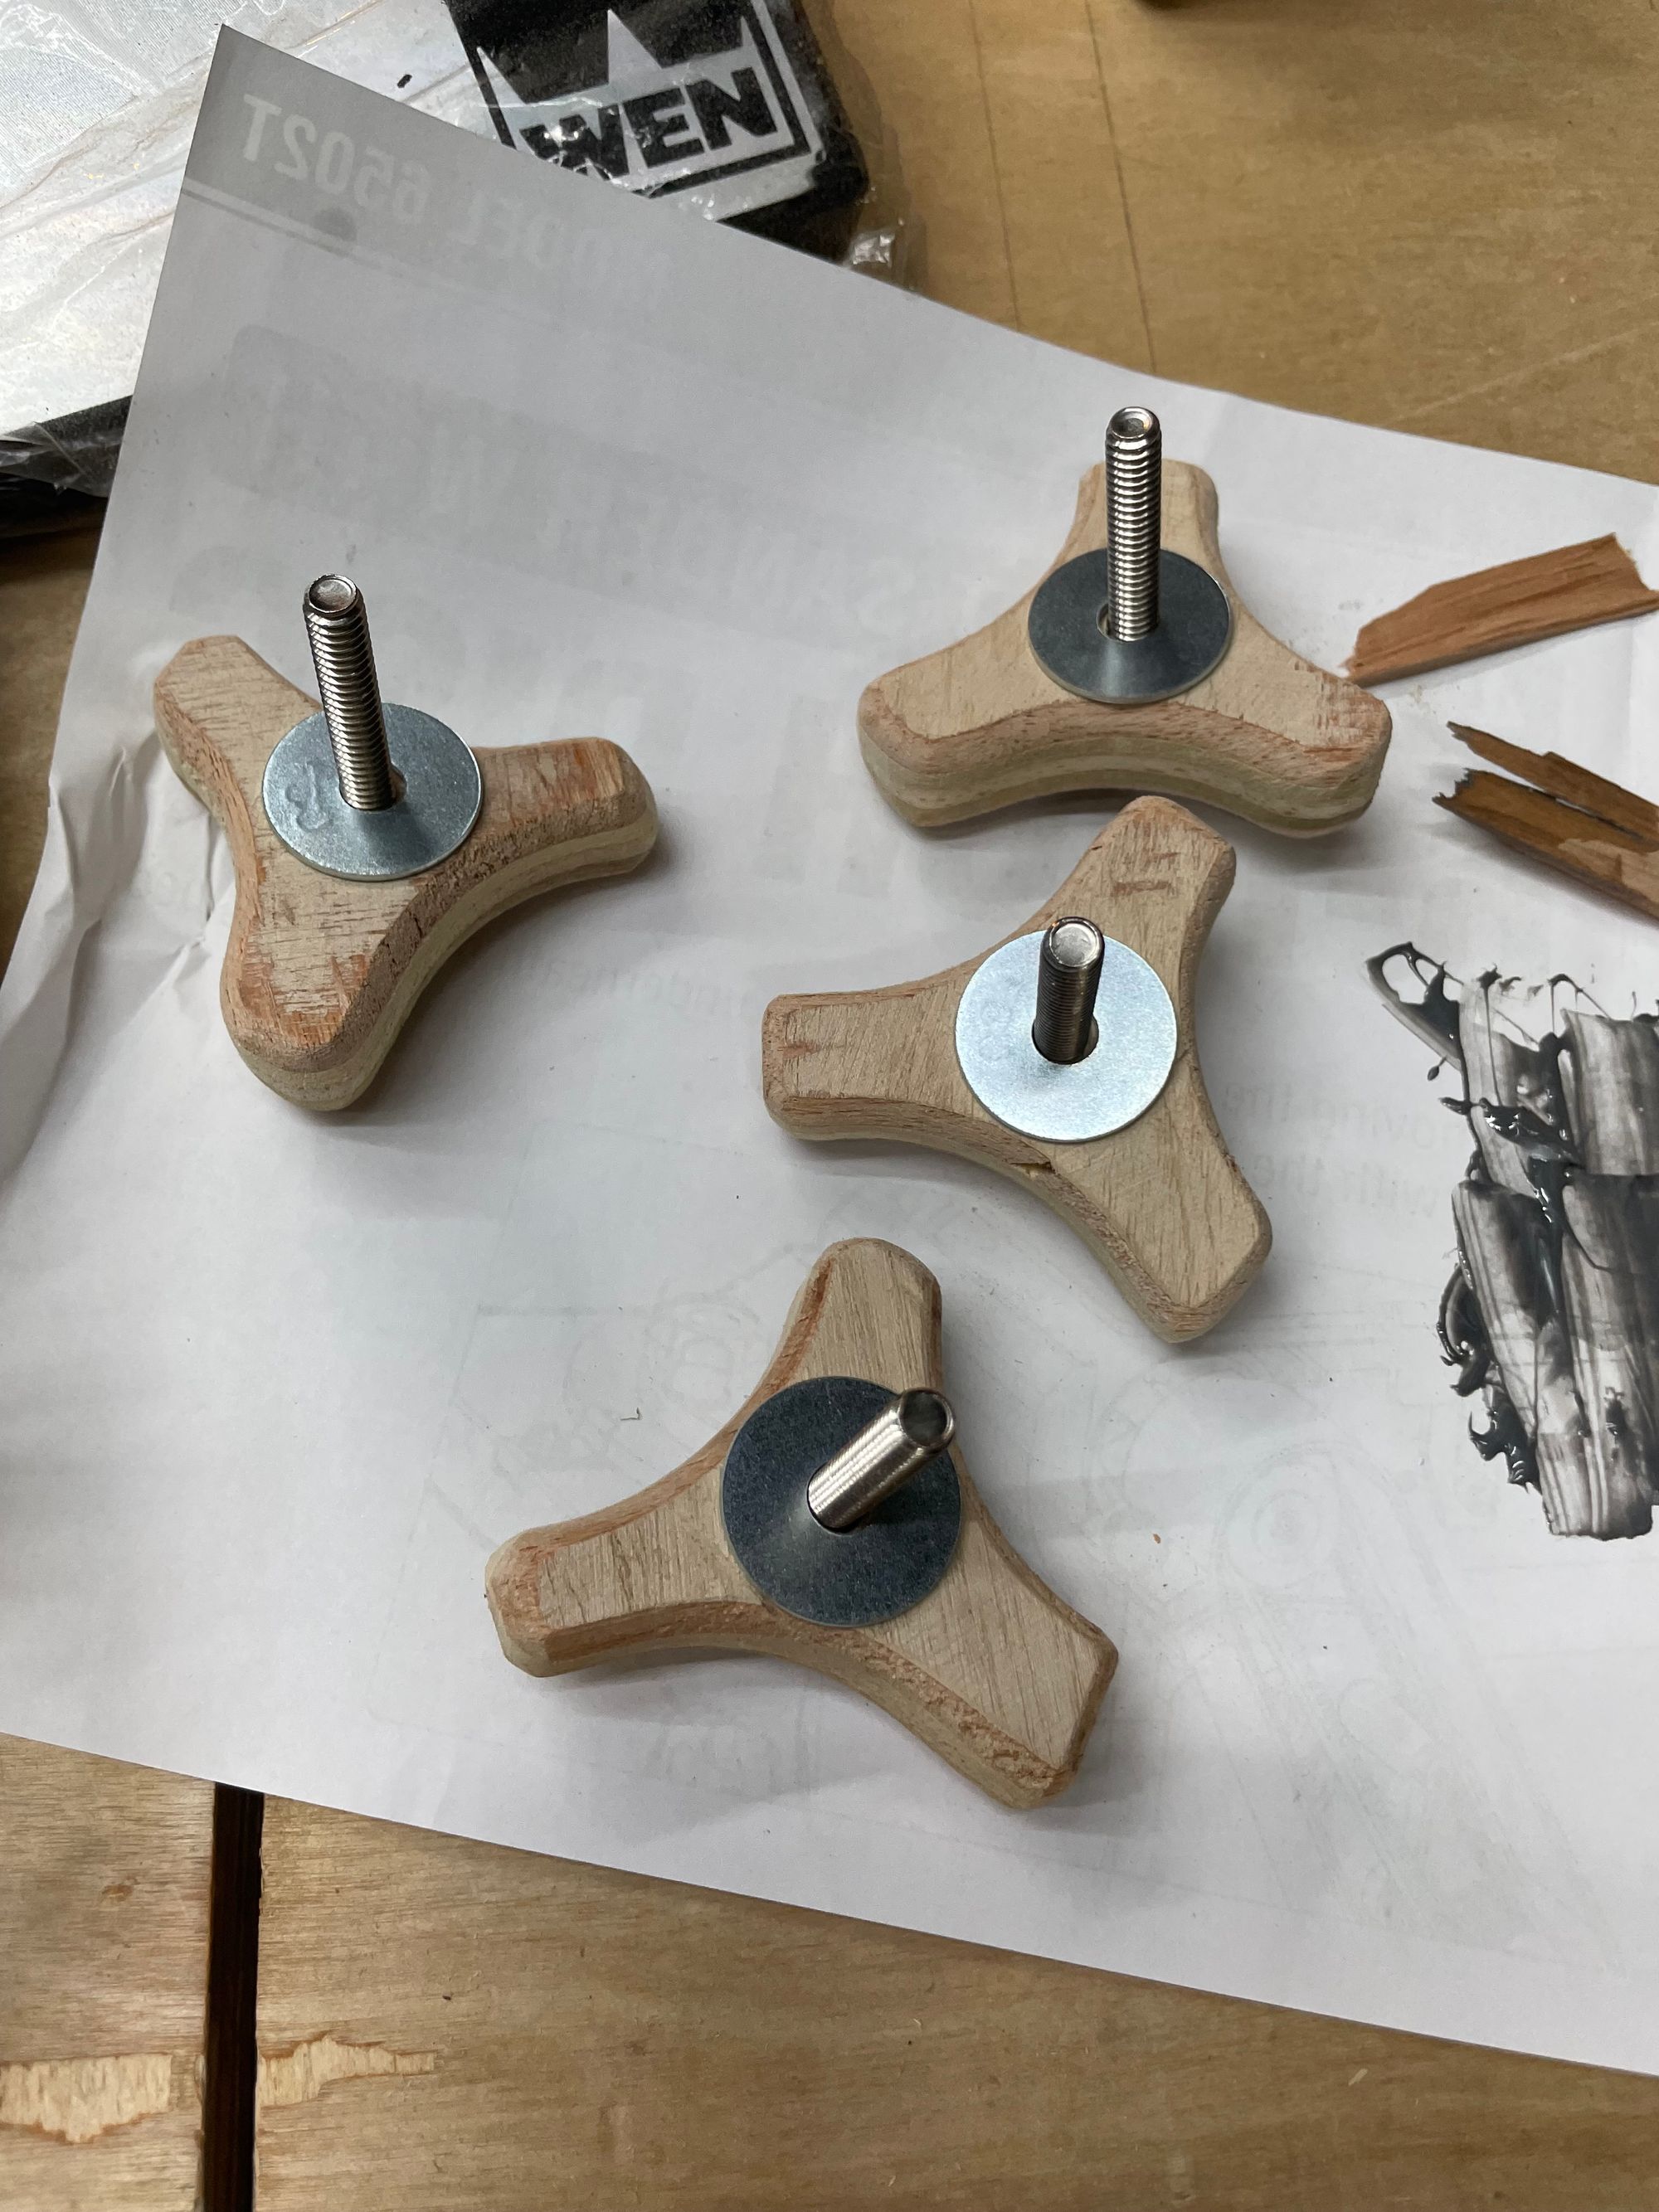
I added in the bolts and washers, using the same epoxy to set the bolts into the knobs - the washers remaining free to move around.
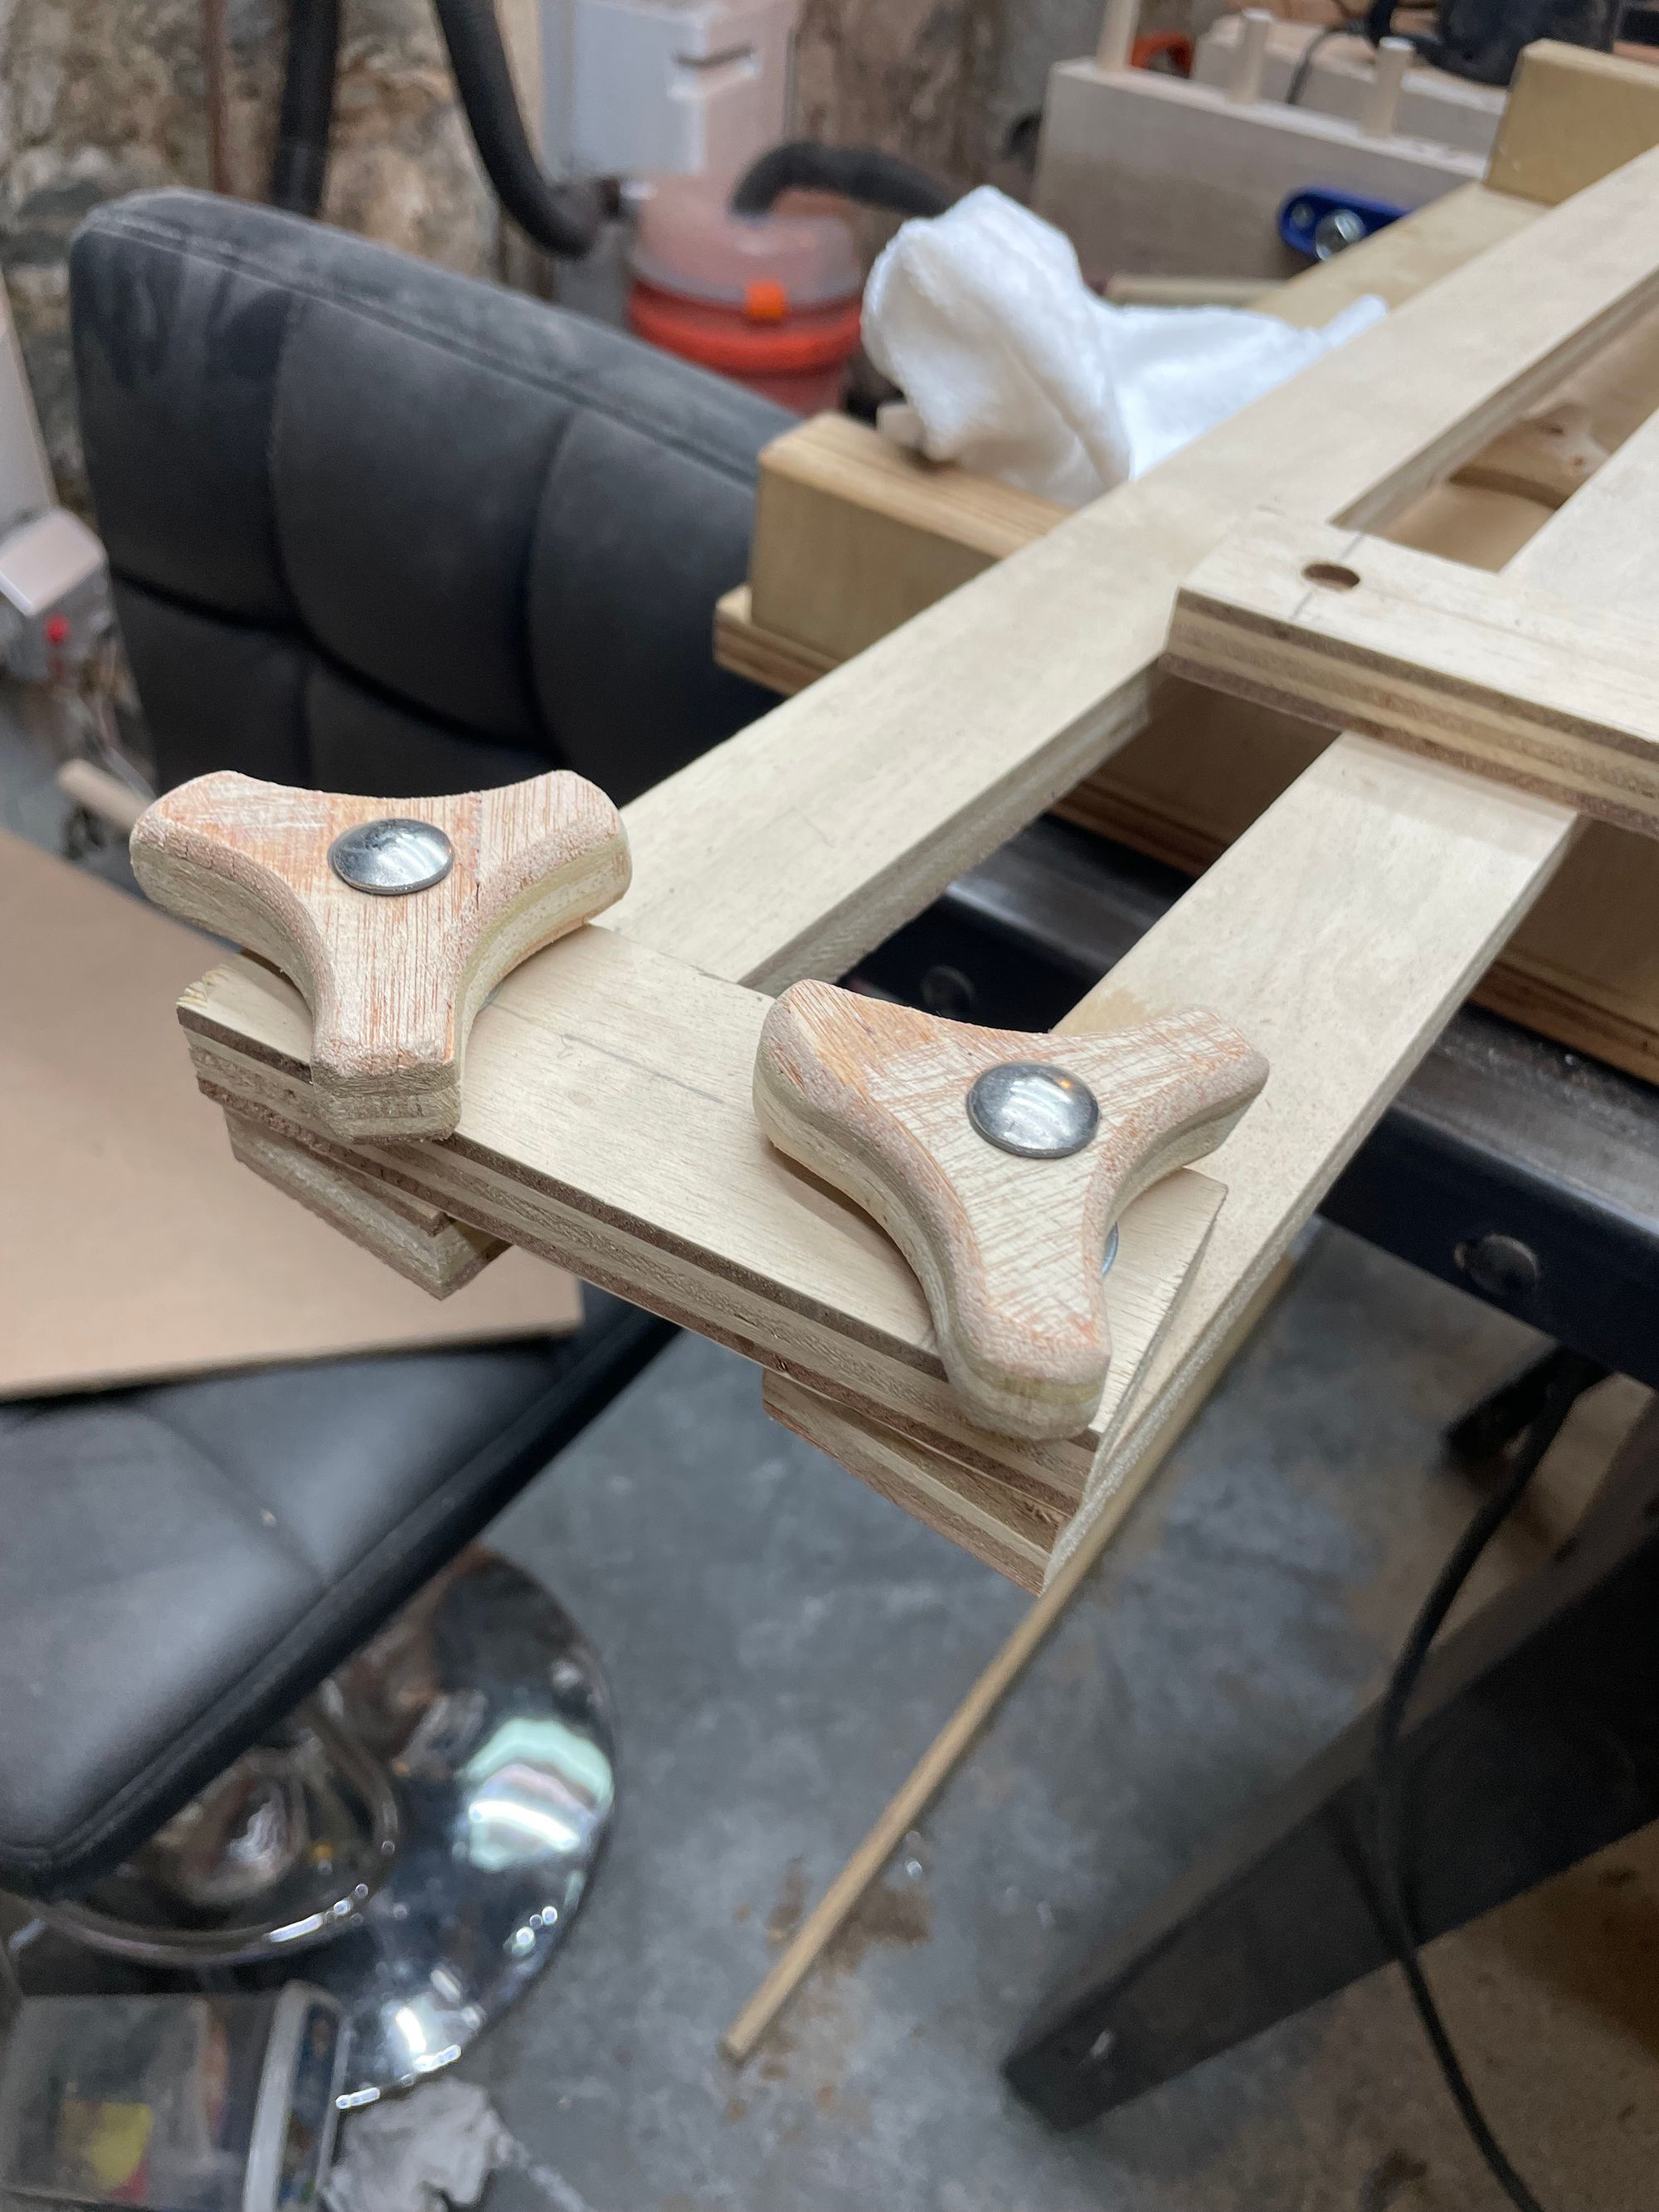
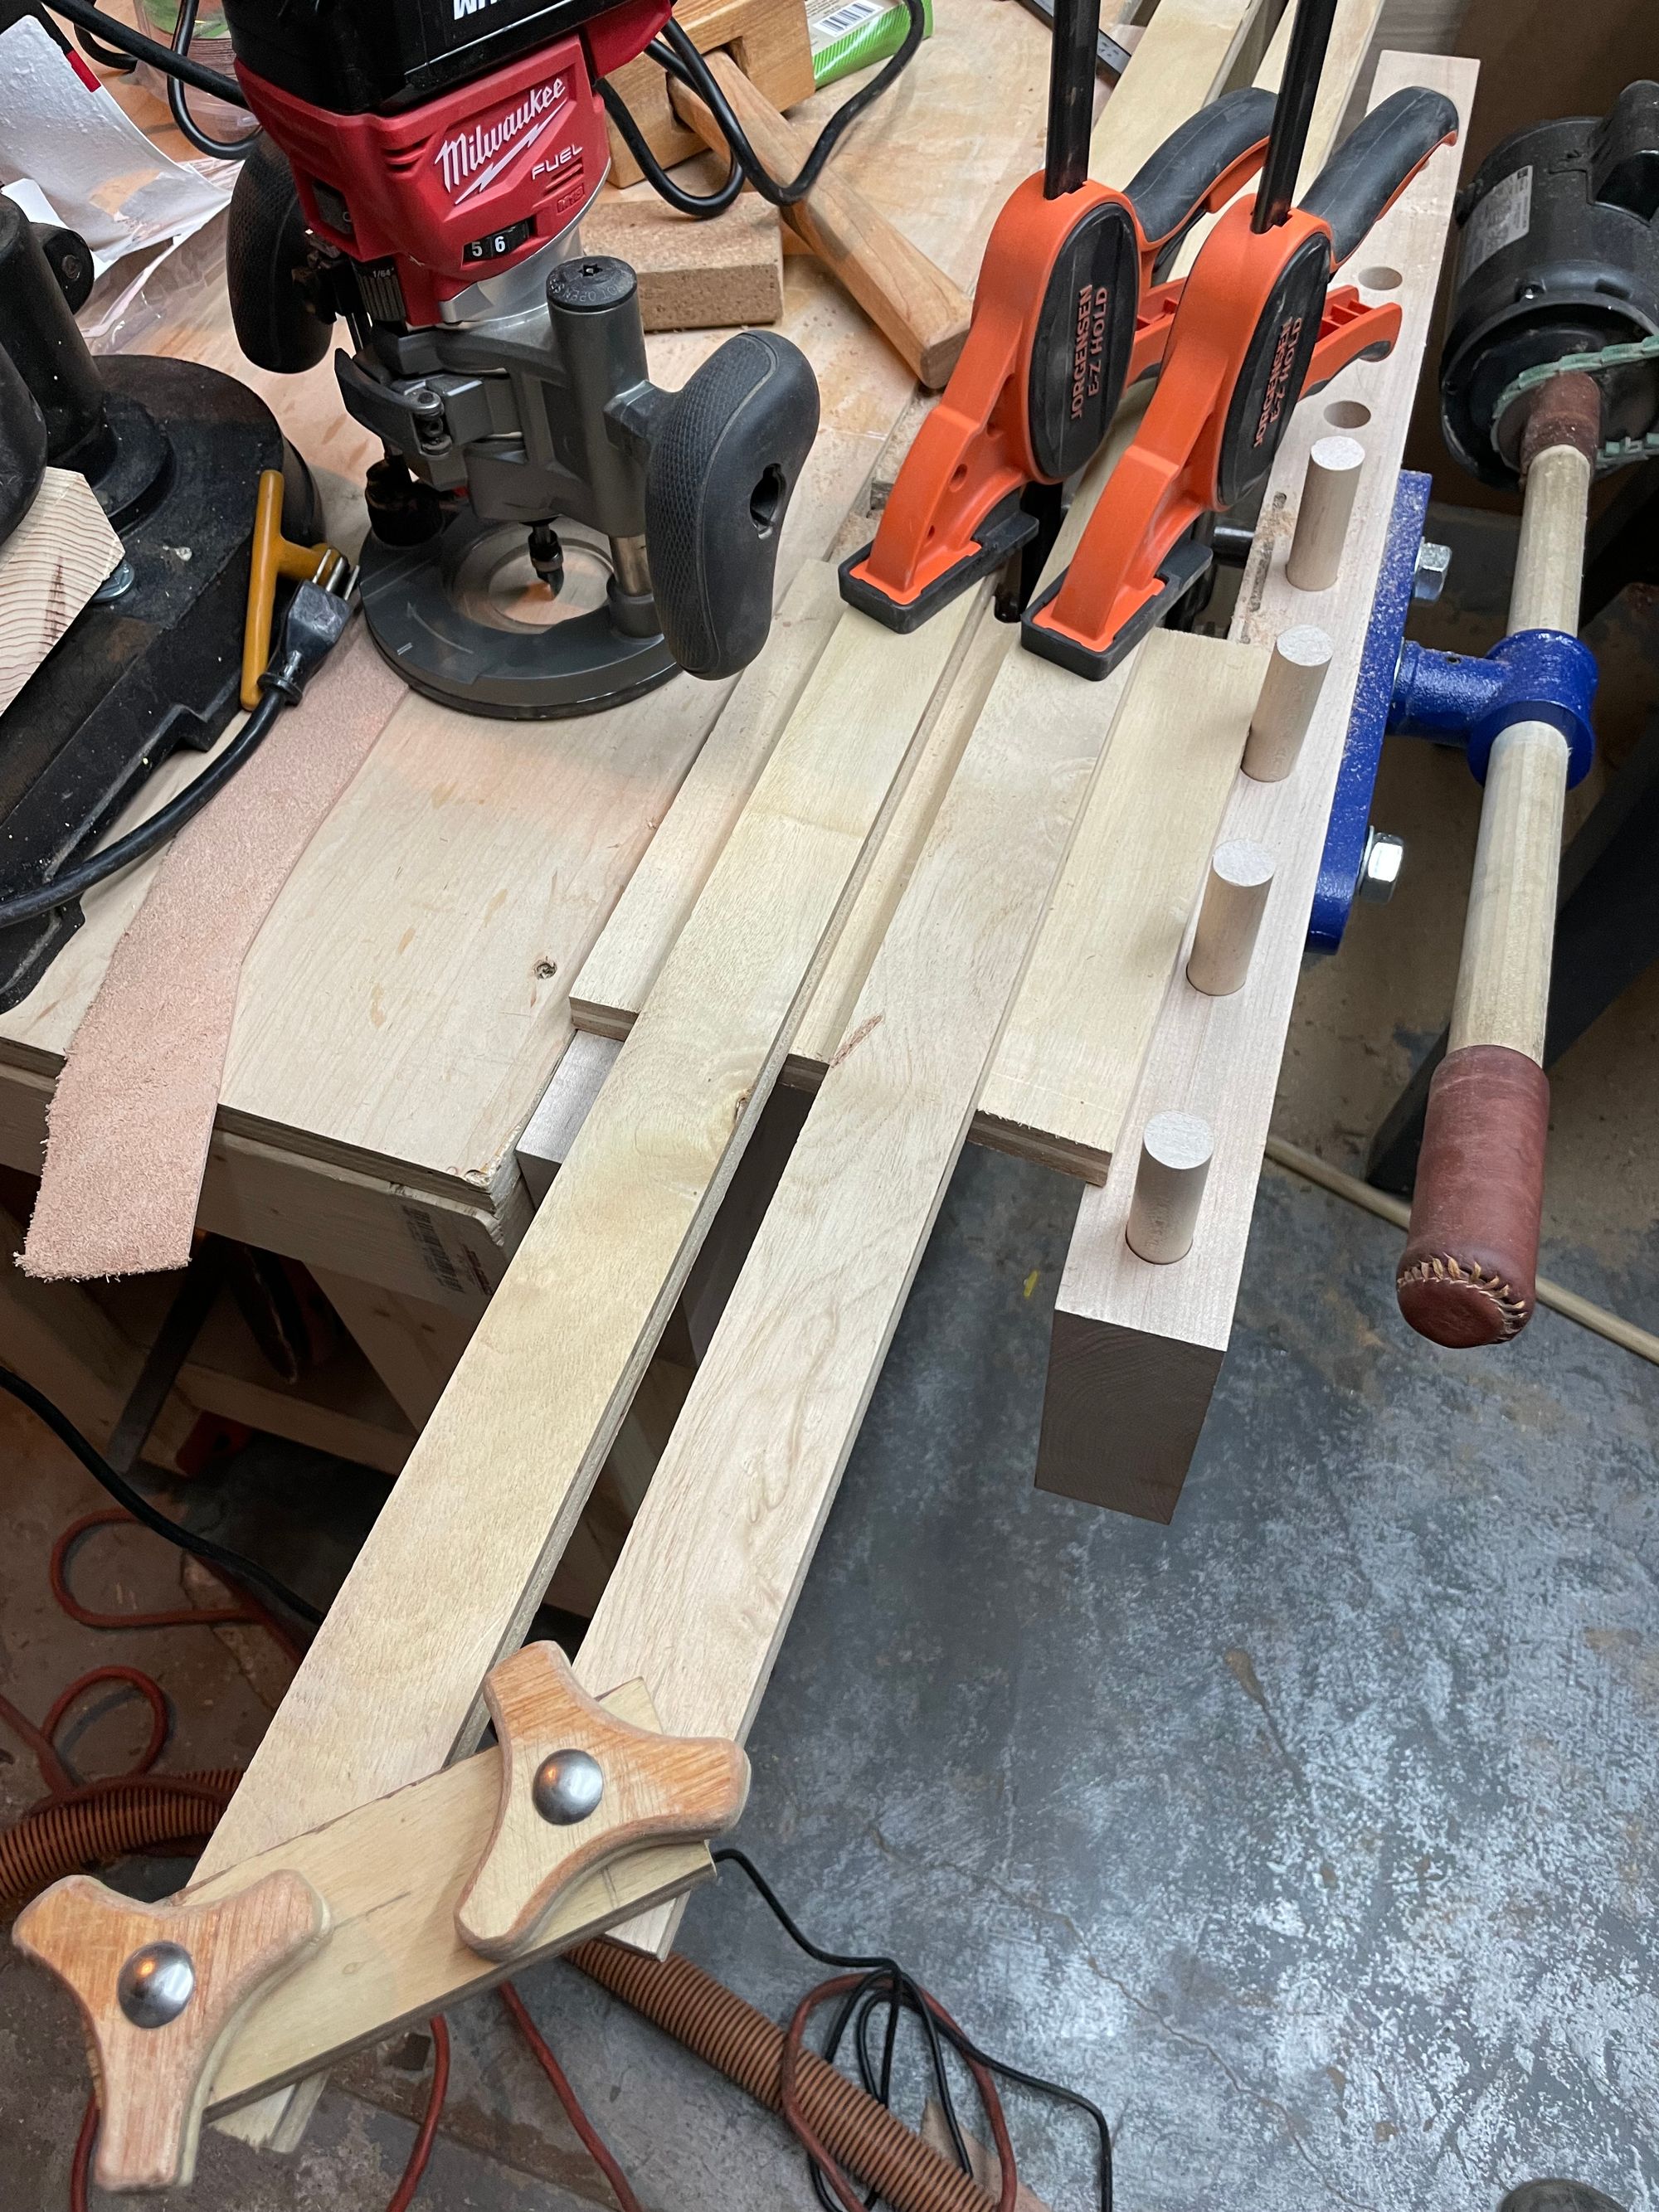
Some test fitting and tweaking was required at this stage, I realized that the long pieces had a certain orientation that allowed them to best sit flush against each other - not strictly necessary but pointing it out in case you see it moving around later.
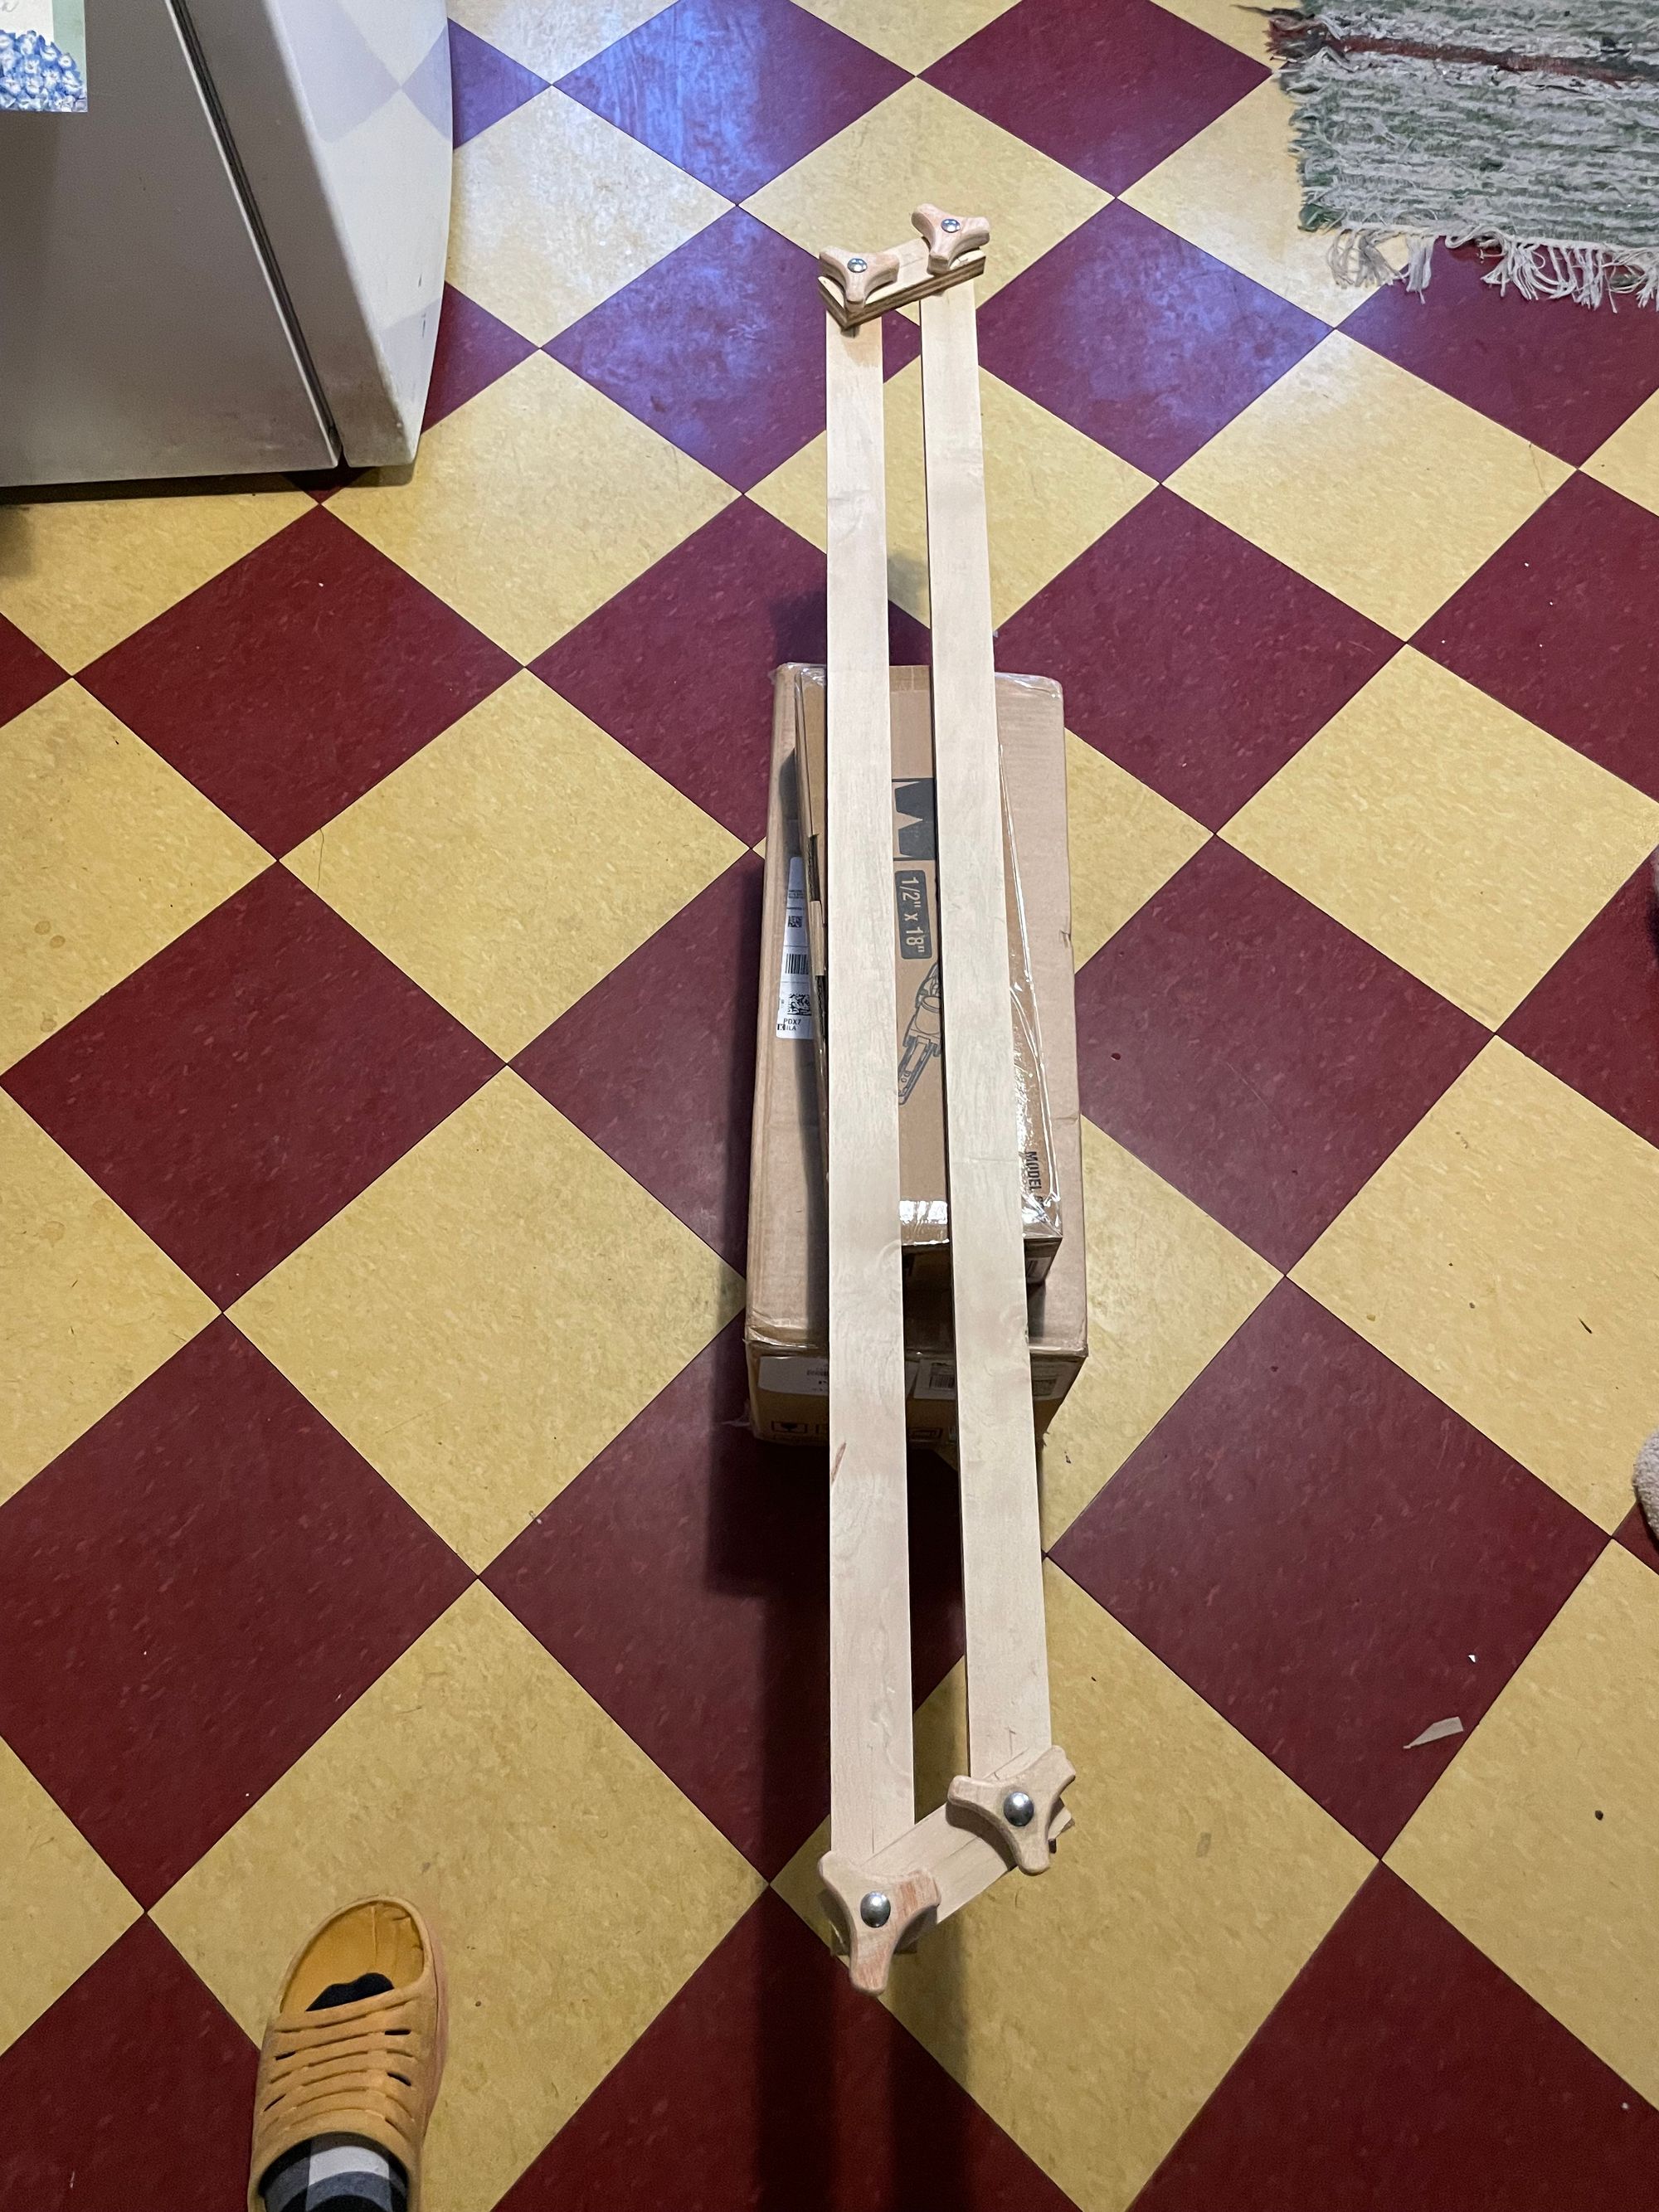
Here it is in our kitchen to give you an idea of the scale of the jig.

Absolutely had to do some satisfying click clacks at this stage!
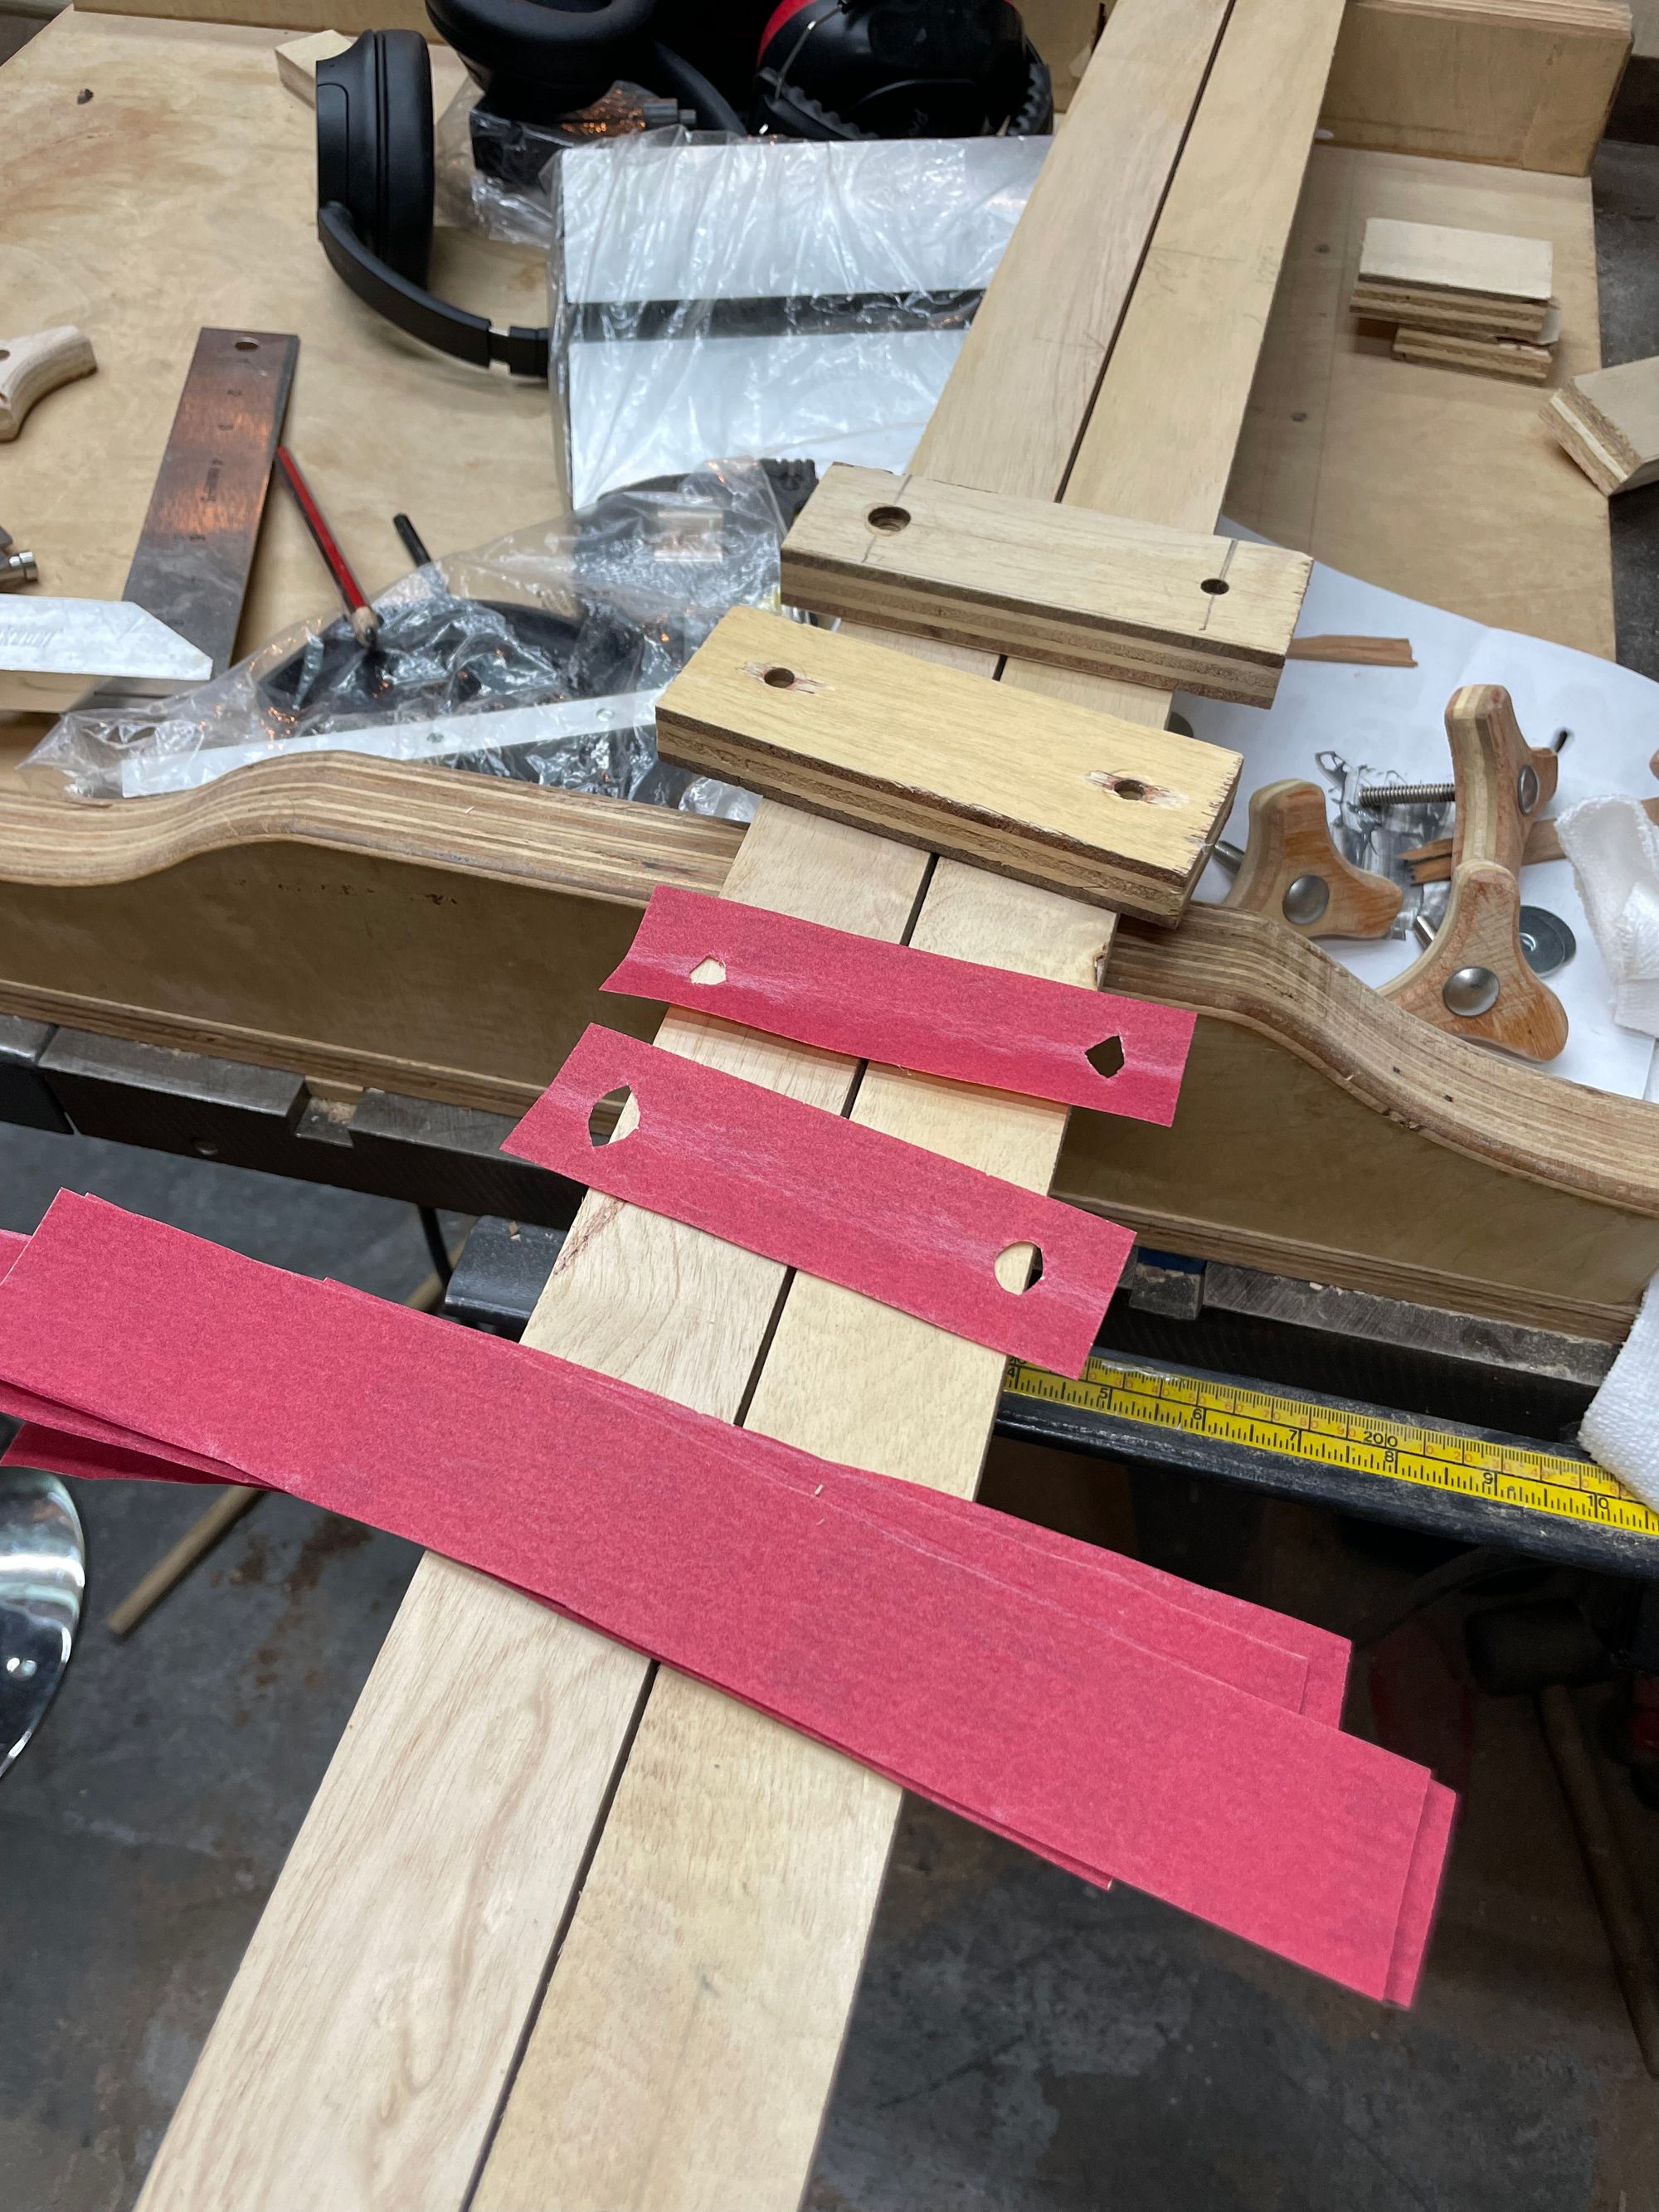
After a quick coat of oil based poly without any prep on the plywood, I moved to the finishing steps, attaching some sand paper for grip.
Nothing fancy just clapped 'em on there with some spray adhesive.
The Finale
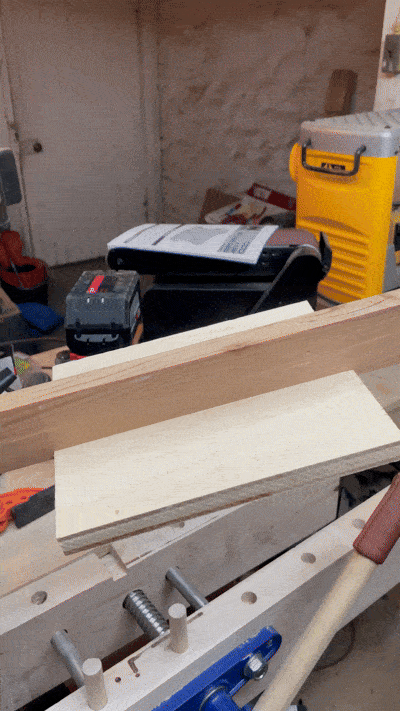
Okay so after all of that, the jig is ready! Can't end without taking it for a spin, so I tried it out with some pieces of scrap.
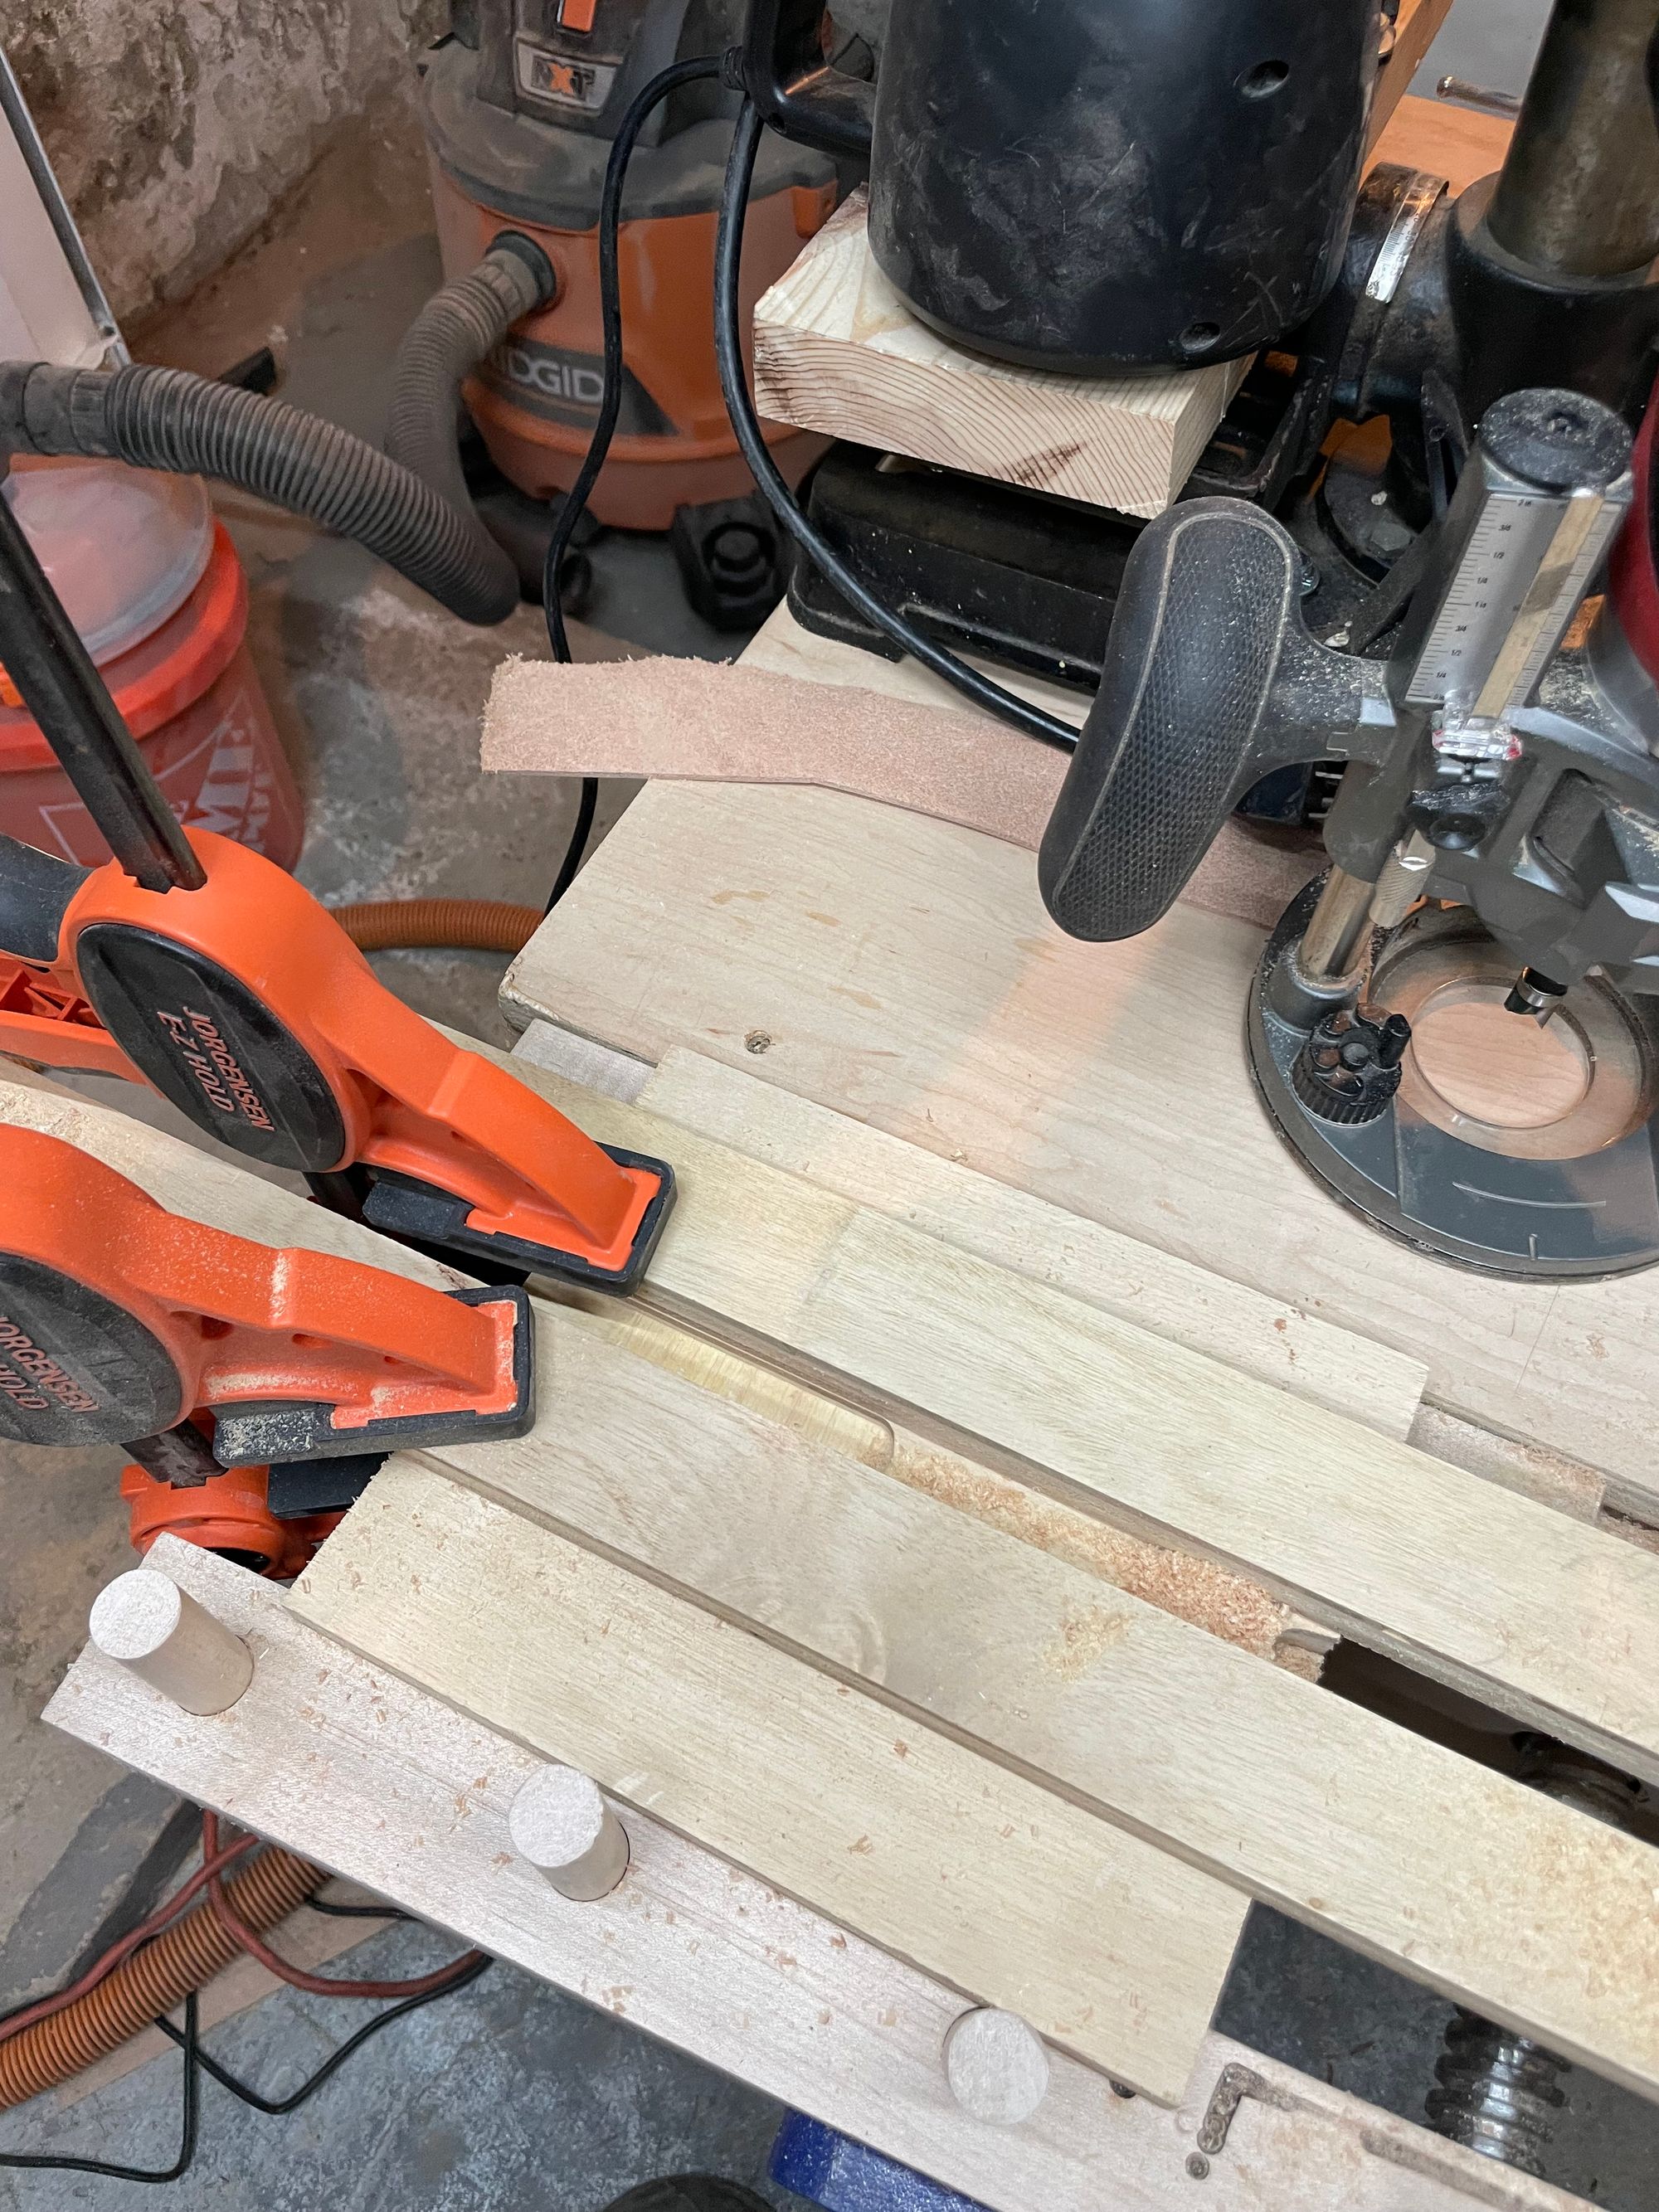
Step one above is to clamp the jig to the piece that goes into the dado, then tighten the knobs before removing the clamps and the piece. As a reminder, this action is what sets the dado width.
After the jig is set, I move it over to my work piece which is a scrap piece of plywood. You can see where I tested out my new router bits on the far end of my work piece, ignore that please. Step 2 is clamping the jig to the workpiece for rigidity, however because this is such a small piece that causes me to have to make 2 passes in this test run - not a big deal.
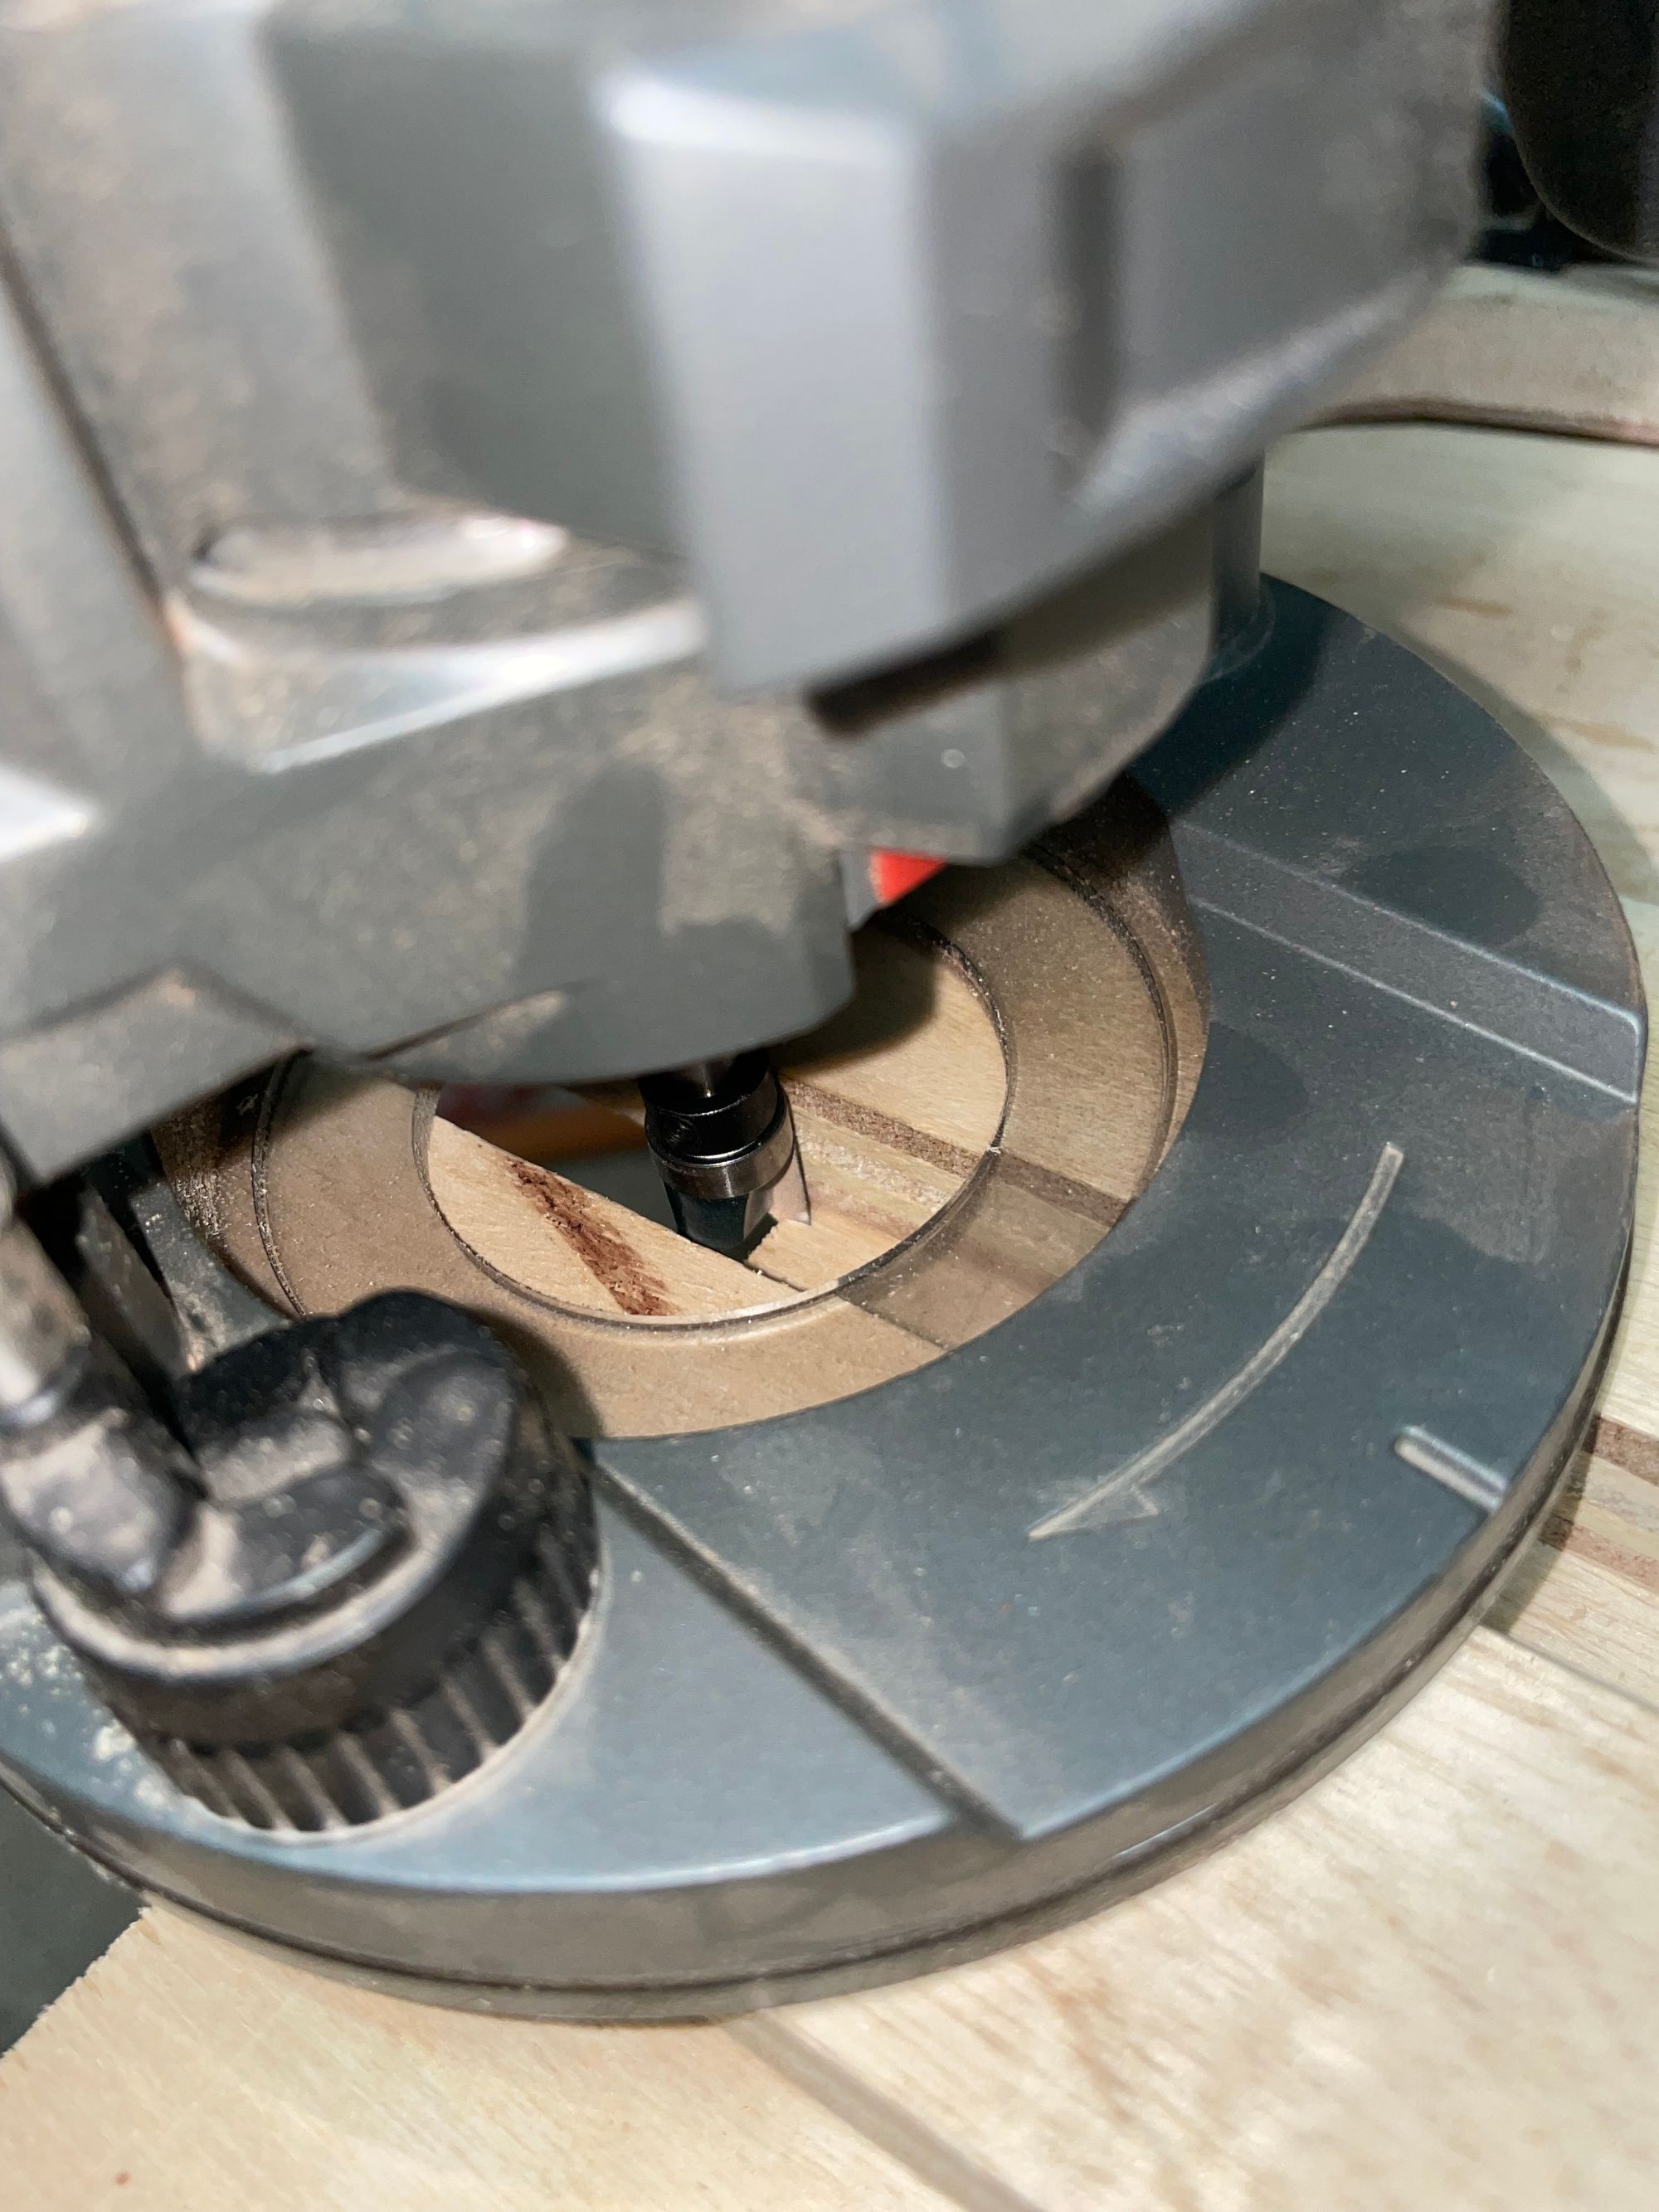
This is what the router bit looks like close up inside the jig and sitting flush with the work piece's top. For Step 3 I will next run the router, plunge it 1/4" and use the jig edge guides against the router bearing to perform my cuts.
Halfway cut, which lets me swap over the clamps to the other side and make the second router pass.
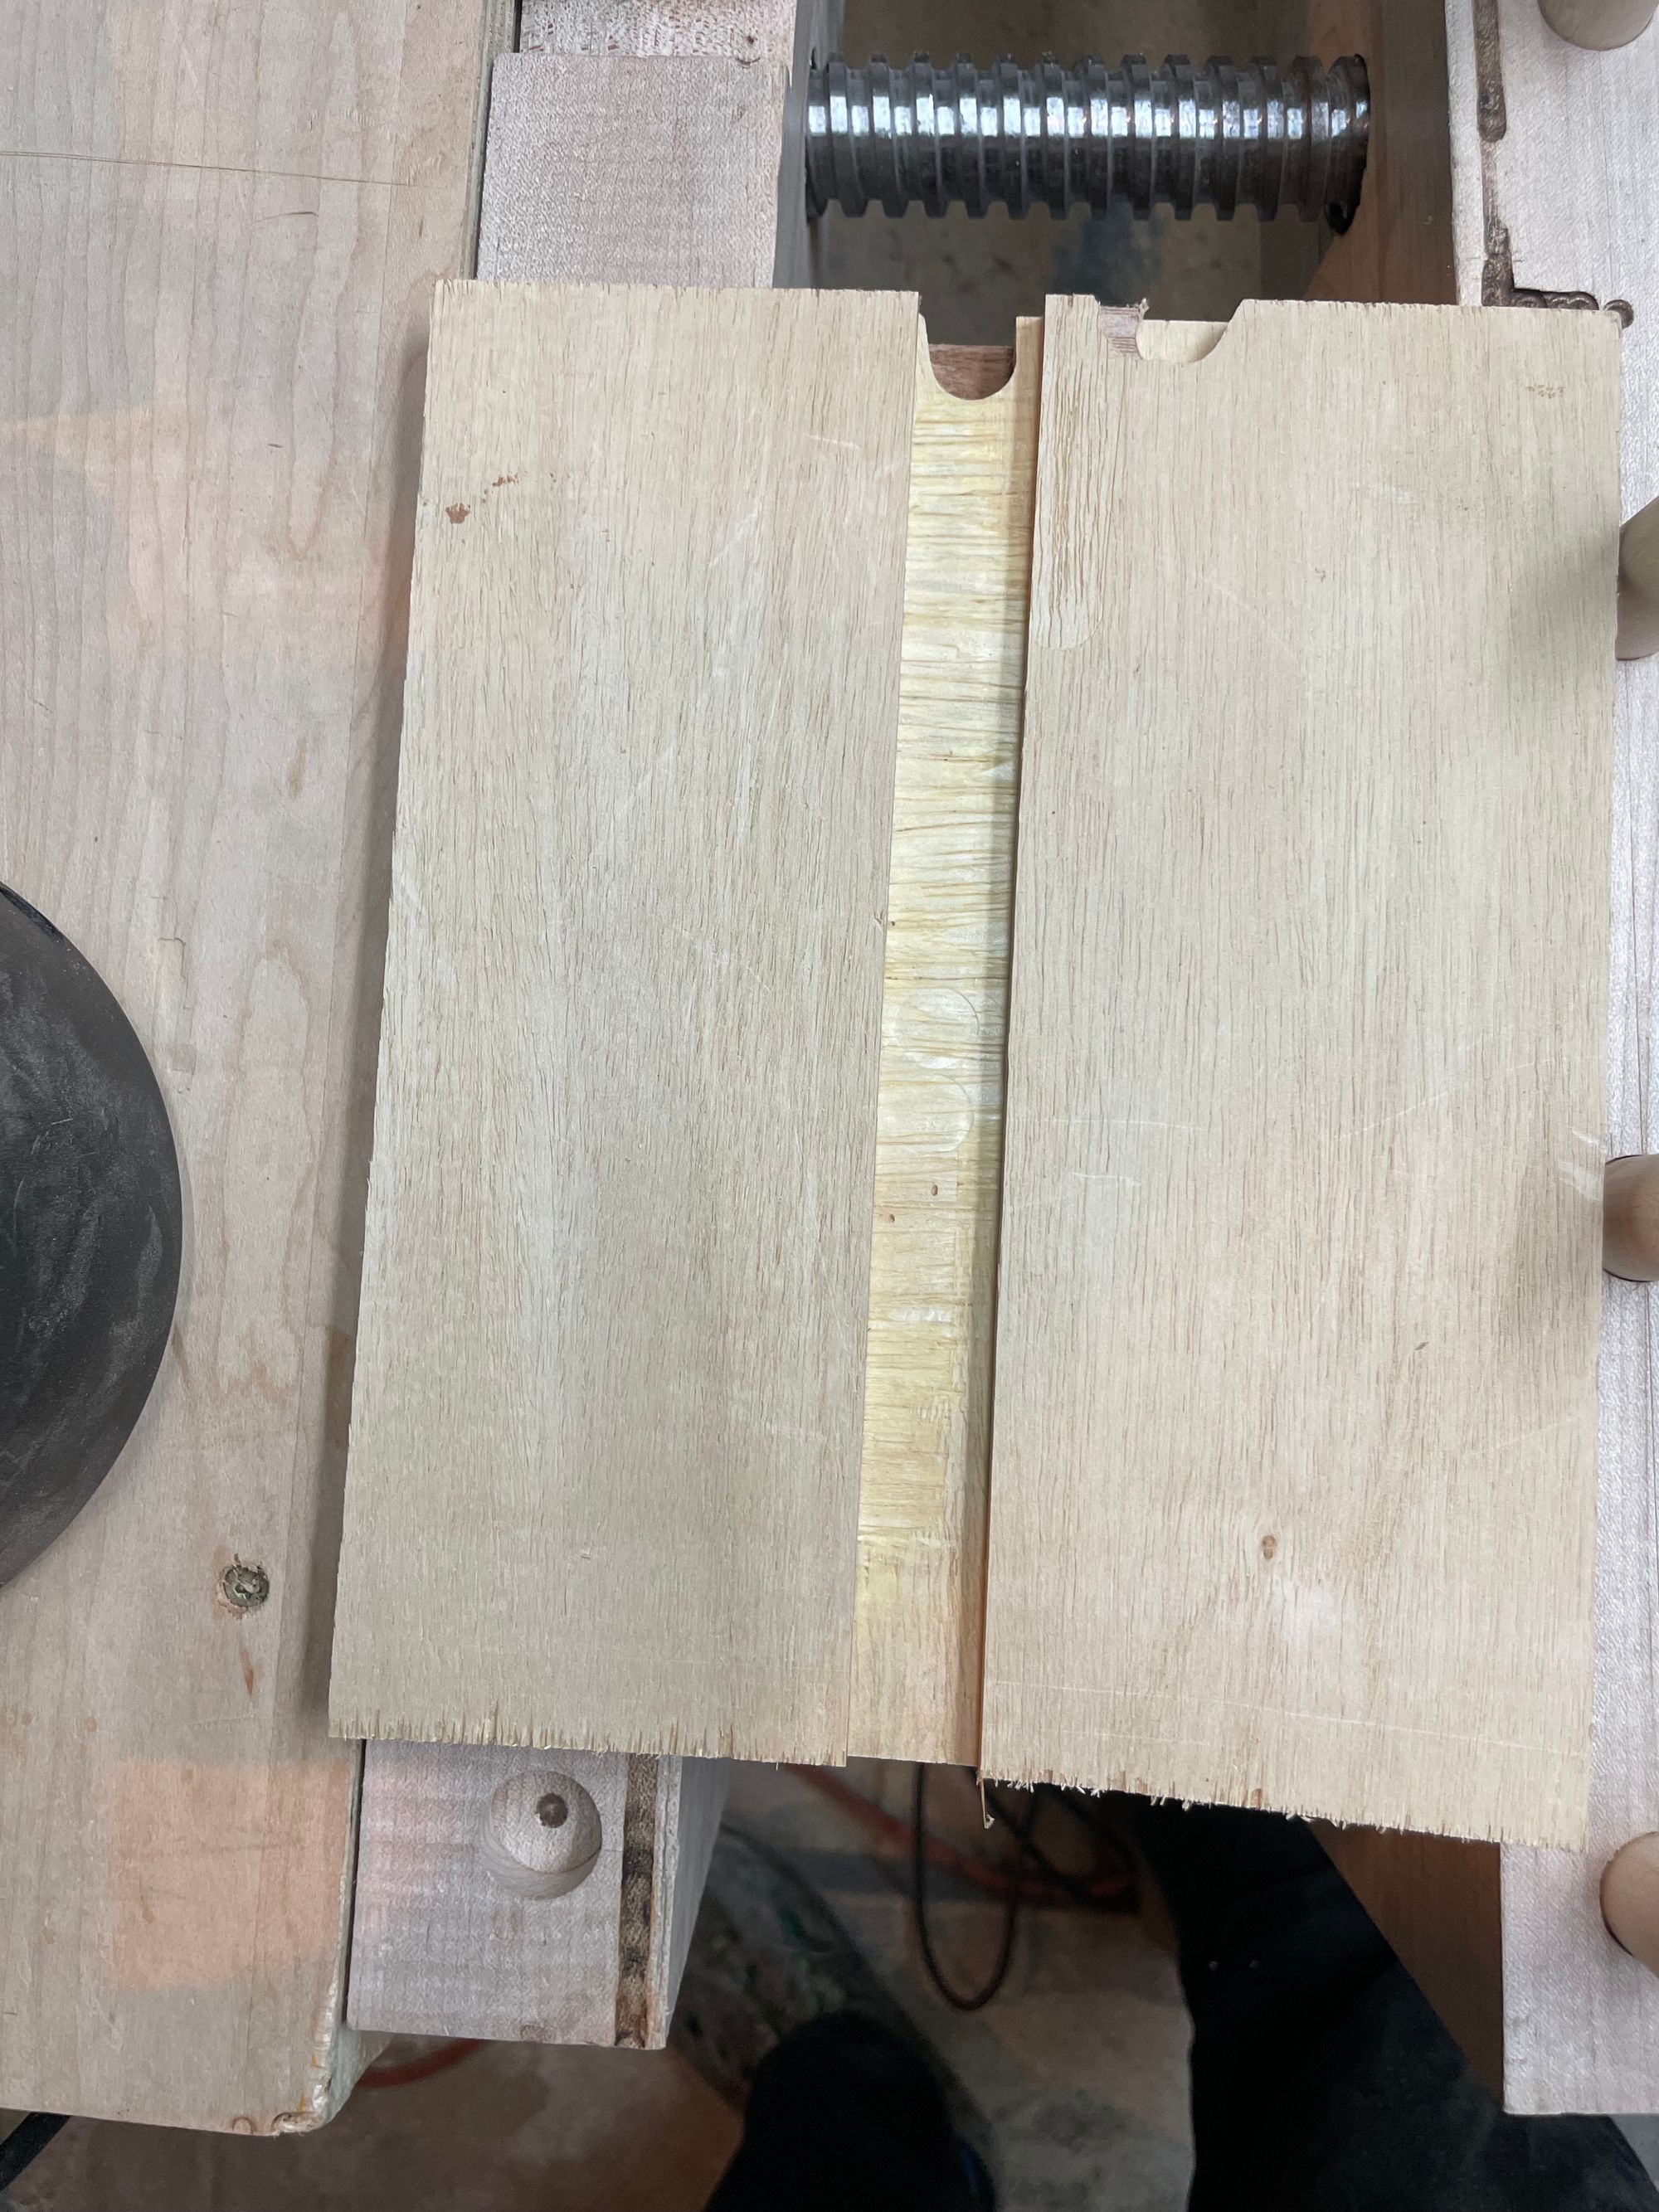
Really happy with the final cut result! Again ignore the router test cuts at the far end, that was me practicing on this piece of plywood before using the jig, the channel/slot is what we are concentrating on.
Now for the big finale, let's slap in the original workpiece into this dado and see how it fits!
Look at that! I am so stoked with that result! That is 2 pieces of wood stuck together without any glue!!! They stay together really nicely and it's pretty hard to pull them apart.
It took me about a couple of minutes to make that dado, where in the past it would have taken me maybe 10 minutes to make it with all the adjusting of fences etc. to get it there. That really adds up when you're making 20 (!!!) dados. I also don't need a special bit either for the exact thickness I'm targeting. Yay!! On to the next build!
End
If you made it this far, consider hitting the subscribe button :) It's free and I'm trying to sign people up to the website newsletter, which emails you when I post - I am trying to slowly stop using large corporation/billionaire controlled platforms to share my posts. Thanks!